___Scott___
Active member
Let me start by saying that I don't recommend this for anyone who just wants a new set of poly bushings. If you need new bushings, buy them pre-made, shipped to your door and ready to install. This write-up is for DIY'ers who just like to DIY stuff.
For me this was an exercise to learn how to use my 3D printer better and to learn how to create 3D models better. I used FreeCAD because it's free and runs on Linux. Thankfully there are a lot of tutorial videos on YouTube to show how to use just about every feature in the software. I assume there is a Windows version, but if you still run Windows there are better options than FreeCAD. Look at Fusion 360 for example.
I figured that if I could create a mould of the front lower control arm bushings, which needed to be replaced, it would be easy to mix up some poly and pour a new set. It sounded easy enough in my head.
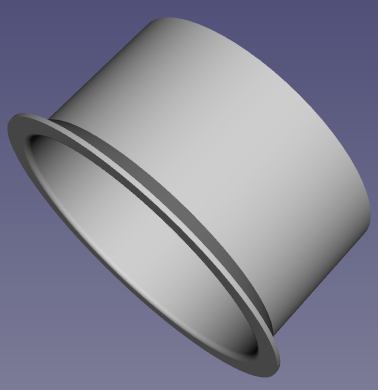
I took a bunch of measurements and drew up the upper half of a mould:
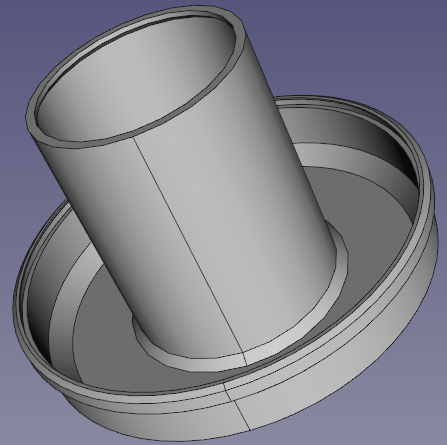
Then I drew up the lower half of the mould:
The two halves snap together:
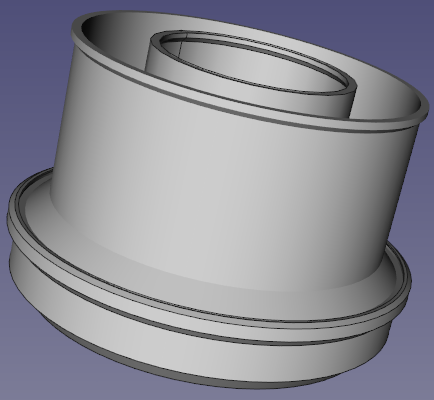
Note that those models are the final version including tweaks after the successful version of the bushings were installed.
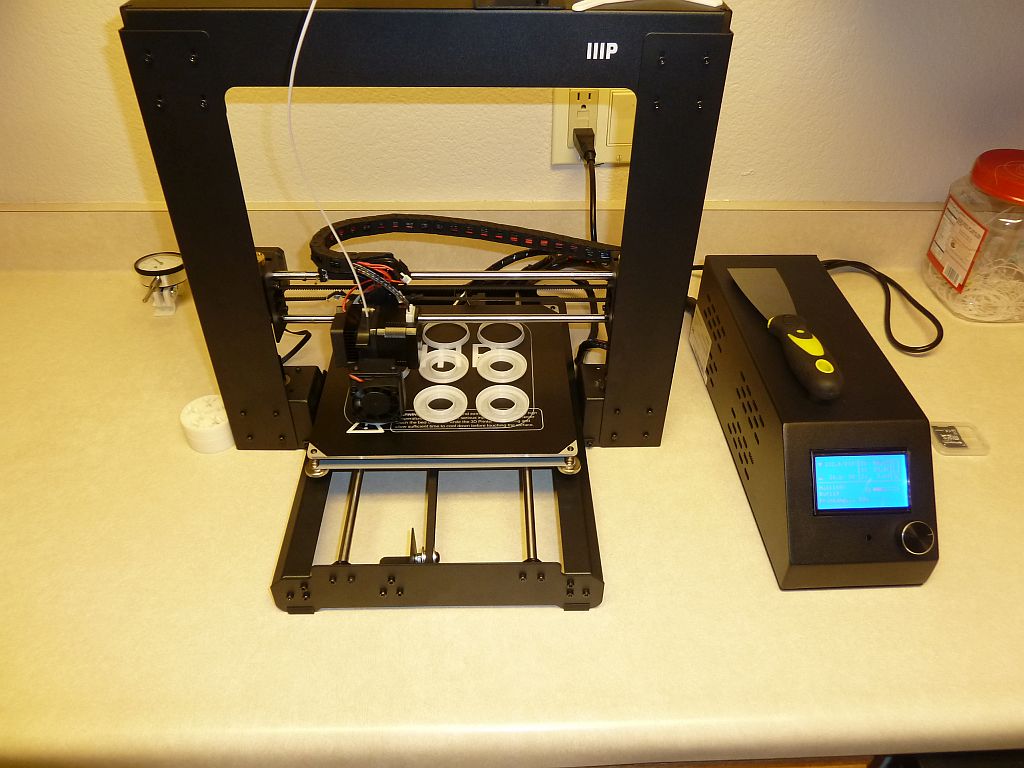
I'm still learning to use my 3D printer so I went through several iterations of printing the moulds. I tried a lot of different settings in the slicer and in the end, to get the pieces to stay stuck to the print bed, I printed each piece one at a time. Here is a pic of my "wishful thinking" all at once approach:
Here is the first version of the moulds all greased up and ready for liquid poly. If you look carefully at the lip where the two halves snap together, you'll notice that initially I didn't run the lip all the way around. I did that to make it easier to snap the two halves together... that was a mistake:
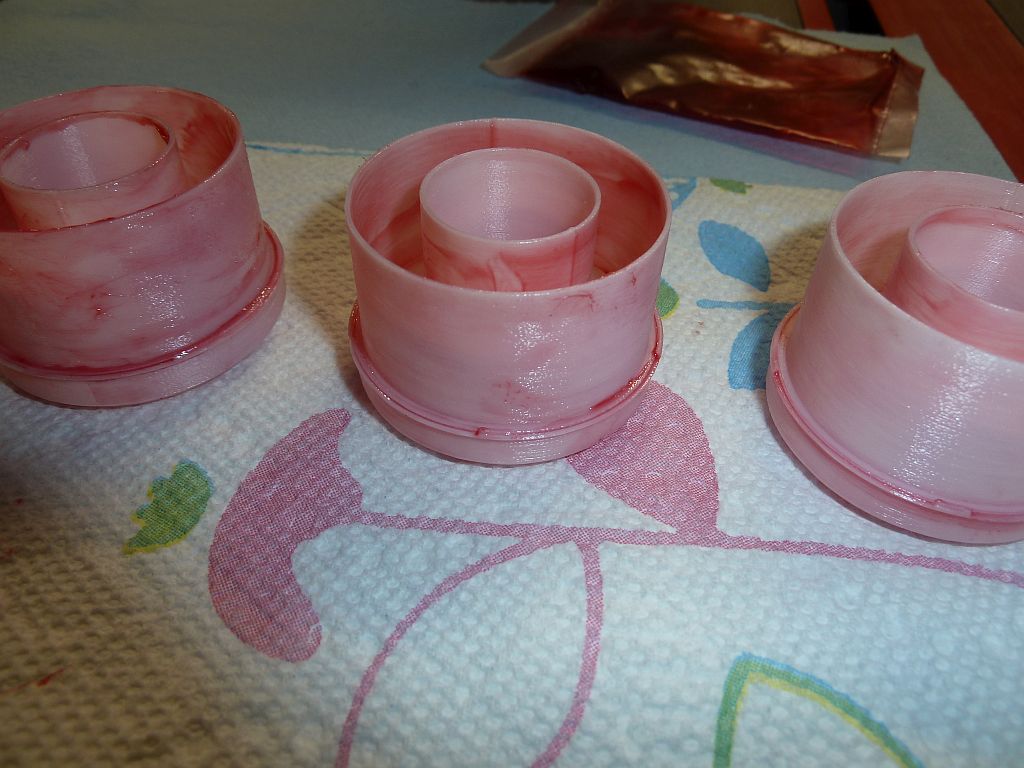
I chose SmoothOn Simpact85 mostly because of price. It's not exactly cheap, but cheaper than the stuff I used for the rear diff mount. It also claimed to be pretty durable and the Shore 85A hardness looked like it would be well suited to this application. I read everything I could find on their website about how to use it, but discovered that they didn't cover all the details. I encountered some surprises. The first surprise was that when it "kicks" it generates a LOT of heat. In hindsight that's not a surprise but they didn't mention it anywhere. Second was that since the working time is 4 minutes, you have to measure/mix/pour very quickly. Quick mixing means you end up with a lot of tiny air bubbles in the mixture. Add heat to that and the mixture expands when it kicks. As a result the PLA moulds softened and deformed at the worst possible time:
Even if that hadn't happened, I typed a dimension in wrong and they are the wrong size anyway. Other than the total failure they came out pretty awesome I thought!
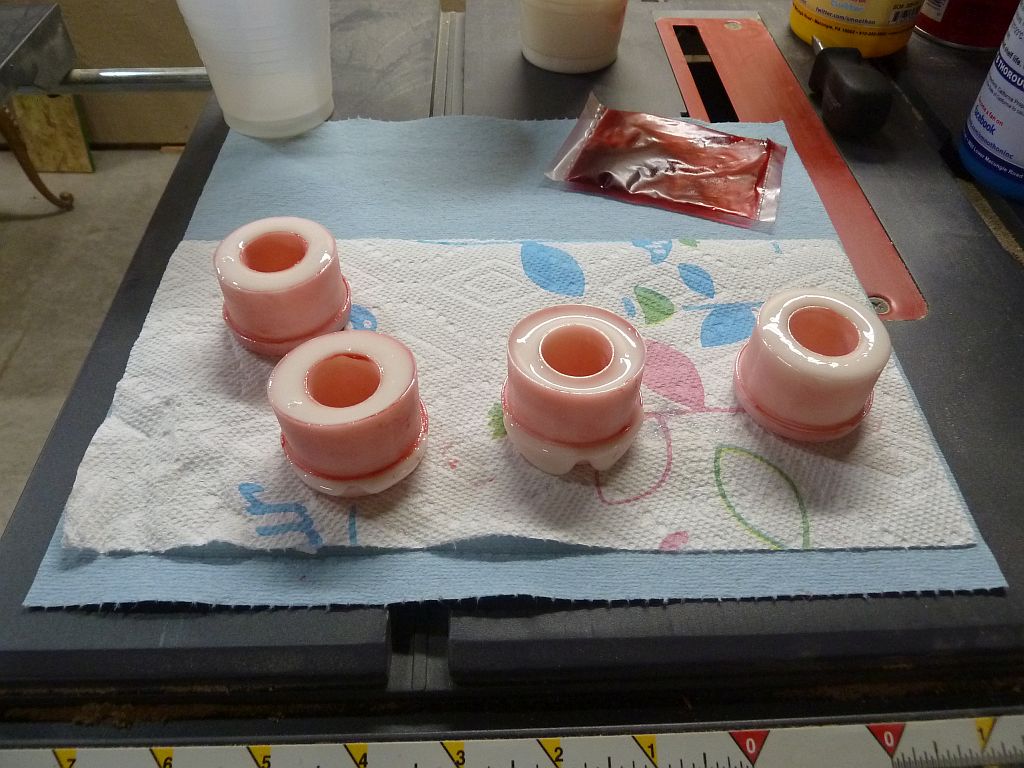
For the next attempt I corrected the dimensional mistake, I ran the lip where the two halves of the mould snap together all the way around, I bulked up the area on the top piece near where it snaps into the bottom piece, and I added a little extra material around the upper edge of both the top piece and the bottom piece to help prevent them from deforming. I printed up a new set of moulds, greased them up (different grease this time), measured/mixed/poured and it all looked great:
The two halves of the mould are a lot trickier to get to snap together with the lip all the way around, but once together they are really hard to get apart. There's no risk of the expanding poly pushing them apart.
Unfortunately, this attempt didn't work either. One mistake may have been the temperature. The instructions say to use at 71F, and this attempt was at 58F (the first attempt was at 68F.) I figured that since the poly generates so much heat anyway, the room temperature wasn't _that_ important. Another factor that may have contributed to the failure was that I may not have mixed it well enough. The first attempt kicked while I was pouring and I didn't want that to happen again so I may have rushed the mix time a little. The thing that probably played the bigger roll in this failure was that I didn't get the mixture exactly right. It's necessary to weigh out the two parts accurately to get the "exact" 0.85:1 mixture. I overshot the weight target of the B component just a little. Instead of starting over, I just added a little extra of the A component. Bad idea. The poly set up with a consistency of cheddar cheese. Obviously that's no good for a control arm bushing.
I printed up another set of moulds and more carefully measured/mixed/poured this third time. Also this third time I printed up a little cone to sit on top of the mould so I could pour more quickly and didn't need to be as careful pouring. They looked like the previous set so I didn't bother with as many pics. Here is one after being pulled from the mould and the grease wiped from it:
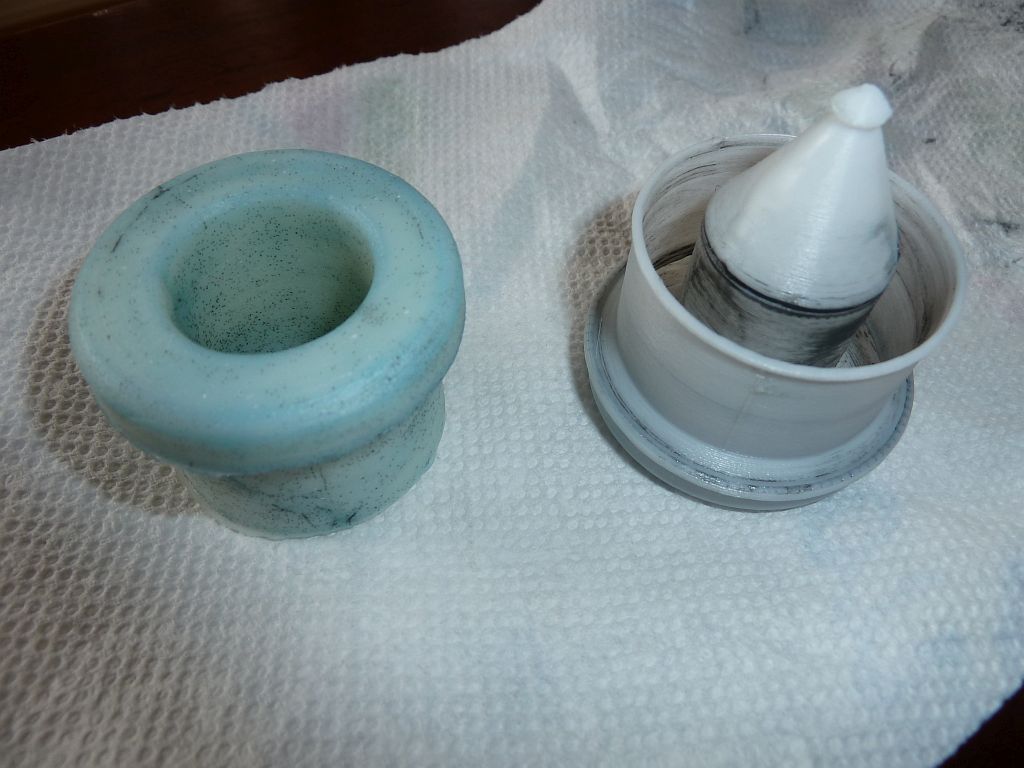
Here you can get a better sense of how much air gets mixed into the poly. I'm sure this reduces the hardness below Shore 85A, but they are still pretty solid.
The temperature was 66F for this final set but, like I mentioned above, careful measuring and careful mixing is super important to achieving successful poly projects.
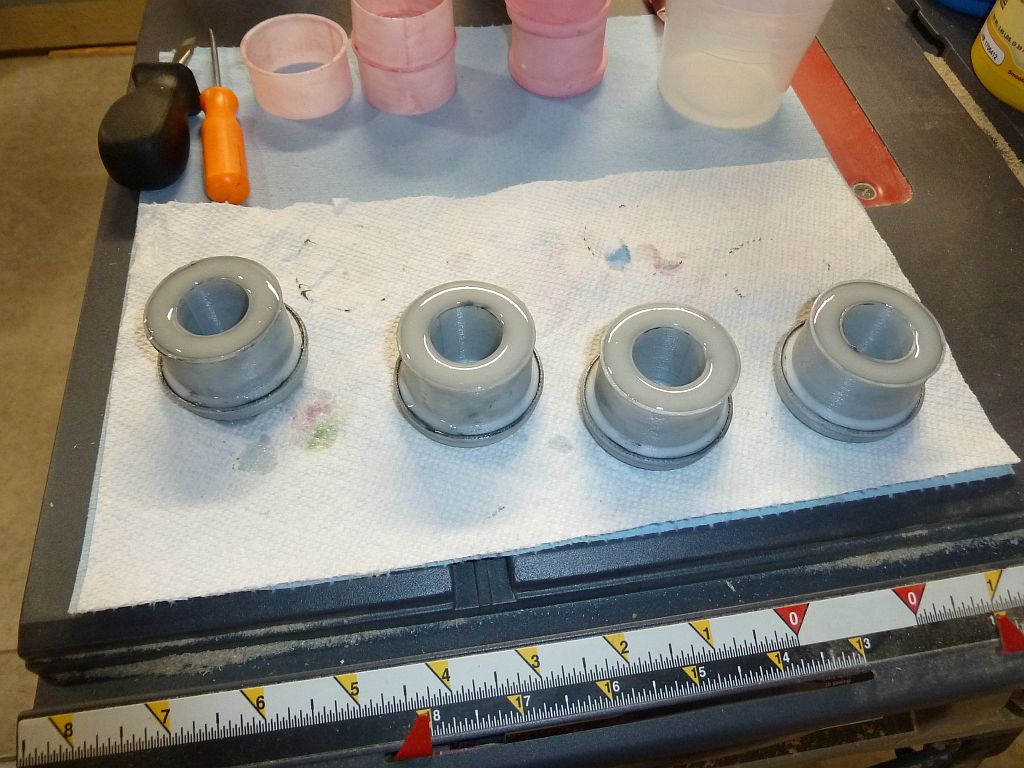
I made the bushings slightly on the big side so they are a tight fit into the control arm. The steel sleeve that slides in the center (not shown) is a tight fit too:
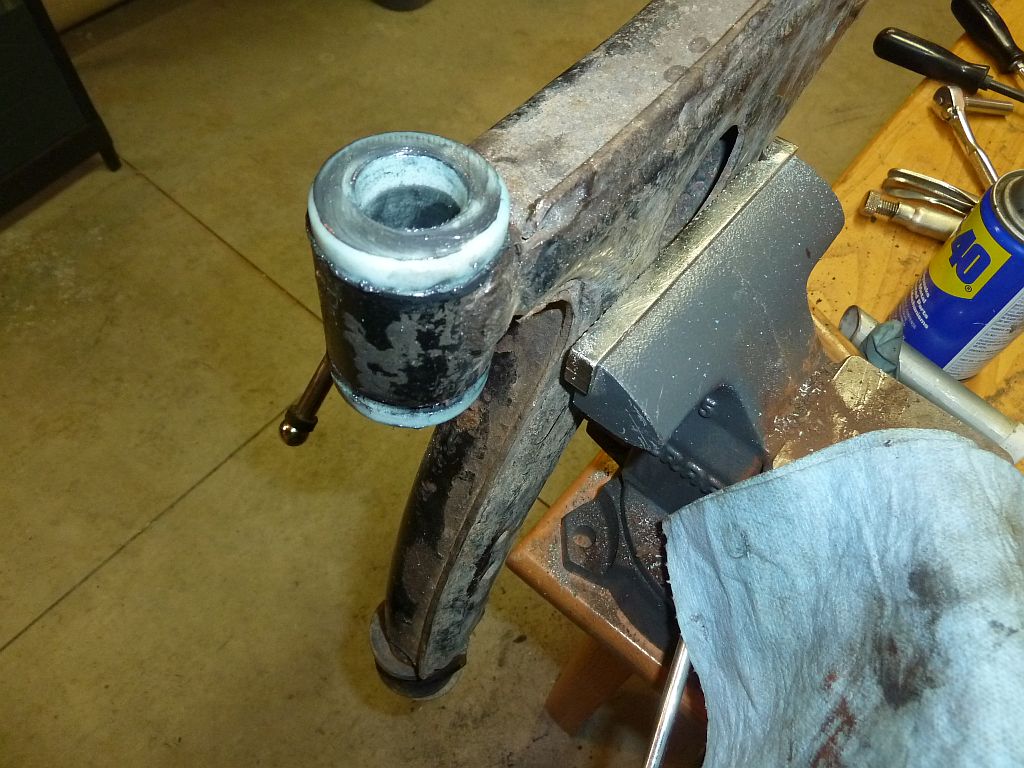
The bushings are only to replace the rubber one that's embedded in the control arm at the front. I haven't attempted to even draw up the bushing at the other end by the sway bar. They've been installed for about a month, so roughly 1000 miles and so far they seem to be holding up. The poly bushings cured a clunk I had in the front end that I thought was coming from the upper strut mounts.
It remains to be seen how long they'll last. The one on the drivers side looks like it did when I put it in but the one on the other side is discolored from being bathed in oil from a leak on that side. There was no mention in the poly claims that it's impervious to motor oil. It may not be, I'll find out.
I should also mention that this wasn't a quick and easy project. It took months of scarce free time. I should just buy a new set to have on hand when these die so I'm not tempted to repeat this project. If only I were that smart :doh:
For me this was an exercise to learn how to use my 3D printer better and to learn how to create 3D models better. I used FreeCAD because it's free and runs on Linux. Thankfully there are a lot of tutorial videos on YouTube to show how to use just about every feature in the software. I assume there is a Windows version, but if you still run Windows there are better options than FreeCAD. Look at Fusion 360 for example.
I figured that if I could create a mould of the front lower control arm bushings, which needed to be replaced, it would be easy to mix up some poly and pour a new set. It sounded easy enough in my head.
I took a bunch of measurements and drew up the upper half of a mould:
Then I drew up the lower half of the mould:
The two halves snap together:
Note that those models are the final version including tweaks after the successful version of the bushings were installed.
I'm still learning to use my 3D printer so I went through several iterations of printing the moulds. I tried a lot of different settings in the slicer and in the end, to get the pieces to stay stuck to the print bed, I printed each piece one at a time. Here is a pic of my "wishful thinking" all at once approach:
Here is the first version of the moulds all greased up and ready for liquid poly. If you look carefully at the lip where the two halves snap together, you'll notice that initially I didn't run the lip all the way around. I did that to make it easier to snap the two halves together... that was a mistake:
I chose SmoothOn Simpact85 mostly because of price. It's not exactly cheap, but cheaper than the stuff I used for the rear diff mount. It also claimed to be pretty durable and the Shore 85A hardness looked like it would be well suited to this application. I read everything I could find on their website about how to use it, but discovered that they didn't cover all the details. I encountered some surprises. The first surprise was that when it "kicks" it generates a LOT of heat. In hindsight that's not a surprise but they didn't mention it anywhere. Second was that since the working time is 4 minutes, you have to measure/mix/pour very quickly. Quick mixing means you end up with a lot of tiny air bubbles in the mixture. Add heat to that and the mixture expands when it kicks. As a result the PLA moulds softened and deformed at the worst possible time:
Even if that hadn't happened, I typed a dimension in wrong and they are the wrong size anyway. Other than the total failure they came out pretty awesome I thought!
For the next attempt I corrected the dimensional mistake, I ran the lip where the two halves of the mould snap together all the way around, I bulked up the area on the top piece near where it snaps into the bottom piece, and I added a little extra material around the upper edge of both the top piece and the bottom piece to help prevent them from deforming. I printed up a new set of moulds, greased them up (different grease this time), measured/mixed/poured and it all looked great:
The two halves of the mould are a lot trickier to get to snap together with the lip all the way around, but once together they are really hard to get apart. There's no risk of the expanding poly pushing them apart.
Unfortunately, this attempt didn't work either. One mistake may have been the temperature. The instructions say to use at 71F, and this attempt was at 58F (the first attempt was at 68F.) I figured that since the poly generates so much heat anyway, the room temperature wasn't _that_ important. Another factor that may have contributed to the failure was that I may not have mixed it well enough. The first attempt kicked while I was pouring and I didn't want that to happen again so I may have rushed the mix time a little. The thing that probably played the bigger roll in this failure was that I didn't get the mixture exactly right. It's necessary to weigh out the two parts accurately to get the "exact" 0.85:1 mixture. I overshot the weight target of the B component just a little. Instead of starting over, I just added a little extra of the A component. Bad idea. The poly set up with a consistency of cheddar cheese. Obviously that's no good for a control arm bushing.
I printed up another set of moulds and more carefully measured/mixed/poured this third time. Also this third time I printed up a little cone to sit on top of the mould so I could pour more quickly and didn't need to be as careful pouring. They looked like the previous set so I didn't bother with as many pics. Here is one after being pulled from the mould and the grease wiped from it:
Here you can get a better sense of how much air gets mixed into the poly. I'm sure this reduces the hardness below Shore 85A, but they are still pretty solid.
The temperature was 66F for this final set but, like I mentioned above, careful measuring and careful mixing is super important to achieving successful poly projects.
I made the bushings slightly on the big side so they are a tight fit into the control arm. The steel sleeve that slides in the center (not shown) is a tight fit too:
The bushings are only to replace the rubber one that's embedded in the control arm at the front. I haven't attempted to even draw up the bushing at the other end by the sway bar. They've been installed for about a month, so roughly 1000 miles and so far they seem to be holding up. The poly bushings cured a clunk I had in the front end that I thought was coming from the upper strut mounts.
It remains to be seen how long they'll last. The one on the drivers side looks like it did when I put it in but the one on the other side is discolored from being bathed in oil from a leak on that side. There was no mention in the poly claims that it's impervious to motor oil. It may not be, I'll find out.
I should also mention that this wasn't a quick and easy project. It took months of scarce free time. I should just buy a new set to have on hand when these die so I'm not tempted to repeat this project. If only I were that smart :doh:
