Ive noticed lately that there is a large number of people repairing and replacing their rear subframe bushings. This job without the right tools sucks ass... Im going to provide my walkthrough for this by showing my preference of tools to use for the job...
Before you do this, understand, this job is not intended for the average backyard mechanic with only a set of sockets and a large hammer. To spare you the headache, you really need access to good air tools, a shop press, and lots of space...
Tools:
-Quality 1/2" pneumatic impact gun (600+ lbft)
-12000 RPM large die grinder (you will see mine in pictures later)
-12+ Ton shop press with appropriate press dies
-Transmission jack (unless you have a lift)
-Rolling floor jack (unless you have a lift)
-2x Jack Stands (unless you have a lift)
-Creeper (unless you have a lift)
-10, 12, 14, 17, 19, 21, and 30mm sockets. (14 and up should be 1/2" 6 point impact type)
-A 14mm and 12mm swivel socket, or a 1/2" swivel you dont care about potentially ruining
-2+ feet of 1/2" socket extensions
-Safety Goggles (not glasses)
-12-19mm double box ended wrenches (have the best angle)
-A set of 6" carbide burr bits (for stuck toe arm cams)
-Flashlight
-BFH
-Plastic bags for organizing parts
-Master Slide hammer set with bearing pullers etc (available at autozone IIRC)
STEP 1 Remove wheel hub assemblies (SEE BGB)
-This is mostly straight forward, but I do find them easier to remove if you unbolt the E-brake cable from the chassis and remove the whole hub assy with the cable still attached.
STEP 2 Using a swivel, a box end, your impact, and a very long 1/2" extension unbolt both the Propeller Shaft and both CV axles from the Differential. Trying to do this by hand is damn near impossible...
STEP 3 Support Subassembly with transmission lift
STEP 4 Unbolt Subassembly, lower the transmission lift, then remove it.
-Wear goggles, and use your impact wrench
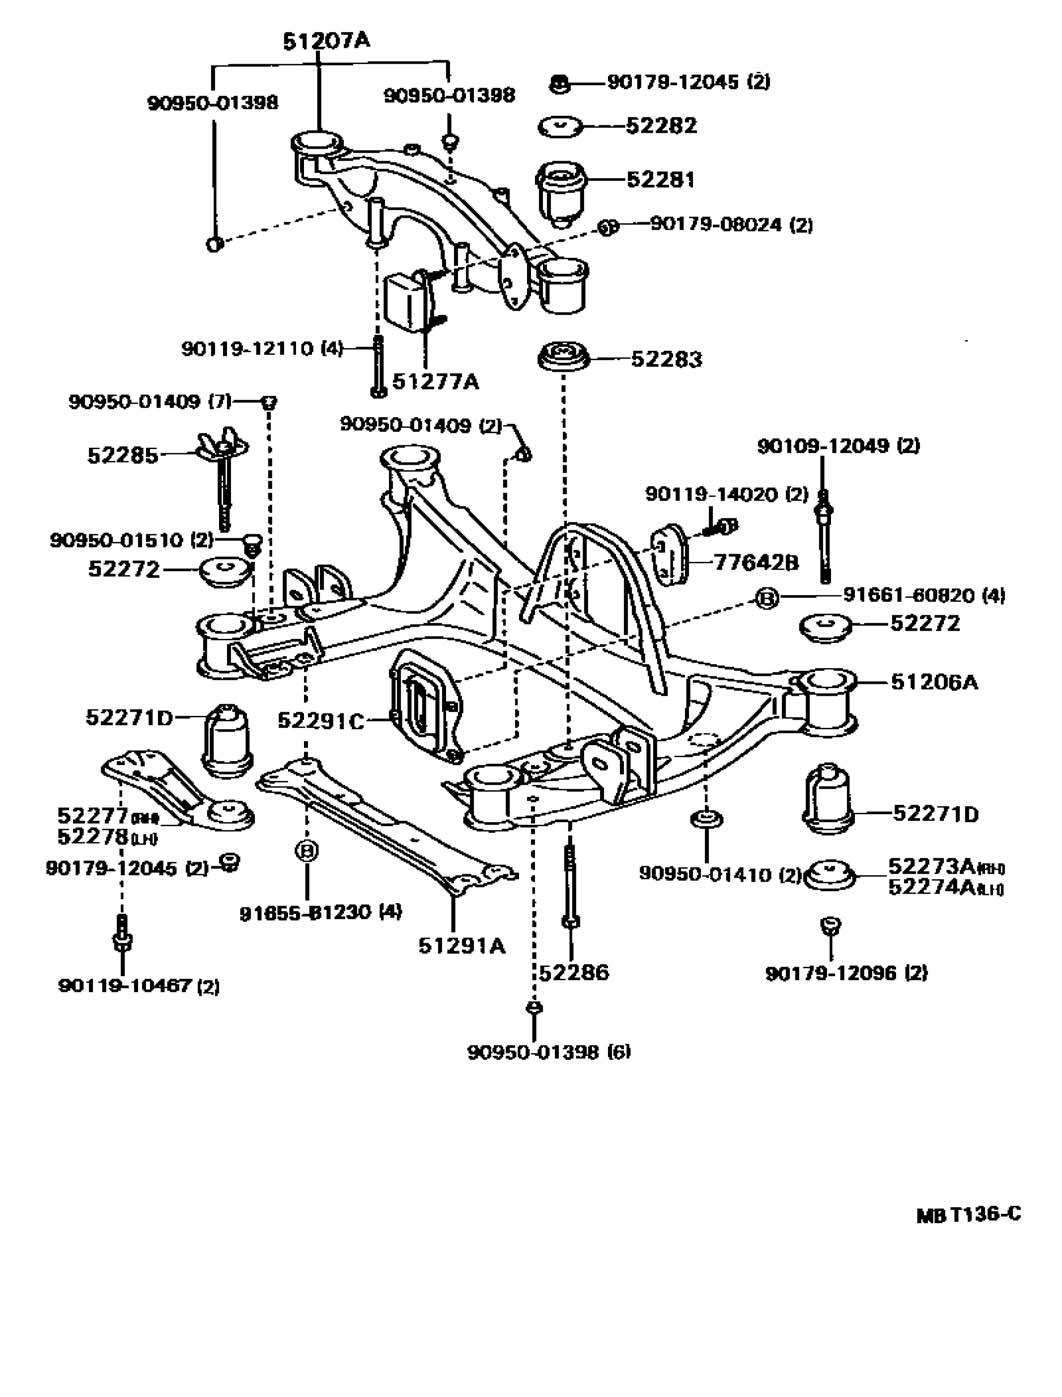
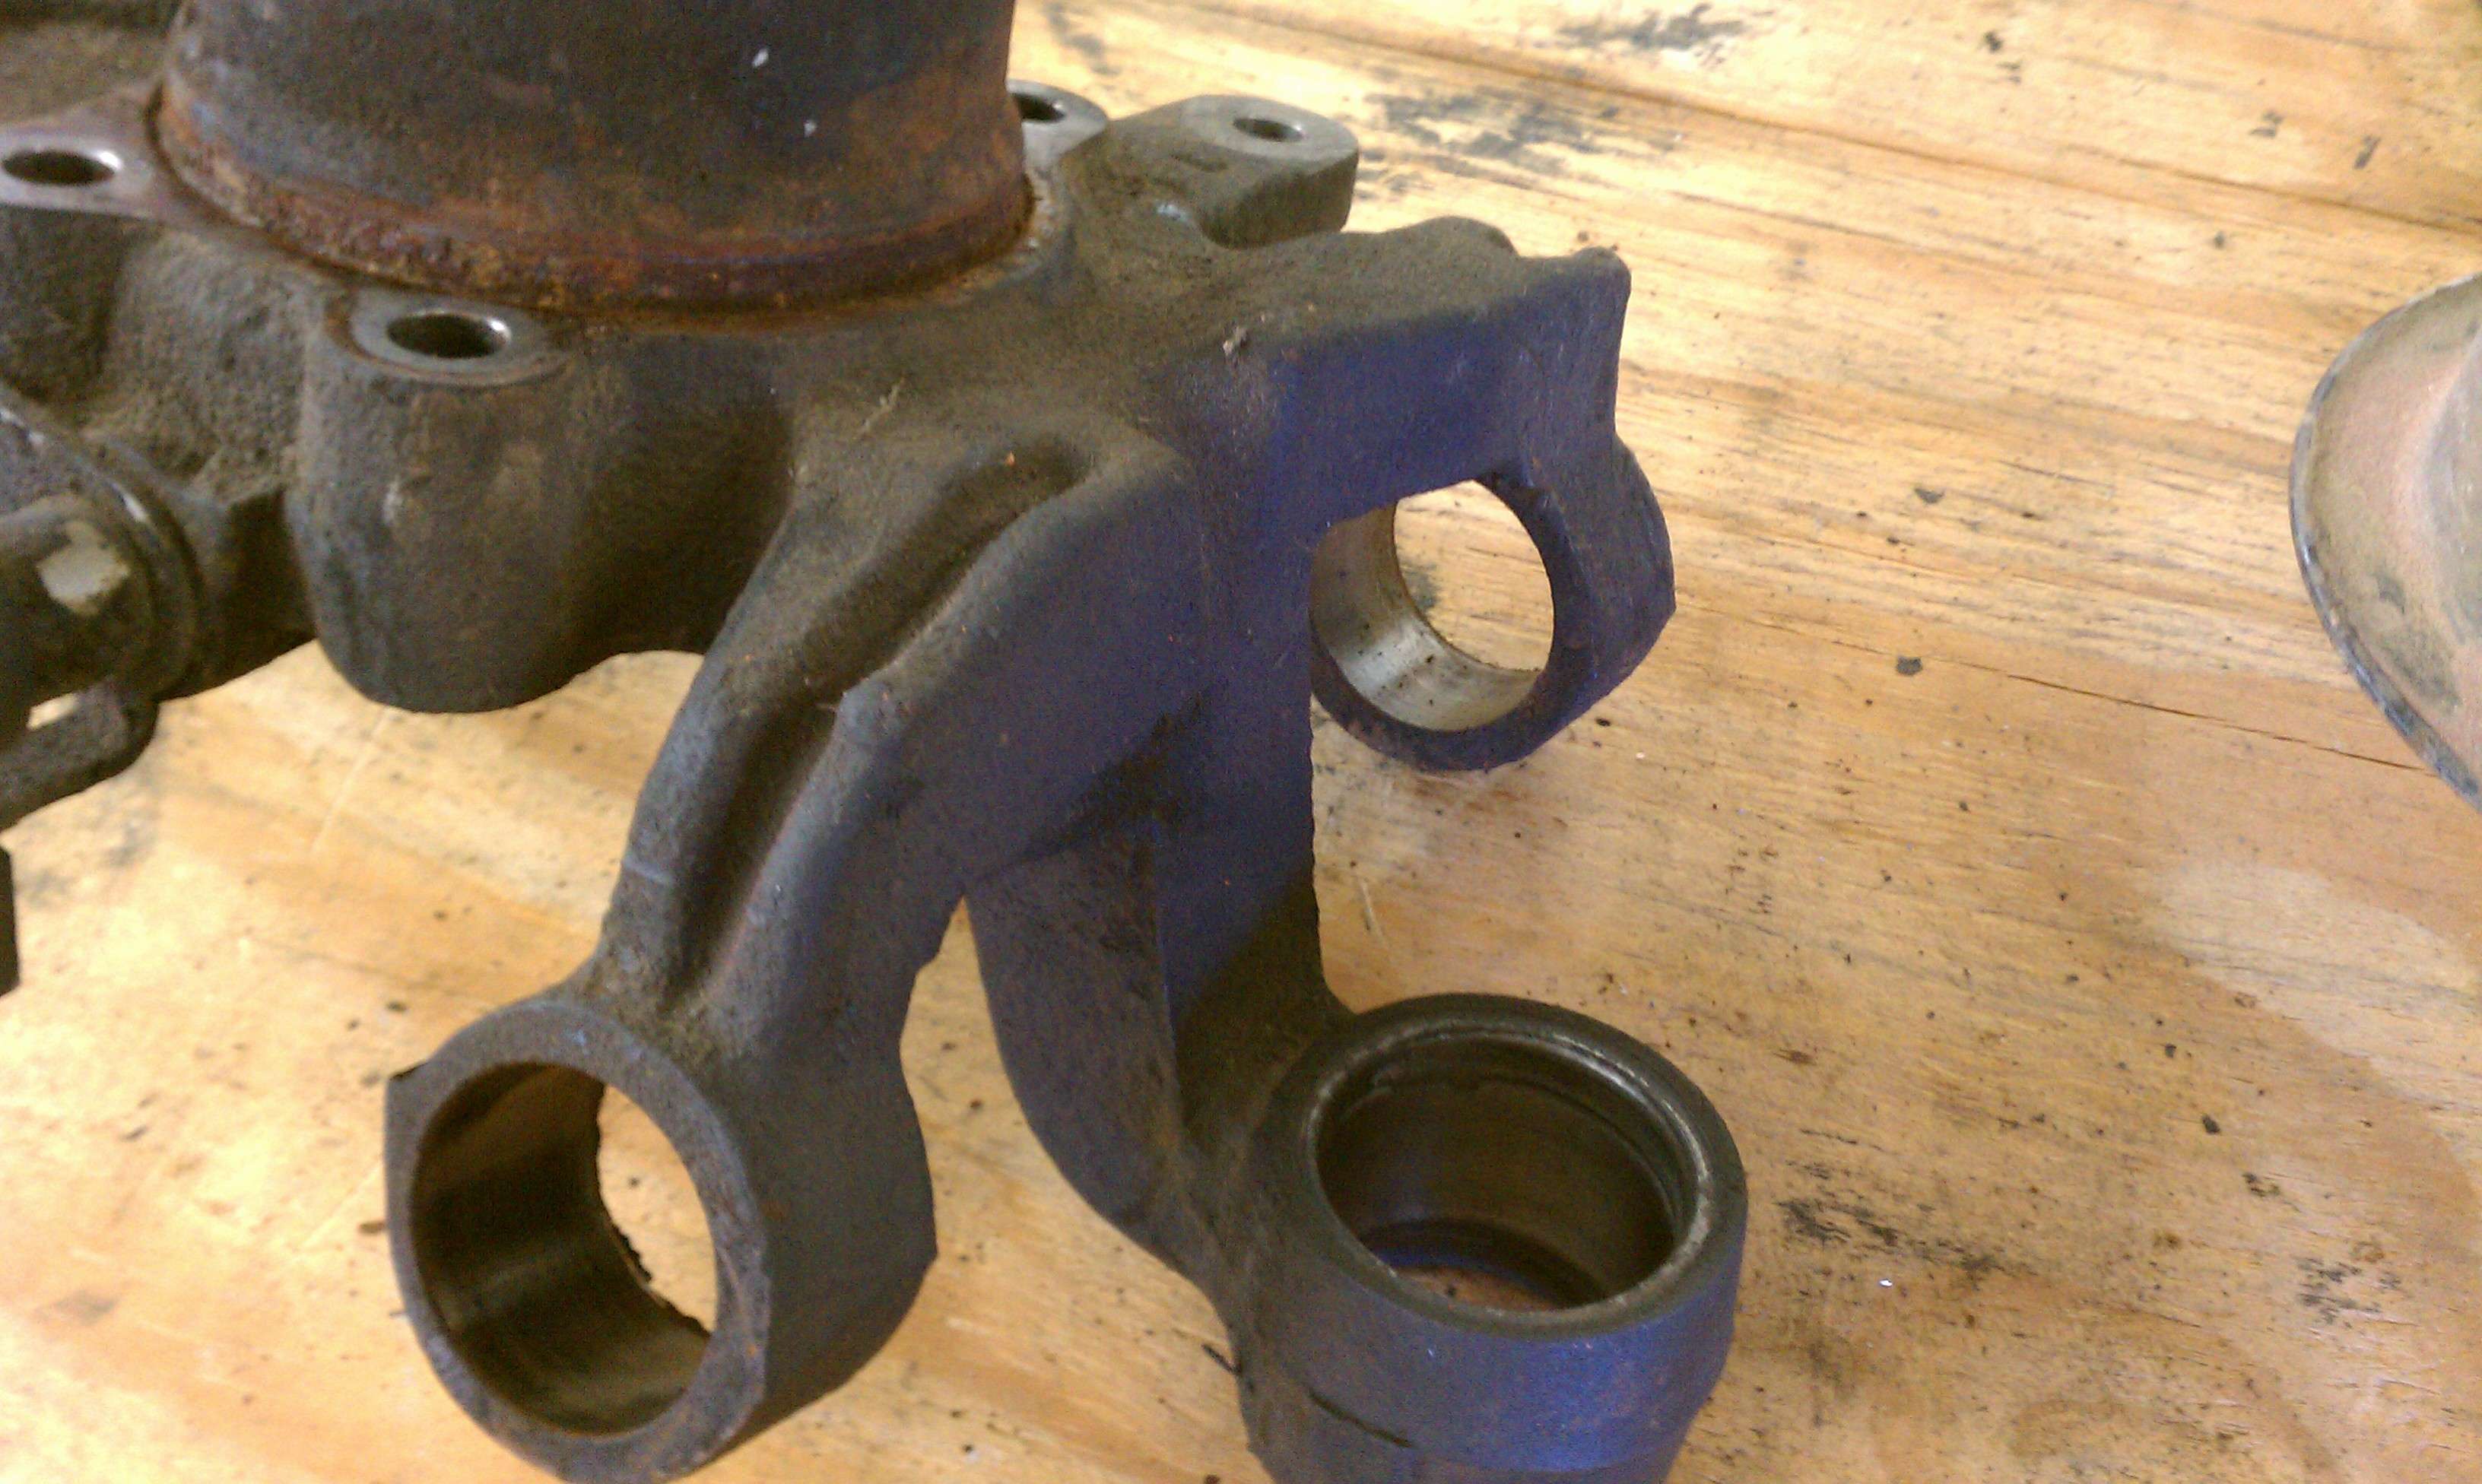
STEP 5 Get acquainted with your subframe") Here are the pertinent parts:
Here are the pertinent parts:
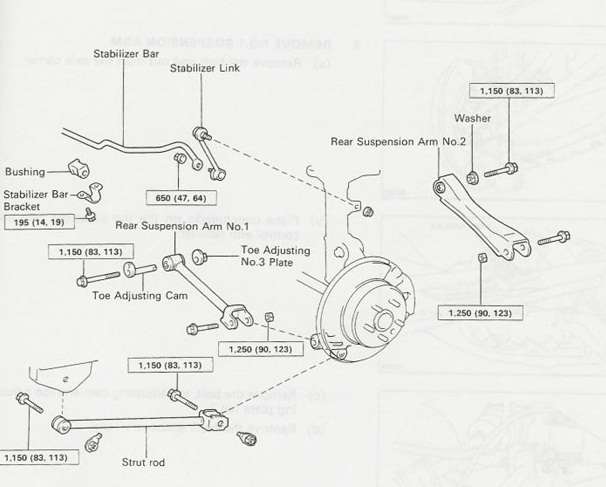
Step 6
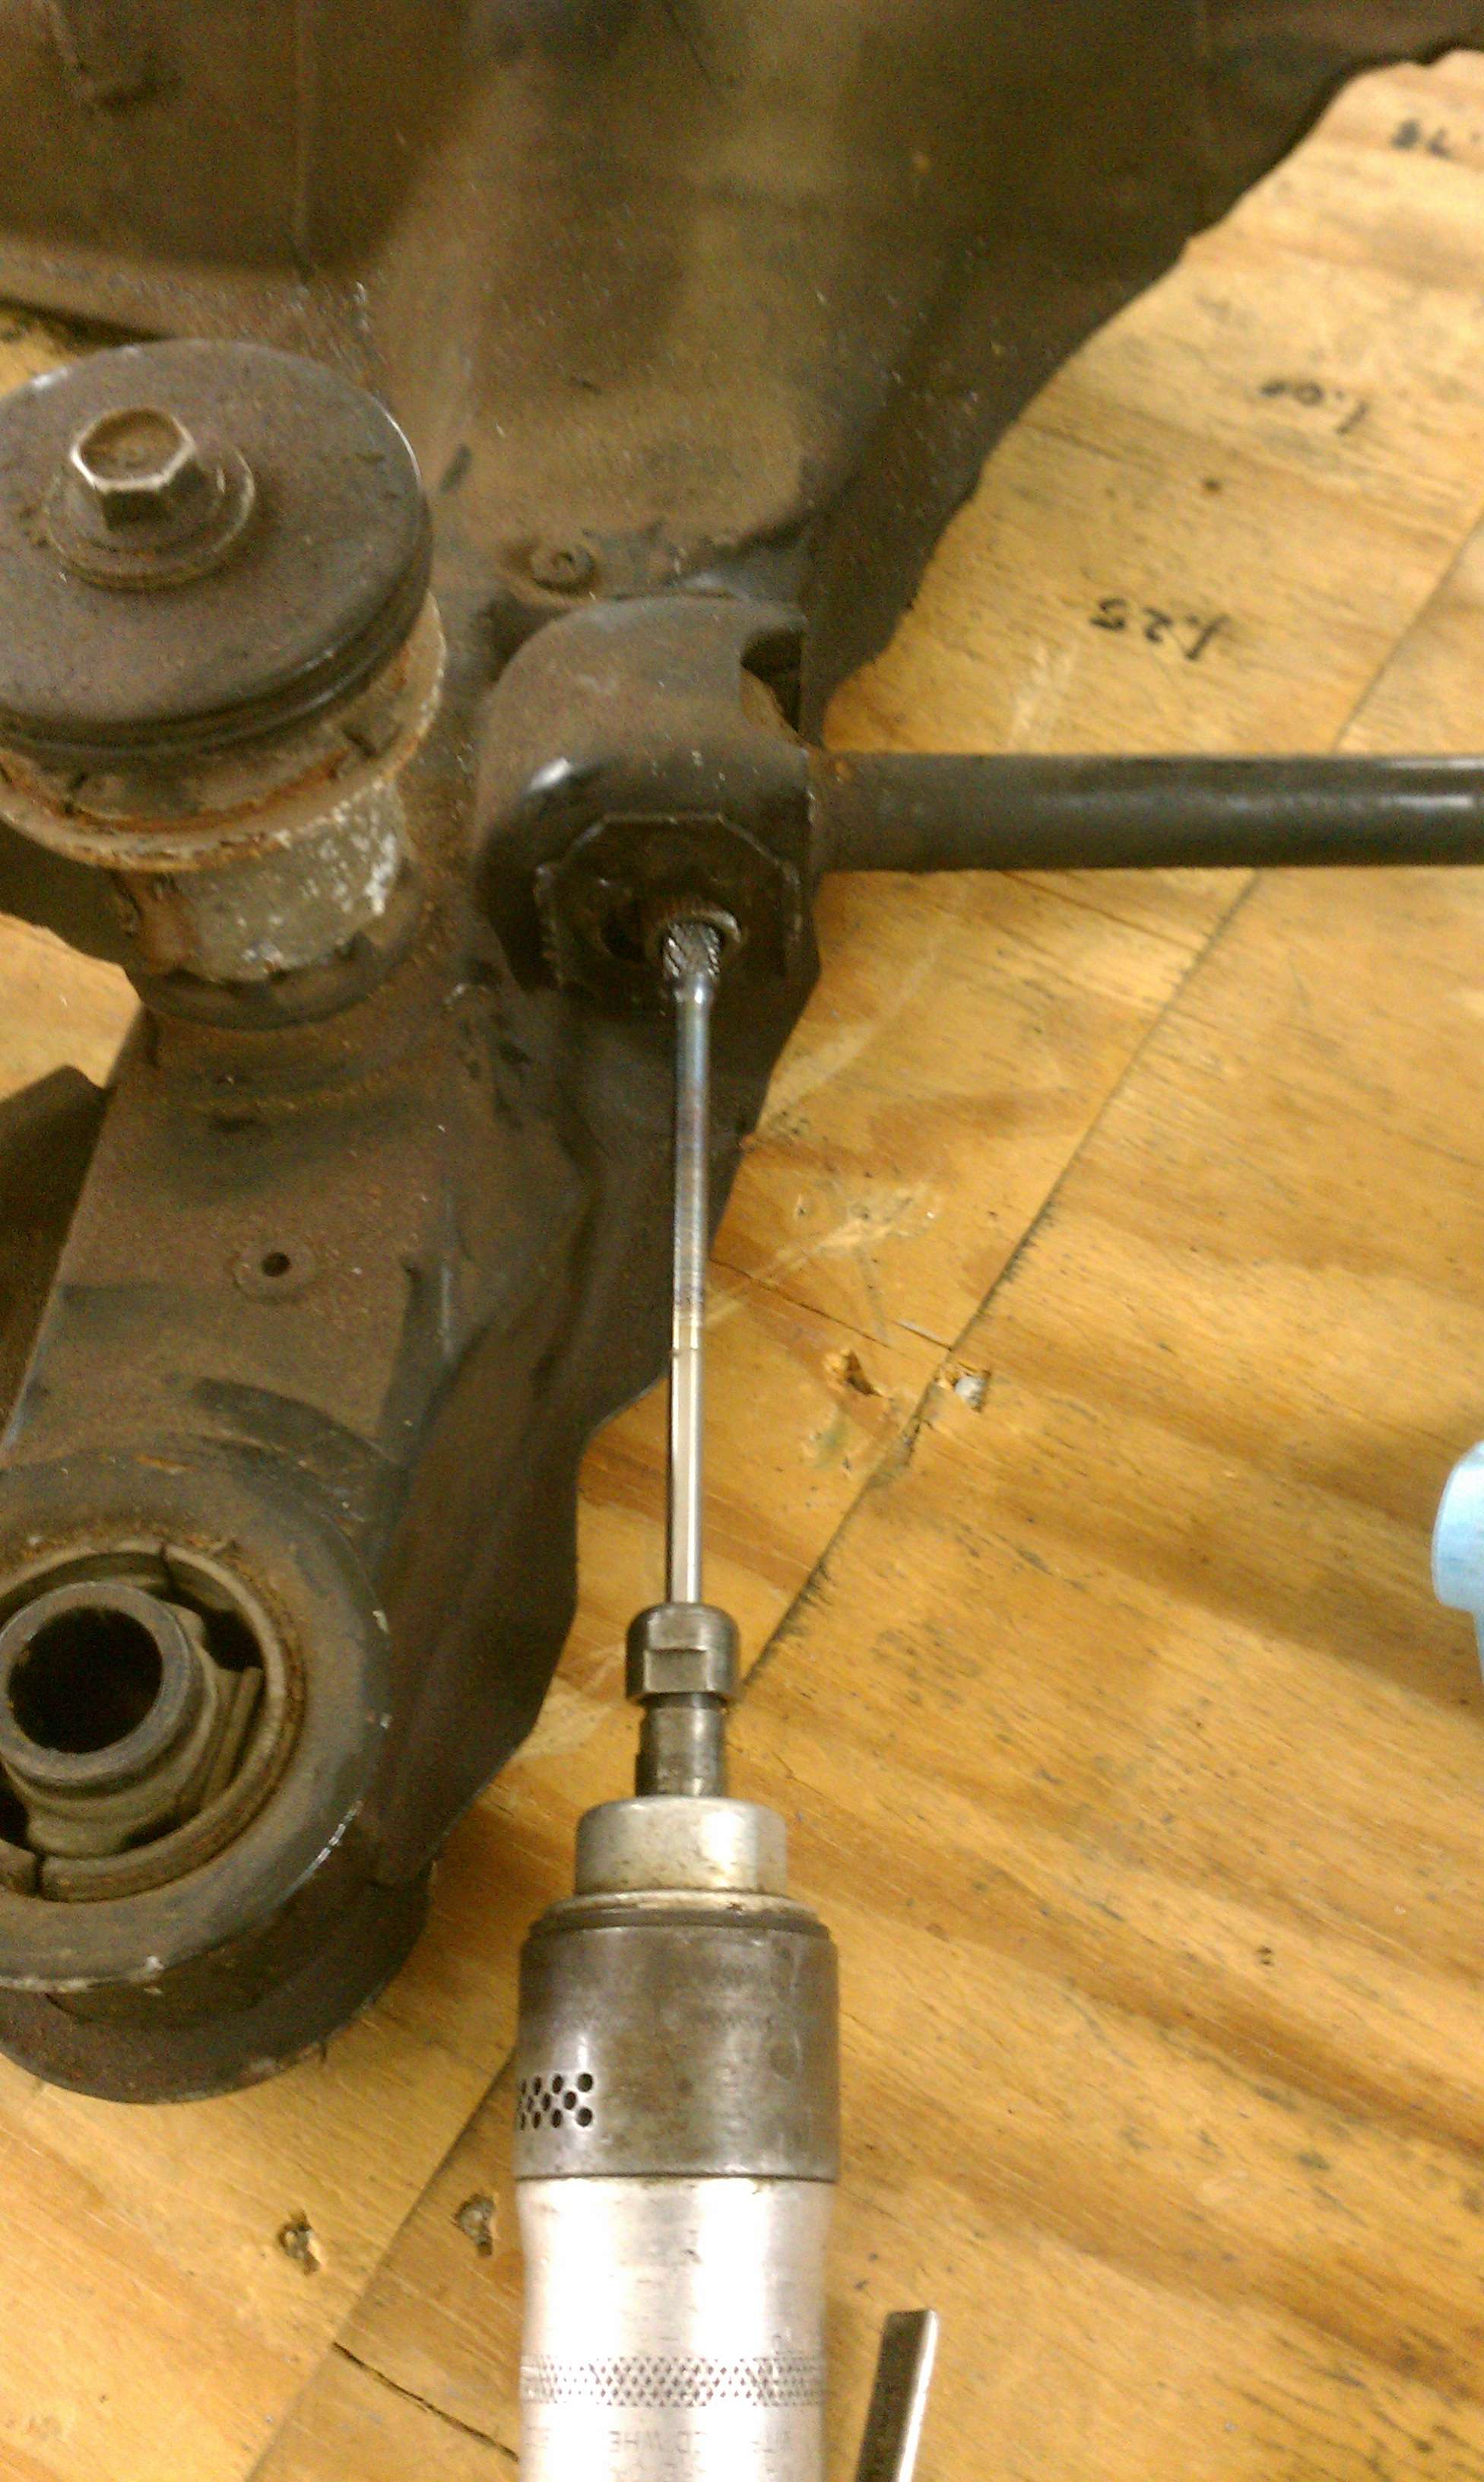
Depending on how you removed things, you will need to remove both suspension arms as well as the strut rod from the chassis. The no.1 Rear suspension arm gives alot of us alot of trouble... Its this part that usually holds most of us up. The toe adjusting cam gets stuck inside the bushing and makes removal of it from the subframe impossible. If it gets stuck, here is what I found does the best job...
Here is the situation in pictures:
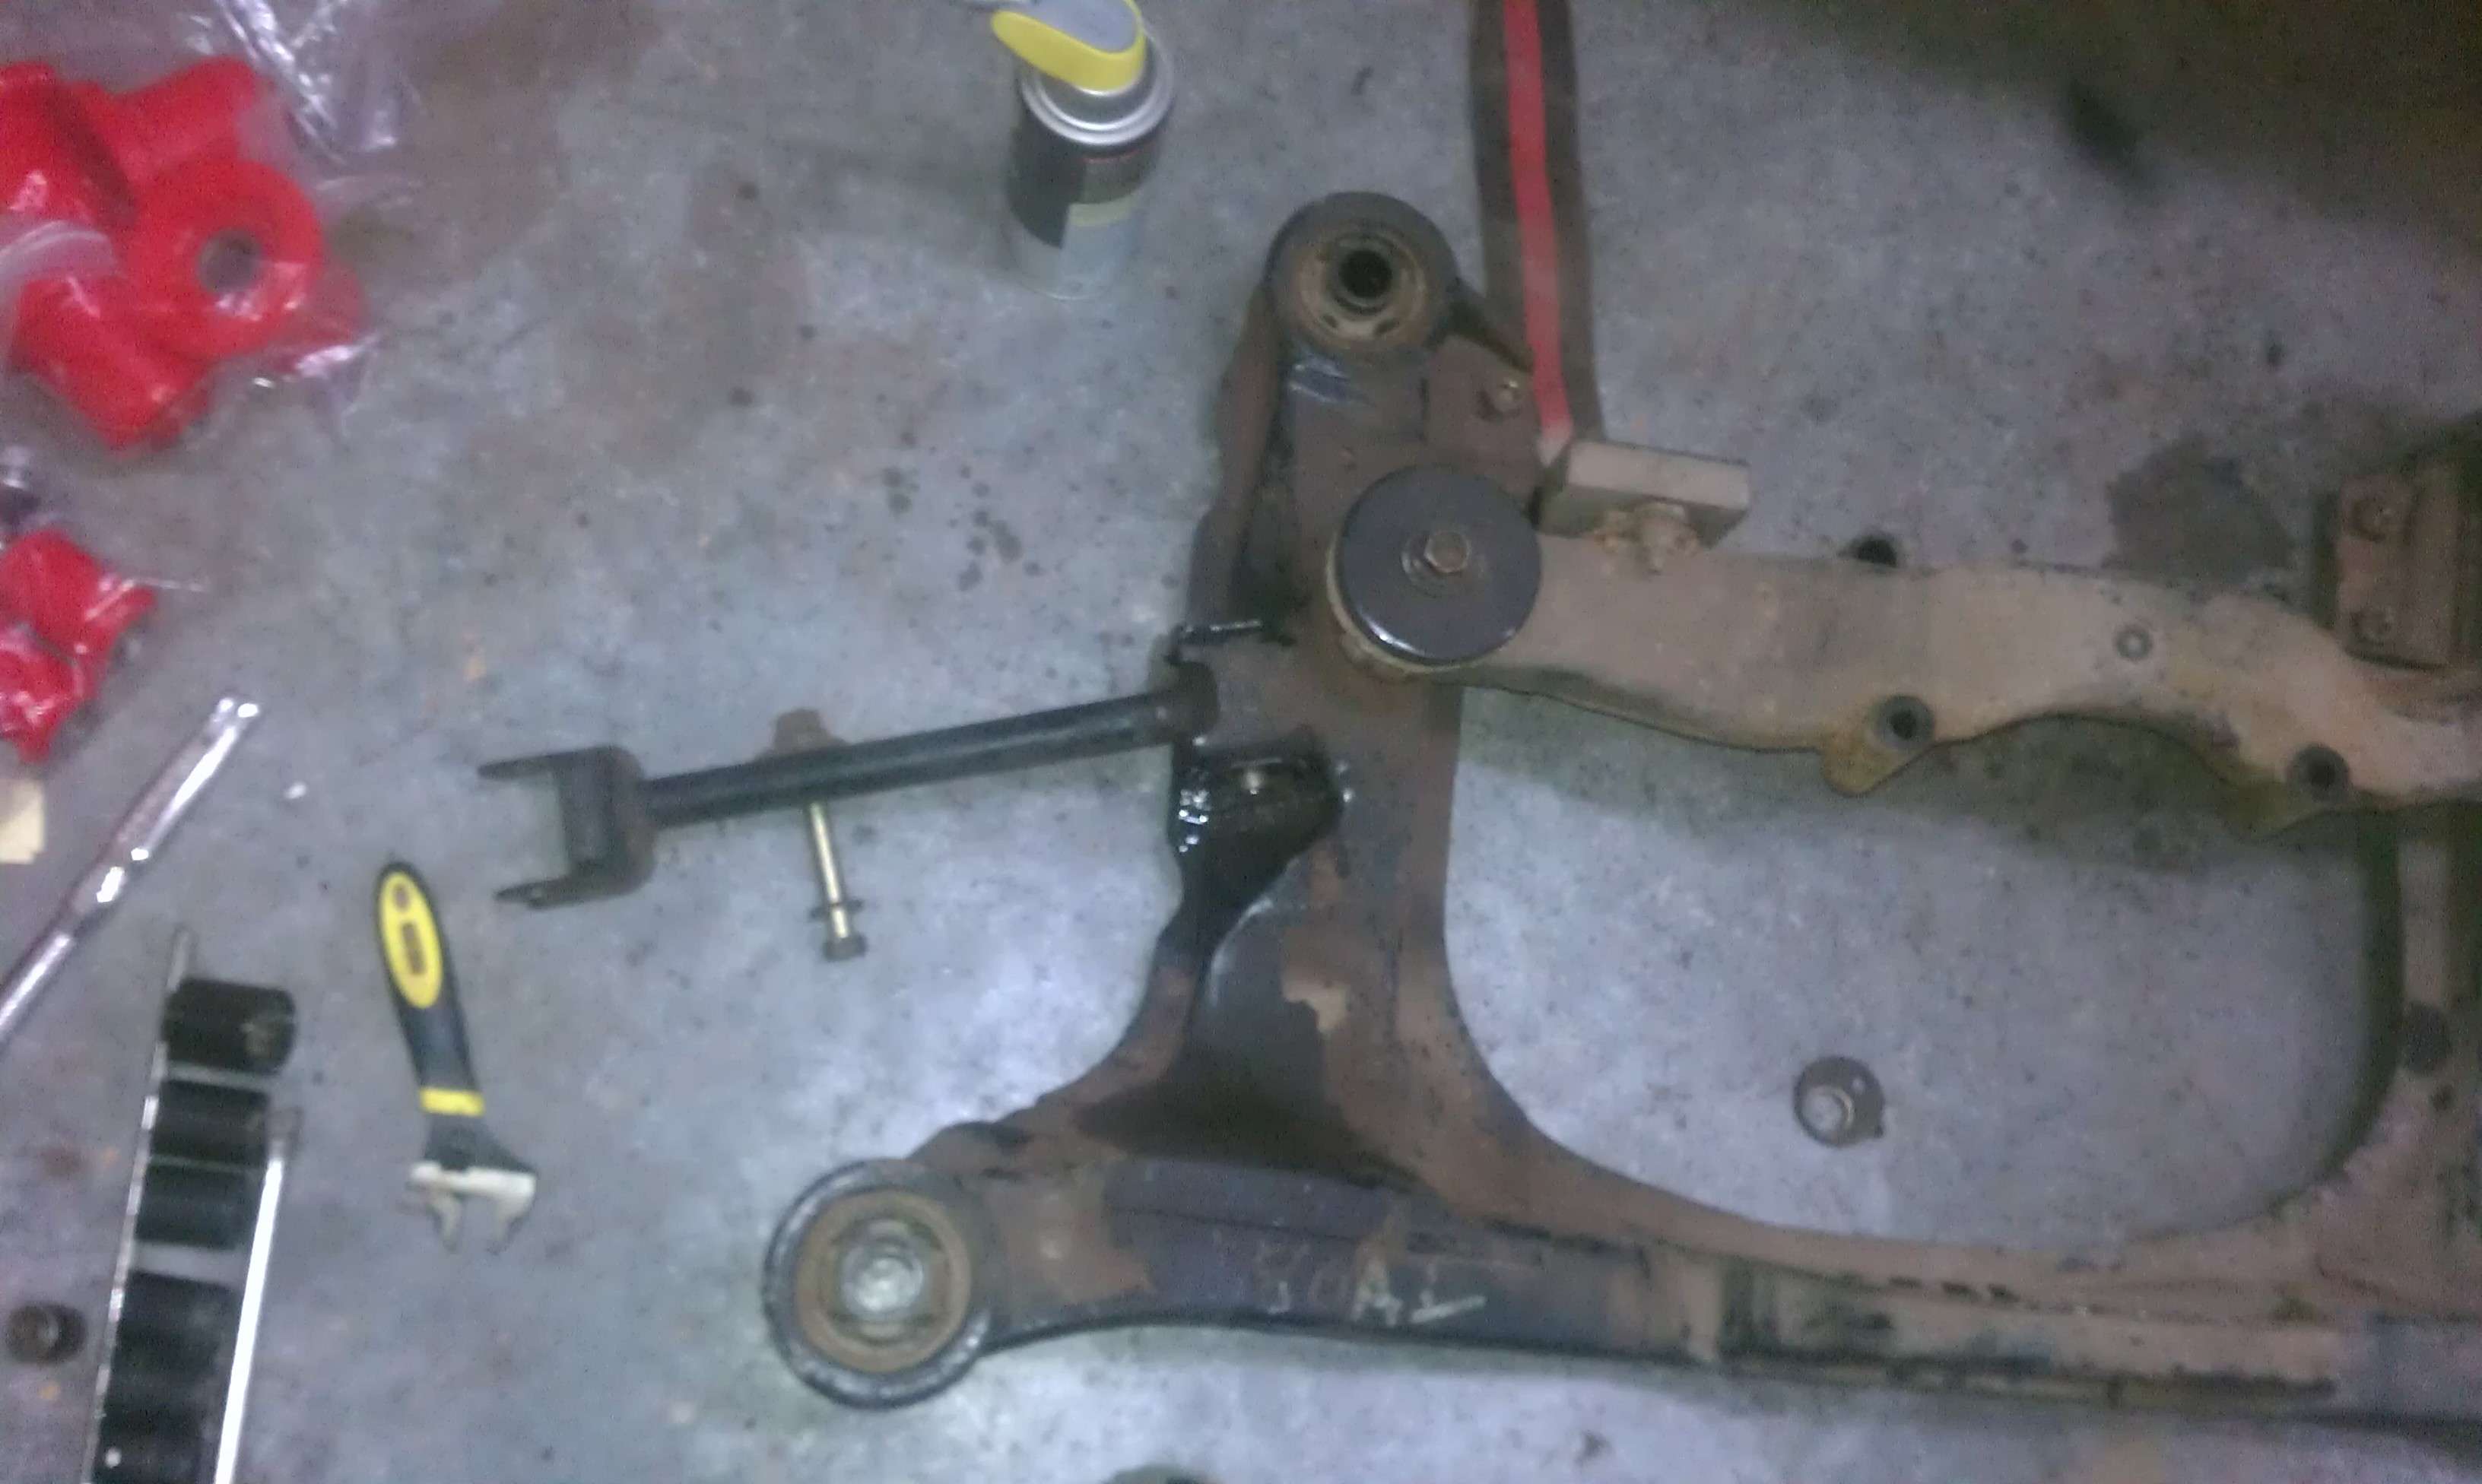
-Dont get pissed and beat it to death with a hammer, this will likely do nothing except bend your toe arm...
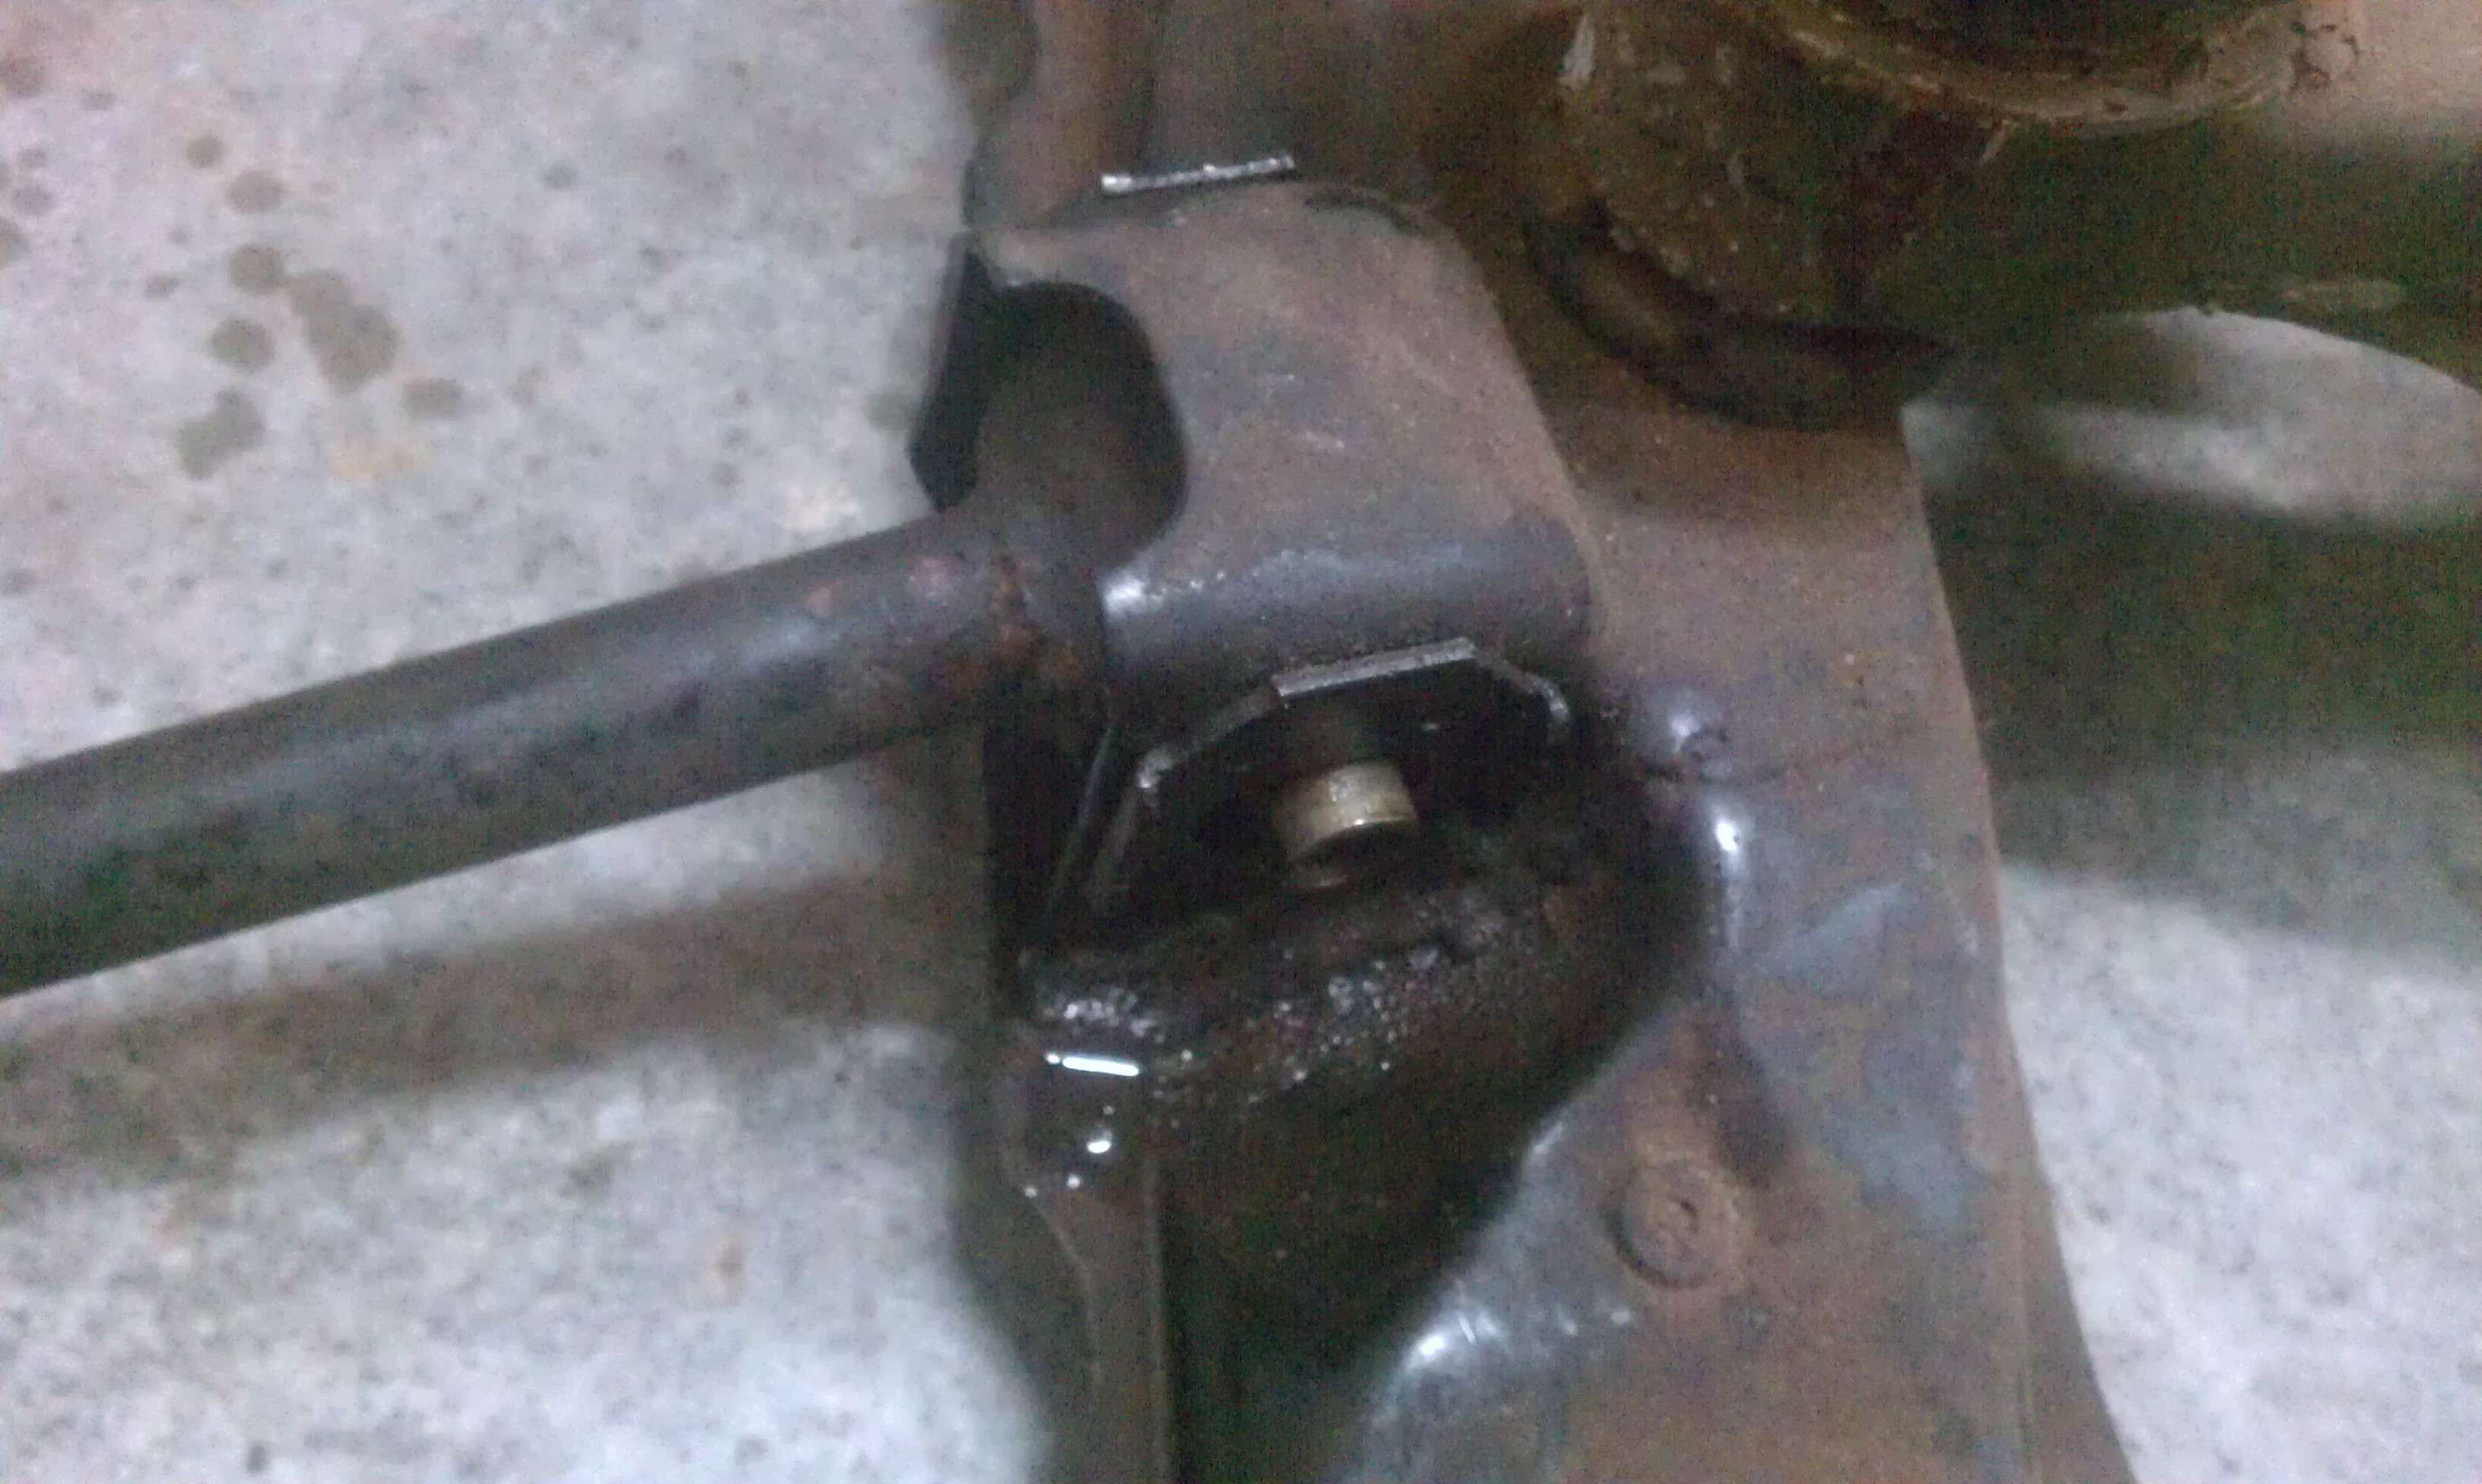
-With a long carbide burr, you are going to remove the piece of the cam sticking out so that you can eventually get the thing out to press out the whole bushing...
Like this:
When you get the front side done, then stick the bit all the way through and work on the back side. You wont be able to access this side of the bushing effectively any other way...
When its done, (took me about 20 mins per side) then you can pull it out and press out the bushing:
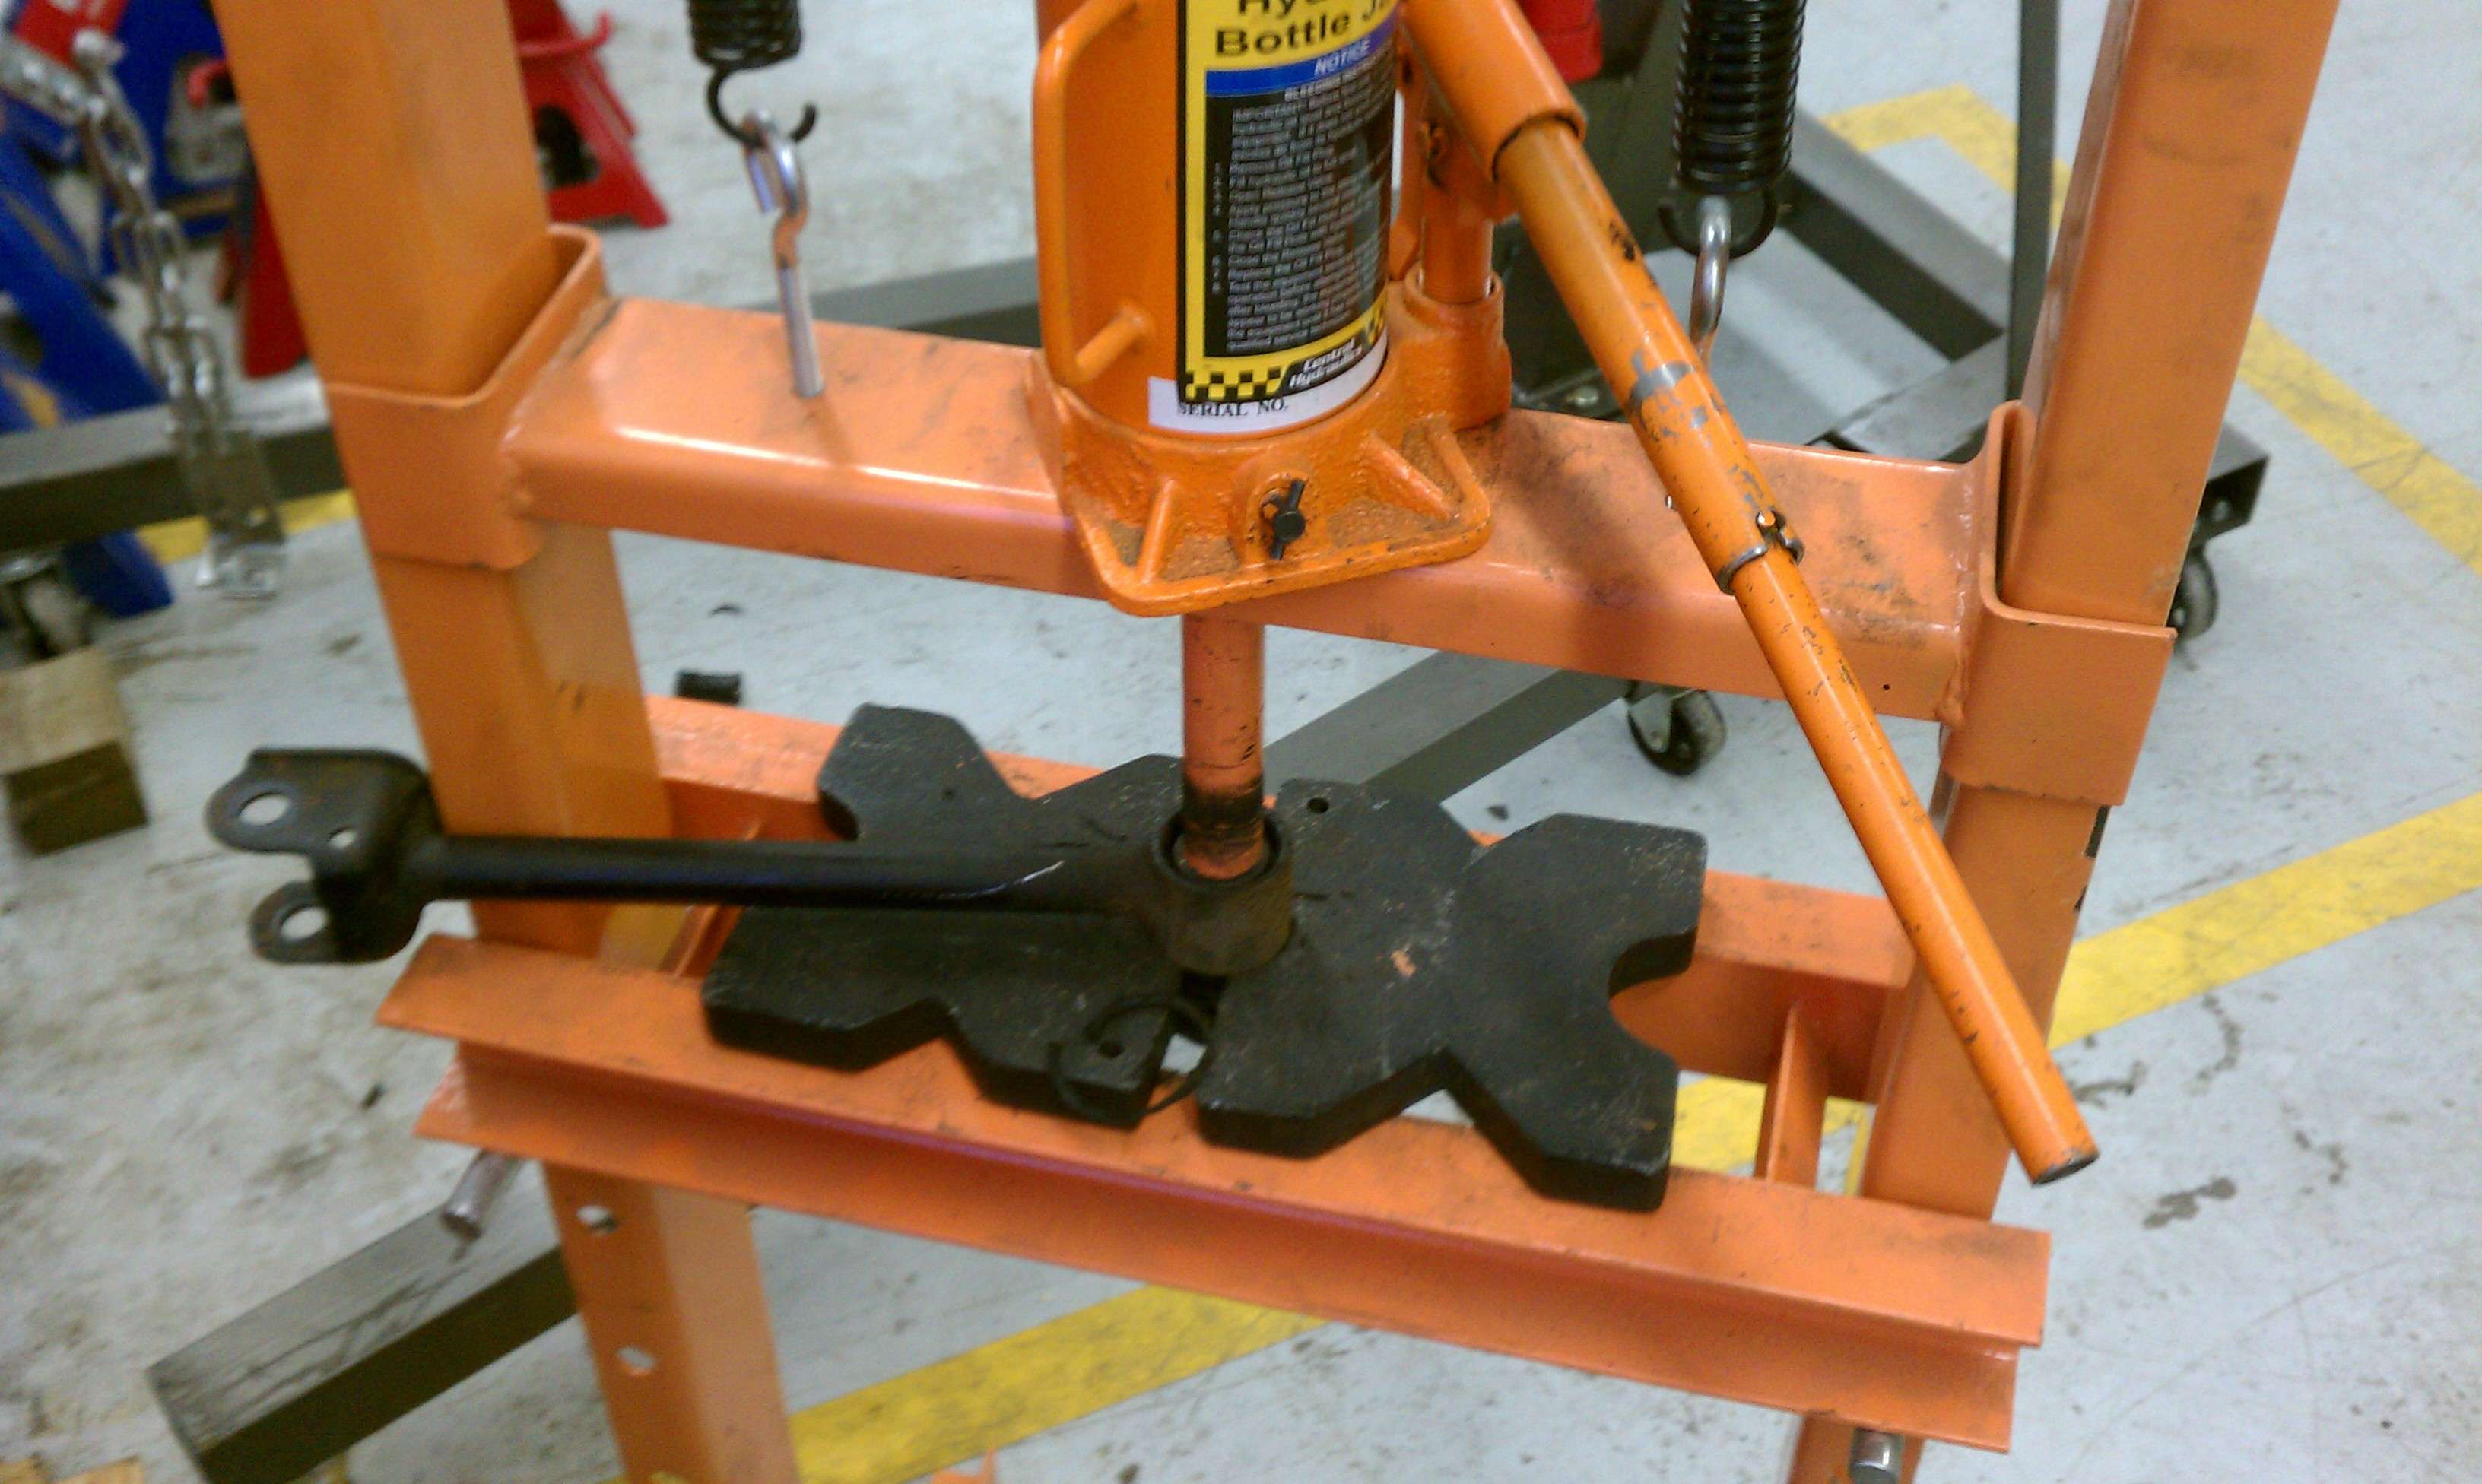
STEP 7
Remove Main Diff mount bushings and Main Subframe chassis mounting bushings
- This was much easier than I thought it was going to be. Just press out the center rubber piece with your press, and then with a hammer and an appropriately sized bearing packer hammer out the exterior metal portion of the bushing
Should wind up with this:

STEP 8
Remove bushings from wheel hub.
-Use a press on the strut bar bushing, its pretty straightforward.
-Use a slide hammer and the appropriate attachments to remove the toe adjustment arm bushing.
-Use a BFH and a socket to hammer out the no.2 suspension arm bushing.
Here is mine finished. I still have the other one to do, so ill post more pictures later if people want.
I have heard people have had issues with the suspension arm bushings but with the slide hammer approach vs a bearing puller (which I tried first and failed at...) it was much easier with the slide hammer...
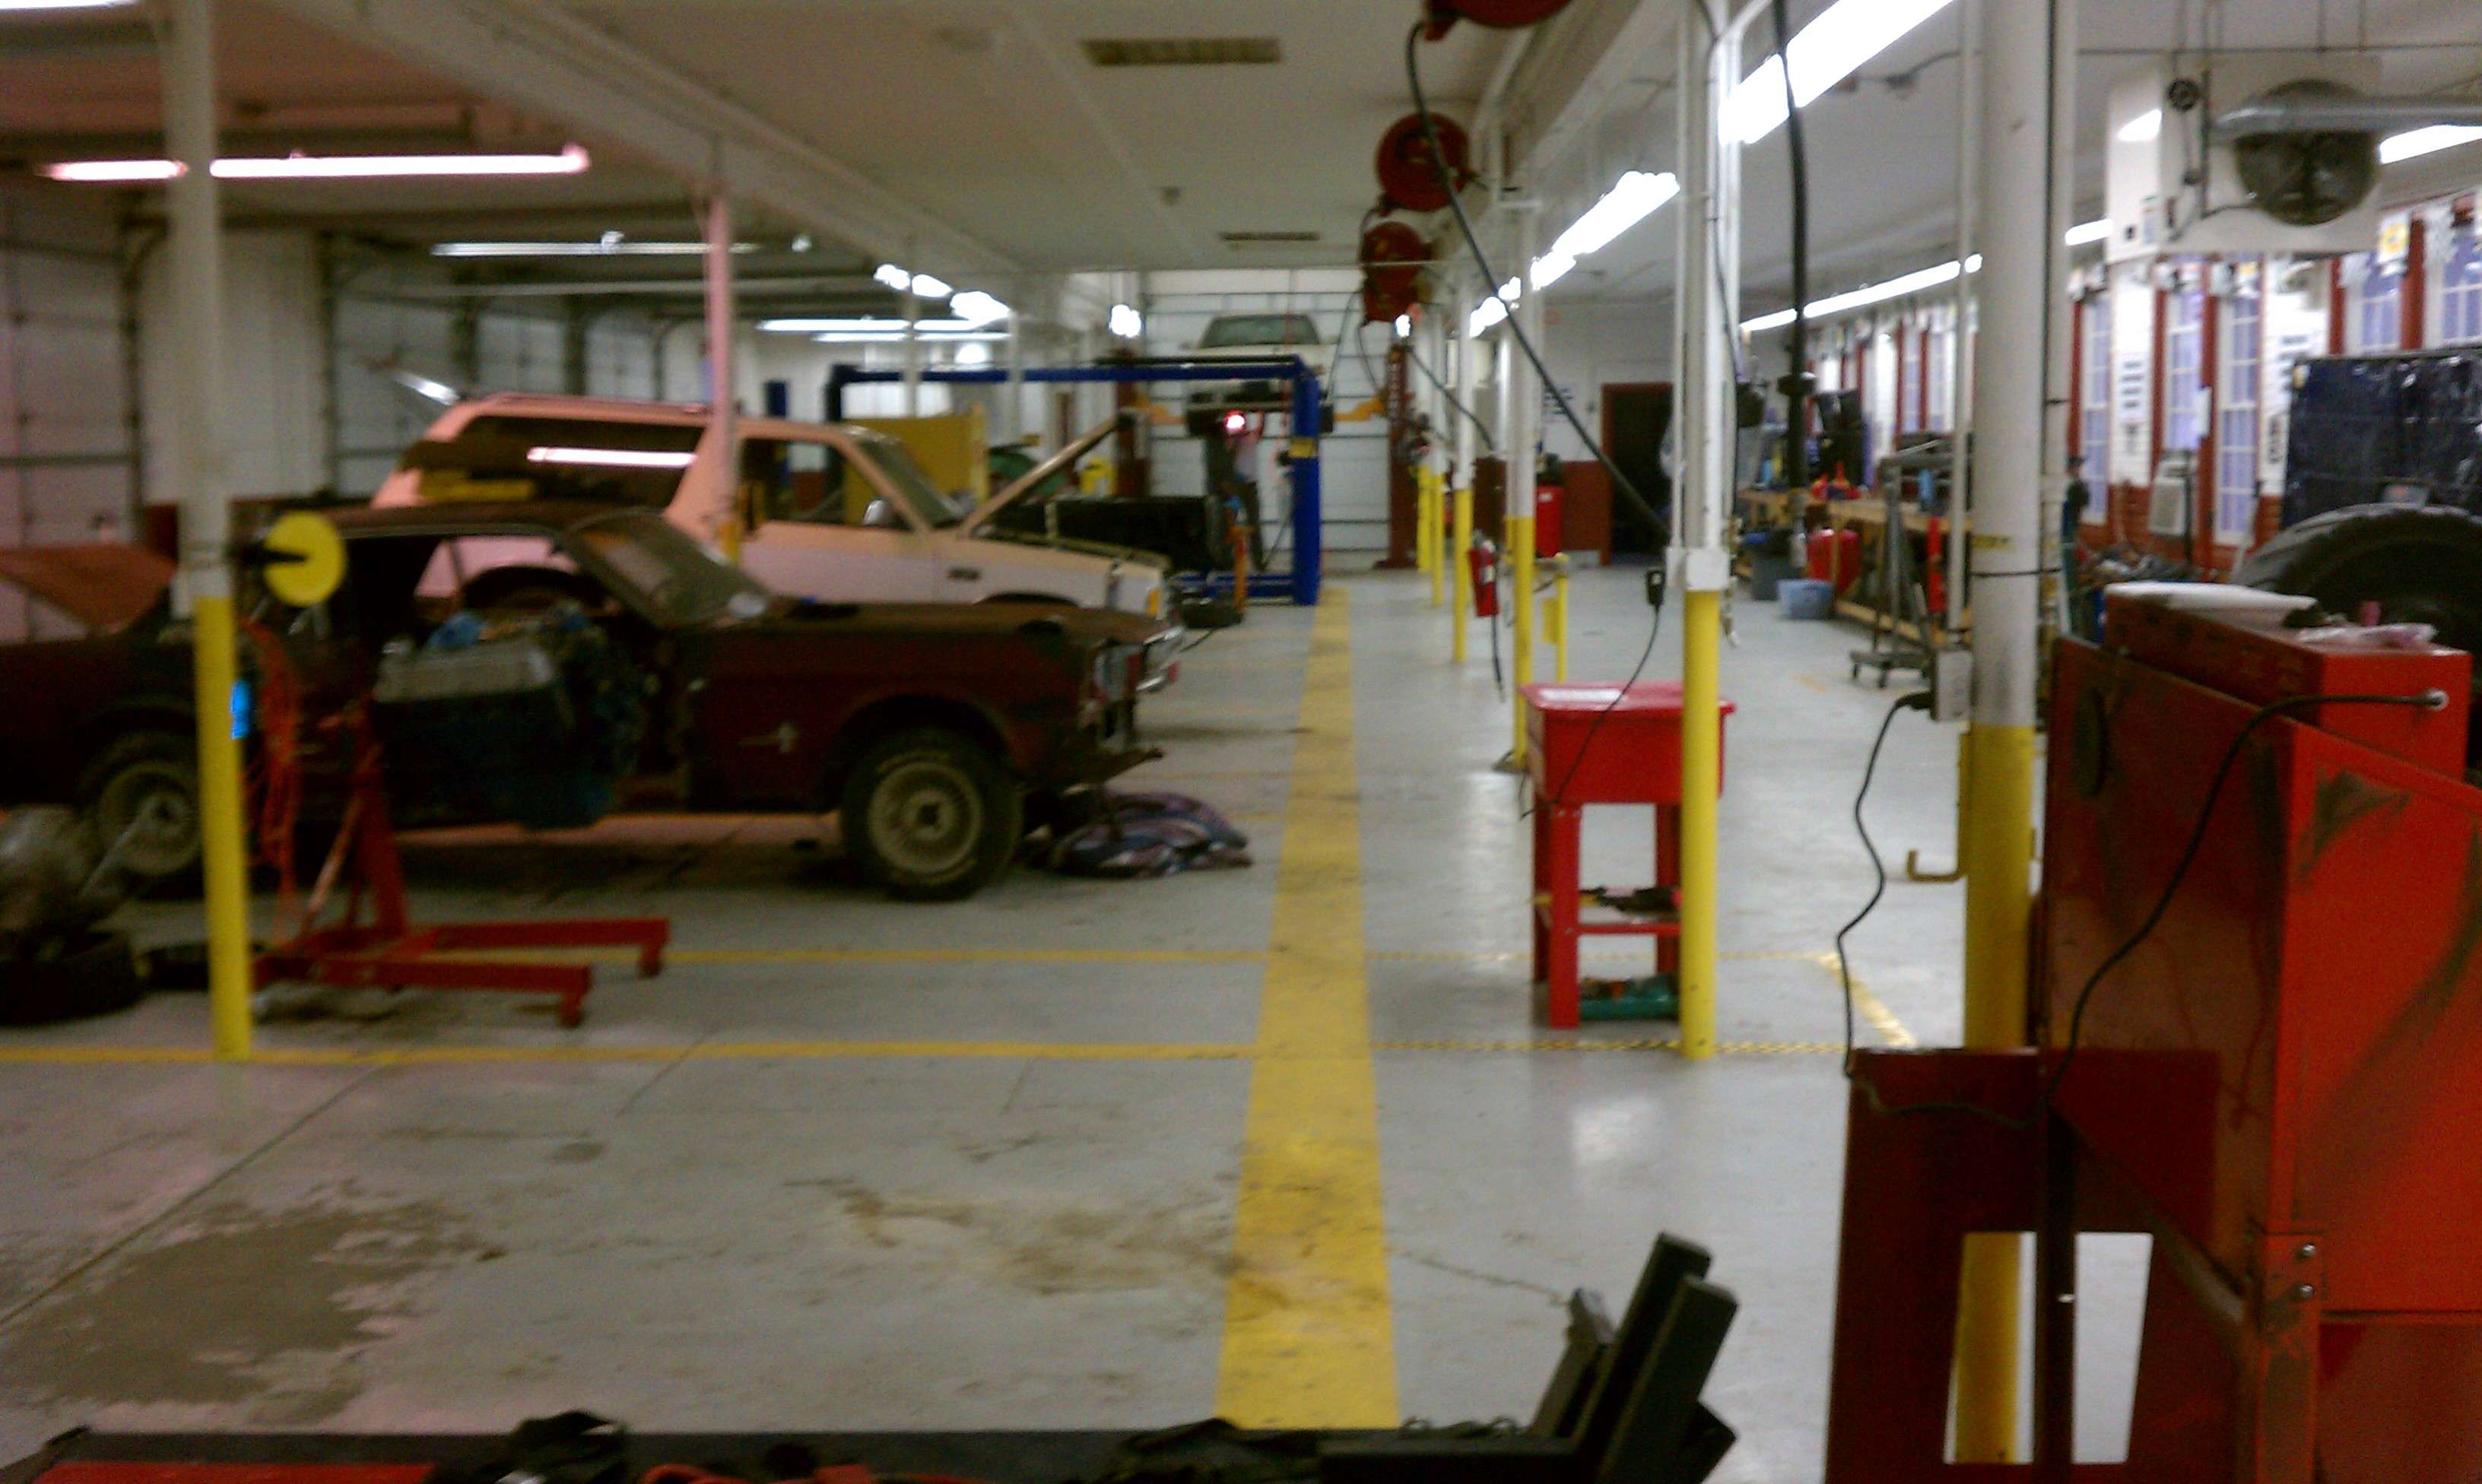
If any of you have access to, or know anyone with access to a military installation I would suggest capitalizing on the use of their auto-craft facilities... Personally this would have sucked alot more for me If I tried this at home in my cluttered garage. It could have been done, but I would have frozen my ass off, and would have had to make multiple runs to autozone or wherever to rent bearing pullers/slide hammers. For $10 you get access to a full garage, with all the tools you would need. Here is a picture of my local auto-craft store...
Anyways, I'm reserving the next slot for painting/powder coating and re-installation of solid-mount bushings...
Before you do this, understand, this job is not intended for the average backyard mechanic with only a set of sockets and a large hammer. To spare you the headache, you really need access to good air tools, a shop press, and lots of space...
Tools:
-Quality 1/2" pneumatic impact gun (600+ lbft)
-12000 RPM large die grinder (you will see mine in pictures later)
-12+ Ton shop press with appropriate press dies
-Transmission jack (unless you have a lift)
-Rolling floor jack (unless you have a lift)
-2x Jack Stands (unless you have a lift)
-Creeper (unless you have a lift)
-10, 12, 14, 17, 19, 21, and 30mm sockets. (14 and up should be 1/2" 6 point impact type)
-A 14mm and 12mm swivel socket, or a 1/2" swivel you dont care about potentially ruining
-2+ feet of 1/2" socket extensions
-Safety Goggles (not glasses)
-12-19mm double box ended wrenches (have the best angle)
-A set of 6" carbide burr bits (for stuck toe arm cams)
-Flashlight
-BFH
-Plastic bags for organizing parts
-Master Slide hammer set with bearing pullers etc (available at autozone IIRC)
STEP 1 Remove wheel hub assemblies (SEE BGB)
-This is mostly straight forward, but I do find them easier to remove if you unbolt the E-brake cable from the chassis and remove the whole hub assy with the cable still attached.
STEP 2 Using a swivel, a box end, your impact, and a very long 1/2" extension unbolt both the Propeller Shaft and both CV axles from the Differential. Trying to do this by hand is damn near impossible...
STEP 3 Support Subassembly with transmission lift
STEP 4 Unbolt Subassembly, lower the transmission lift, then remove it.
-Wear goggles, and use your impact wrench
STEP 5 Get acquainted with your subframe
Here are the pertinent parts:
Step 6
Depending on how you removed things, you will need to remove both suspension arms as well as the strut rod from the chassis. The no.1 Rear suspension arm gives alot of us alot of trouble... Its this part that usually holds most of us up. The toe adjusting cam gets stuck inside the bushing and makes removal of it from the subframe impossible. If it gets stuck, here is what I found does the best job...
Here is the situation in pictures:
-Dont get pissed and beat it to death with a hammer, this will likely do nothing except bend your toe arm...
-With a long carbide burr, you are going to remove the piece of the cam sticking out so that you can eventually get the thing out to press out the whole bushing...
Like this:
When you get the front side done, then stick the bit all the way through and work on the back side. You wont be able to access this side of the bushing effectively any other way...
When its done, (took me about 20 mins per side) then you can pull it out and press out the bushing:
STEP 7
Remove Main Diff mount bushings and Main Subframe chassis mounting bushings
- This was much easier than I thought it was going to be. Just press out the center rubber piece with your press, and then with a hammer and an appropriately sized bearing packer hammer out the exterior metal portion of the bushing
Should wind up with this:
STEP 8
Remove bushings from wheel hub.
-Use a press on the strut bar bushing, its pretty straightforward.
-Use a slide hammer and the appropriate attachments to remove the toe adjustment arm bushing.
-Use a BFH and a socket to hammer out the no.2 suspension arm bushing.
Here is mine finished. I still have the other one to do, so ill post more pictures later if people want.
I have heard people have had issues with the suspension arm bushings but with the slide hammer approach vs a bearing puller (which I tried first and failed at...) it was much easier with the slide hammer...
If any of you have access to, or know anyone with access to a military installation I would suggest capitalizing on the use of their auto-craft facilities... Personally this would have sucked alot more for me If I tried this at home in my cluttered garage. It could have been done, but I would have frozen my ass off, and would have had to make multiple runs to autozone or wherever to rent bearing pullers/slide hammers. For $10 you get access to a full garage, with all the tools you would need. Here is a picture of my local auto-craft store...
Anyways, I'm reserving the next slot for painting/powder coating and re-installation of solid-mount bushings...
