This is my guide showing how I removed and replaced my valve cover. What you do with this information is 100% up to you, I do not imply or guarantee anything and any damage you may do to your car is out of my hands.
Having said that, here's what I did.
First, lets outline what tools will be needed to complete this:
-Sockets
-Socket wrenches
-Allen wrenches
-Phillips head screw driver
-Degreaser/Engine cleaner
Optional:
- Hex or Allen wrench bolts (See www.twosrus.com for an easy purchase)
- Black RTV or Toyota FPIG
- Outer Valve Cover Gasket #: 11213-88381
- Inner Valve Cover Gasket #: 11214-88381
Step 1:
First things first, remove the intercooler, the spark plug wires, and the air manifold brace.
Manifold brace highlighted in blue:
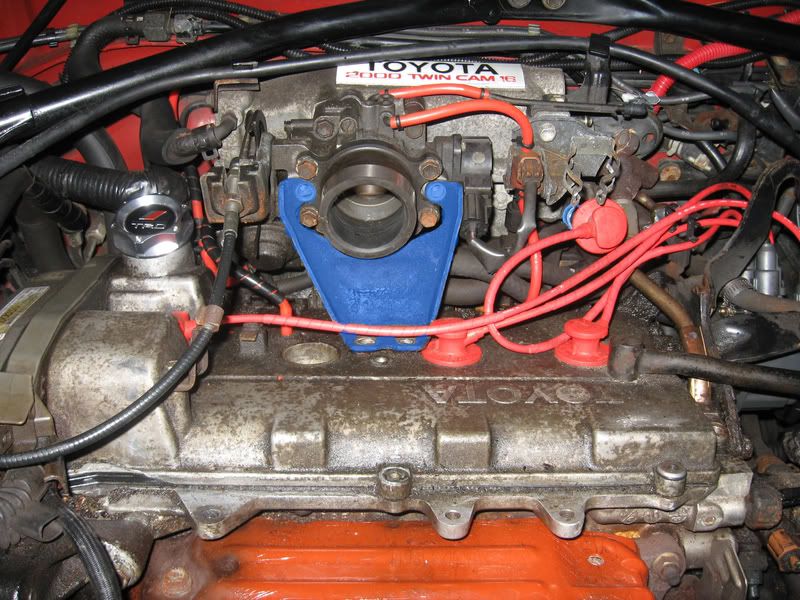
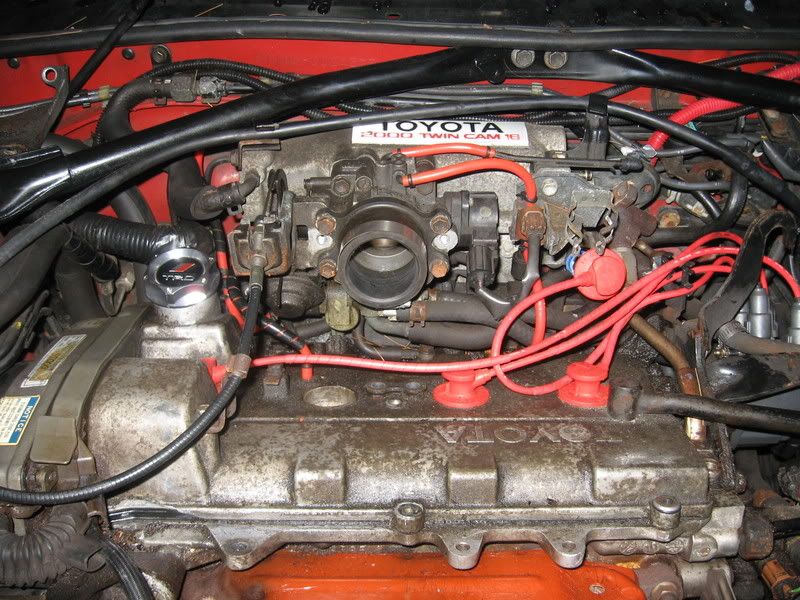
It is attached to the throttle body, and the valve cover by four bolts. Remove those and it will pop free. Save the bolts, or replace them with appropriate new ones.
Brace removed:
Step 2:
Remove the 10 bolts for the valve cover. There are 3 in the front, 3 in the middle, and 4 in the rear. These are all accessible without removing anything else, but may require some finagling with a long Phillips head screw driver.
Step 3, as needed:
Remove/Disconnect the EGR if necessary. Please see the EGR FAQ/How To for more information on that.
Step 4:
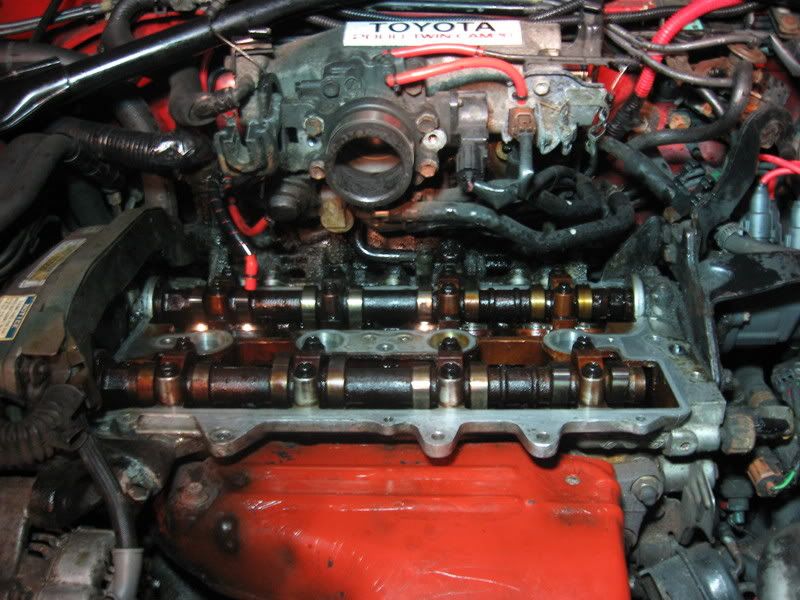
Remove the valve cover by lifting it upwards. This process can be quite annoying, but just be calm and work it free.
Getting there:
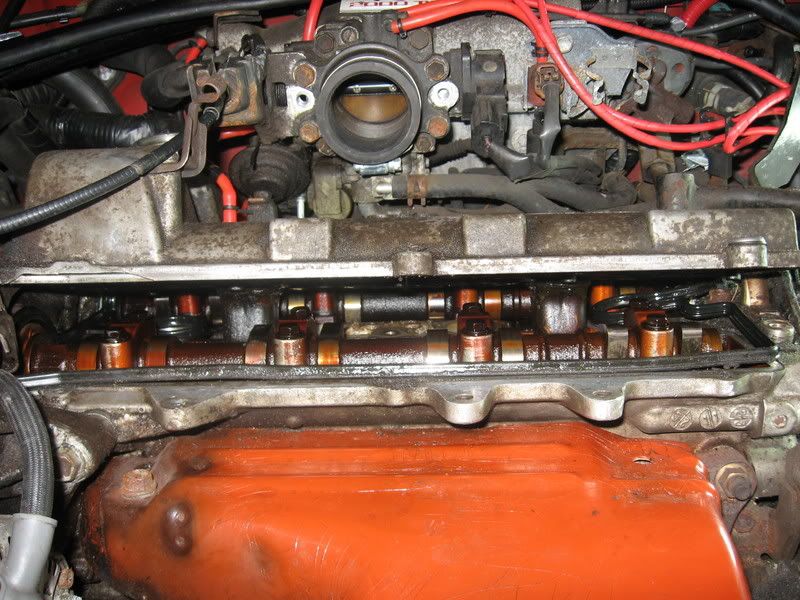
Off:
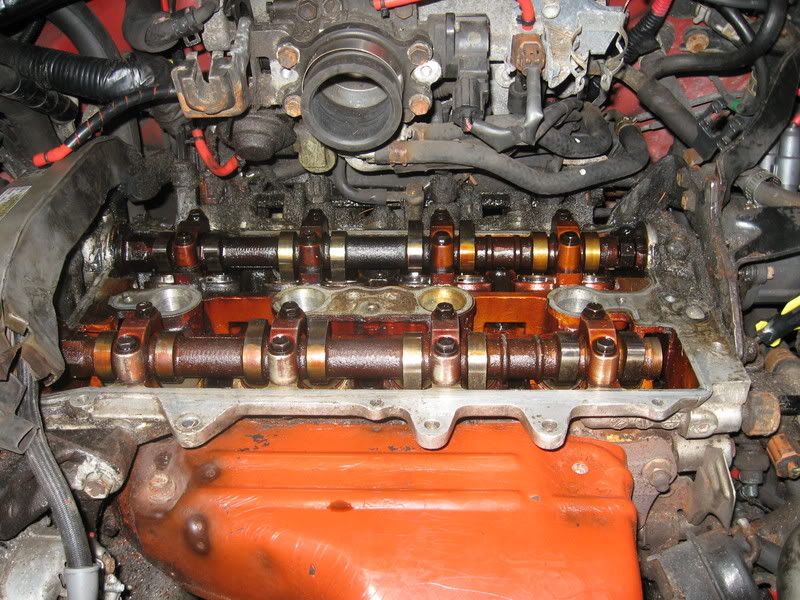
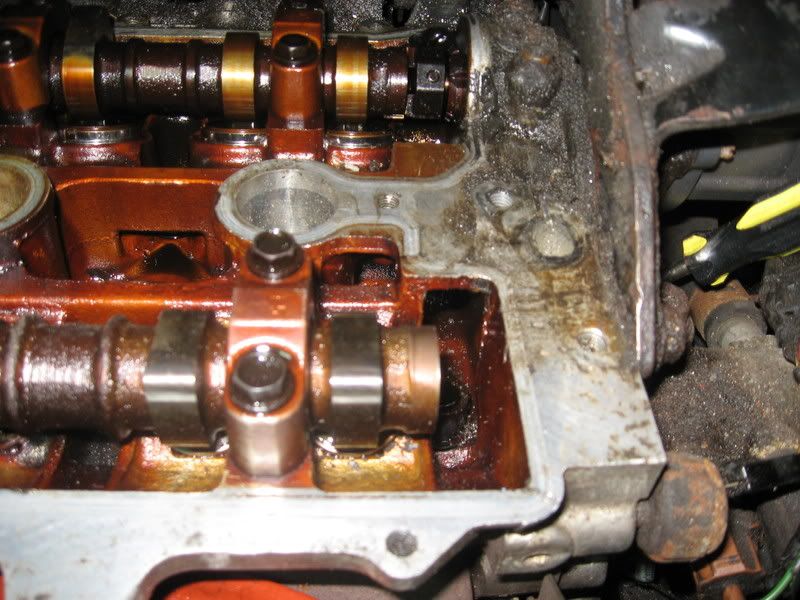
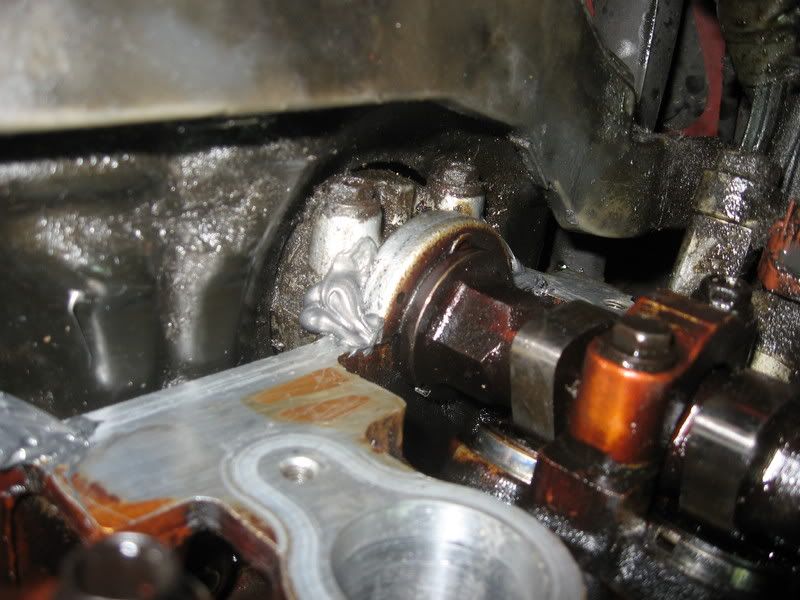
Very dirty:
Step 5:
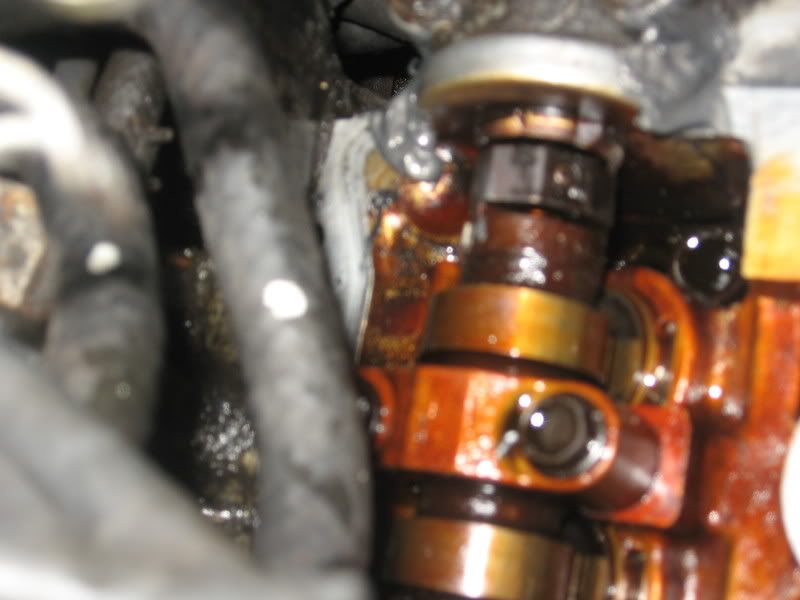
At this point, I cleaned up the surrounding gunk, taking care to avoid any dirt and grime from falling in with the cams.
I used engine degreaser and clean rags to carefully scrub the dirt and grime from the surfaces. I didn't go crazy over cleaning it, it does have 213,000 miles on it after all.
But do try and get rid of all the dirt and particles that would cause improper sealing: allowing oil to seep or leak out. Also take care to remove the old Toyota FPIG sealant from around the cam corners.
Step 6:
Get the valve cover ready for reinstall. For me, this included sand blasting and powder coating. If you do such things, please take the necessary precautions in cleaning it.
Time to put the valve cover back on! Get the FPIG or I used RTV Black ready, as well as your valve cover.
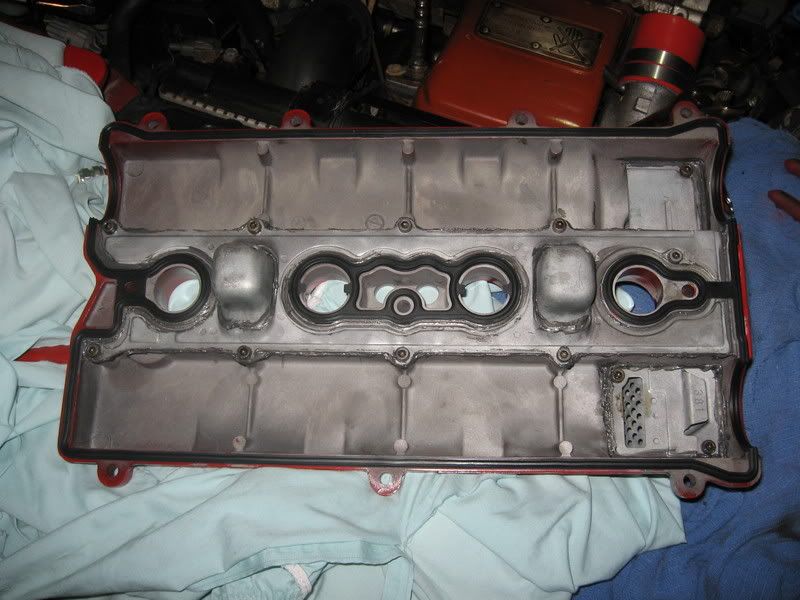
Here is my valve cover, with new RTV around the edges and the new gaskets (inner and outer) in place.
Step 7:
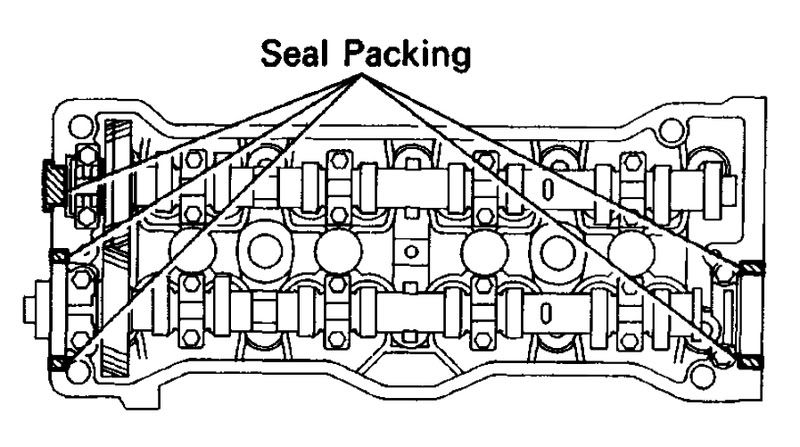
Time to reinstall the valve cover. First apply sealant to the four corners around the cam shafts:
Follow the instructions for whatever sealant you use. Mine required 24 hours to sit. So be sure to abide by these rules if you want it to cure properly.
Here is my RTV Black on the head:
Left side:
Right side:
At this point carefully put the valve cover back on, it should be twice as easy as removal.
Reinstall the bolts being extremely care NOT to over torque the bolts. The Toyota BGB requires that they be 69 in. lbf (7.8 N-m) of force. This is basically HAND tight.
If you over tighten the bolts, the valve cover tabs WILL break.
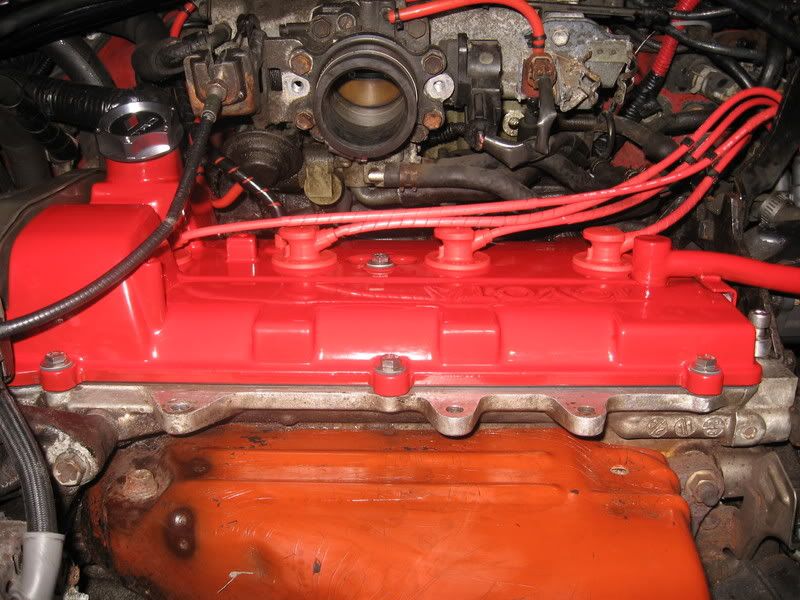
Enjoy!
If anyone has anything to add, or any questions I'd be happy to help as best I can.
I have more pictures, if anything isn't clear or needs further explanation drop me a line and I'll edit it.
-Towels
Having said that, here's what I did.
First, lets outline what tools will be needed to complete this:
-Sockets
-Socket wrenches
-Allen wrenches
-Phillips head screw driver
-Degreaser/Engine cleaner
Optional:
- Hex or Allen wrench bolts (See www.twosrus.com for an easy purchase)
- Black RTV or Toyota FPIG
- Outer Valve Cover Gasket #: 11213-88381
- Inner Valve Cover Gasket #: 11214-88381
Step 1:
First things first, remove the intercooler, the spark plug wires, and the air manifold brace.
Manifold brace highlighted in blue:
It is attached to the throttle body, and the valve cover by four bolts. Remove those and it will pop free. Save the bolts, or replace them with appropriate new ones.
Brace removed:
Step 2:
Remove the 10 bolts for the valve cover. There are 3 in the front, 3 in the middle, and 4 in the rear. These are all accessible without removing anything else, but may require some finagling with a long Phillips head screw driver.
Step 3, as needed:
Remove/Disconnect the EGR if necessary. Please see the EGR FAQ/How To for more information on that.
Step 4:
Remove the valve cover by lifting it upwards. This process can be quite annoying, but just be calm and work it free.
Getting there:
Off:
Very dirty:
Step 5:
At this point, I cleaned up the surrounding gunk, taking care to avoid any dirt and grime from falling in with the cams.
I used engine degreaser and clean rags to carefully scrub the dirt and grime from the surfaces. I didn't go crazy over cleaning it, it does have 213,000 miles on it after all.
But do try and get rid of all the dirt and particles that would cause improper sealing: allowing oil to seep or leak out. Also take care to remove the old Toyota FPIG sealant from around the cam corners.
Step 6:
Get the valve cover ready for reinstall. For me, this included sand blasting and powder coating. If you do such things, please take the necessary precautions in cleaning it.
Time to put the valve cover back on! Get the FPIG or I used RTV Black ready, as well as your valve cover.
Here is my valve cover, with new RTV around the edges and the new gaskets (inner and outer) in place.
Step 7:
Time to reinstall the valve cover. First apply sealant to the four corners around the cam shafts:
Follow the instructions for whatever sealant you use. Mine required 24 hours to sit. So be sure to abide by these rules if you want it to cure properly.
Here is my RTV Black on the head:
Left side:
Right side:
At this point carefully put the valve cover back on, it should be twice as easy as removal.
Reinstall the bolts being extremely care NOT to over torque the bolts. The Toyota BGB requires that they be 69 in. lbf (7.8 N-m) of force. This is basically HAND tight.
If you over tighten the bolts, the valve cover tabs WILL break.
Enjoy!
If anyone has anything to add, or any questions I'd be happy to help as best I can.
I have more pictures, if anything isn't clear or needs further explanation drop me a line and I'll edit it.
-Towels
