88 165 Project "Racetrac" had to sell and now dead :(

TRDTurko

New member
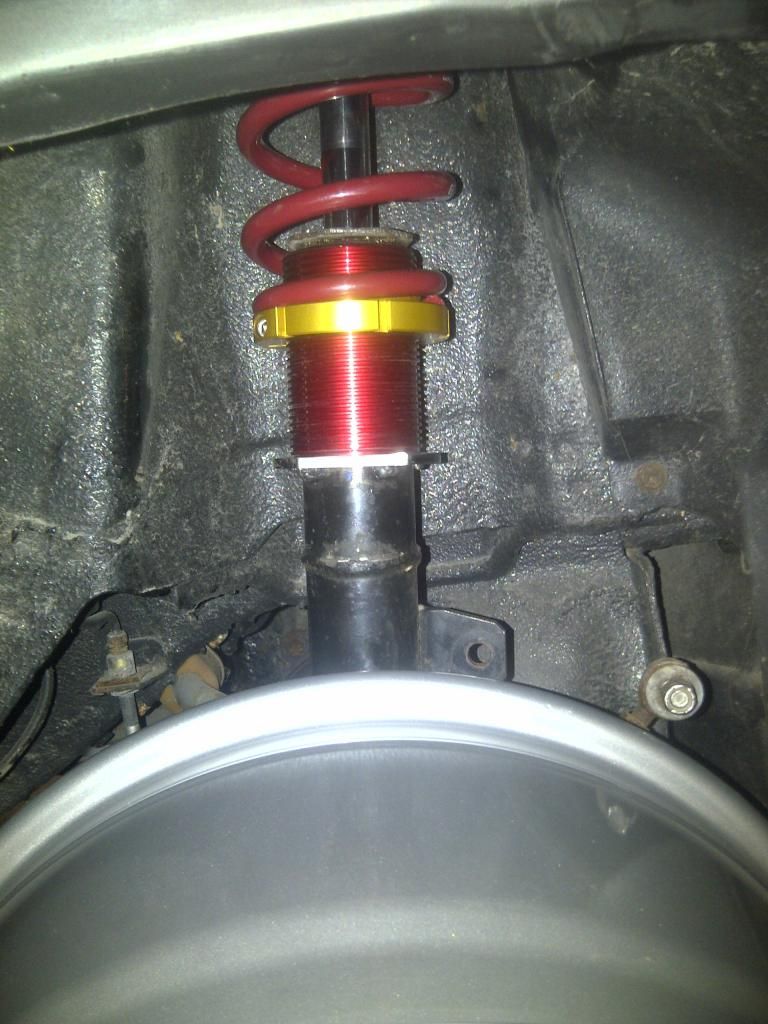
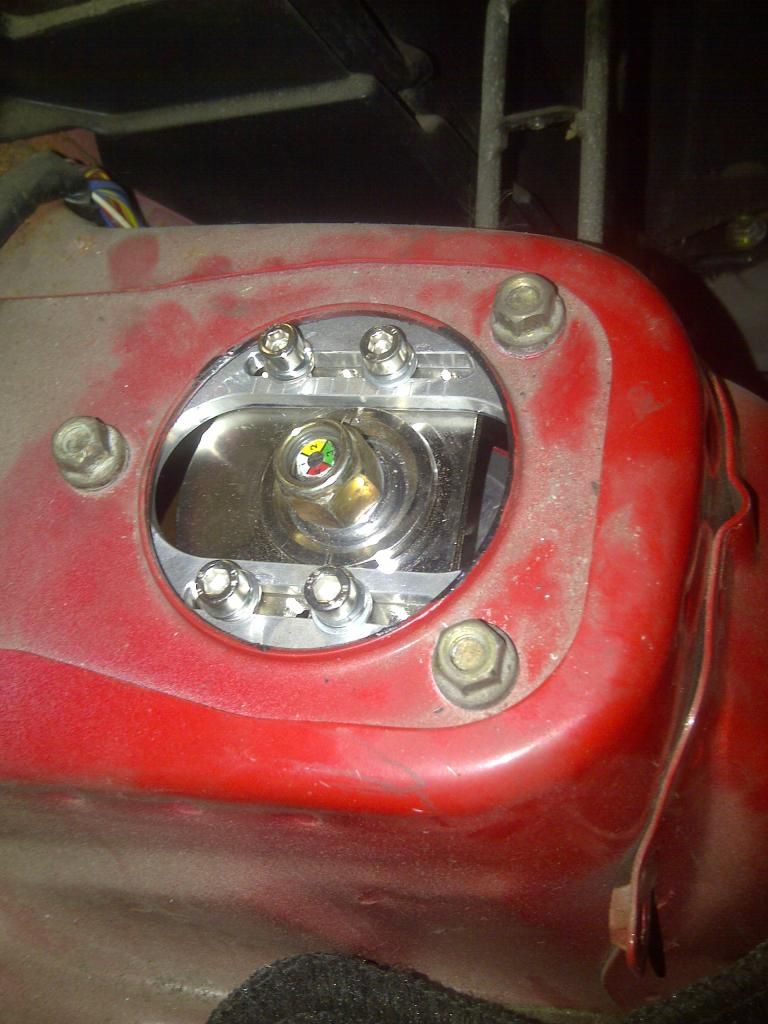
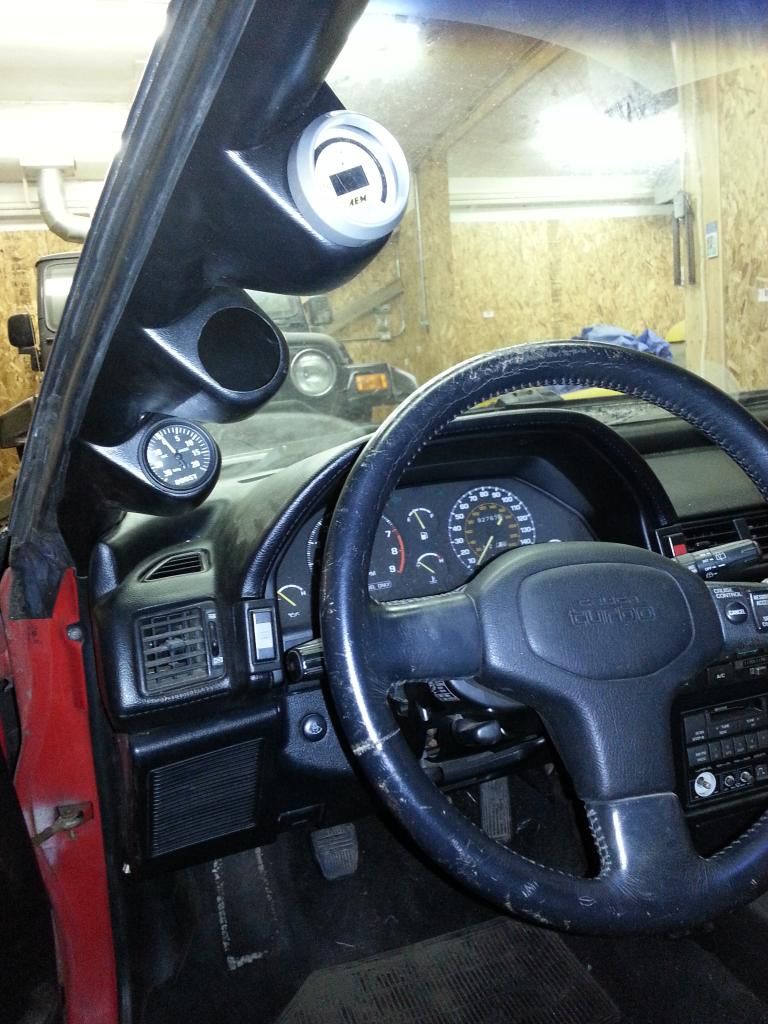
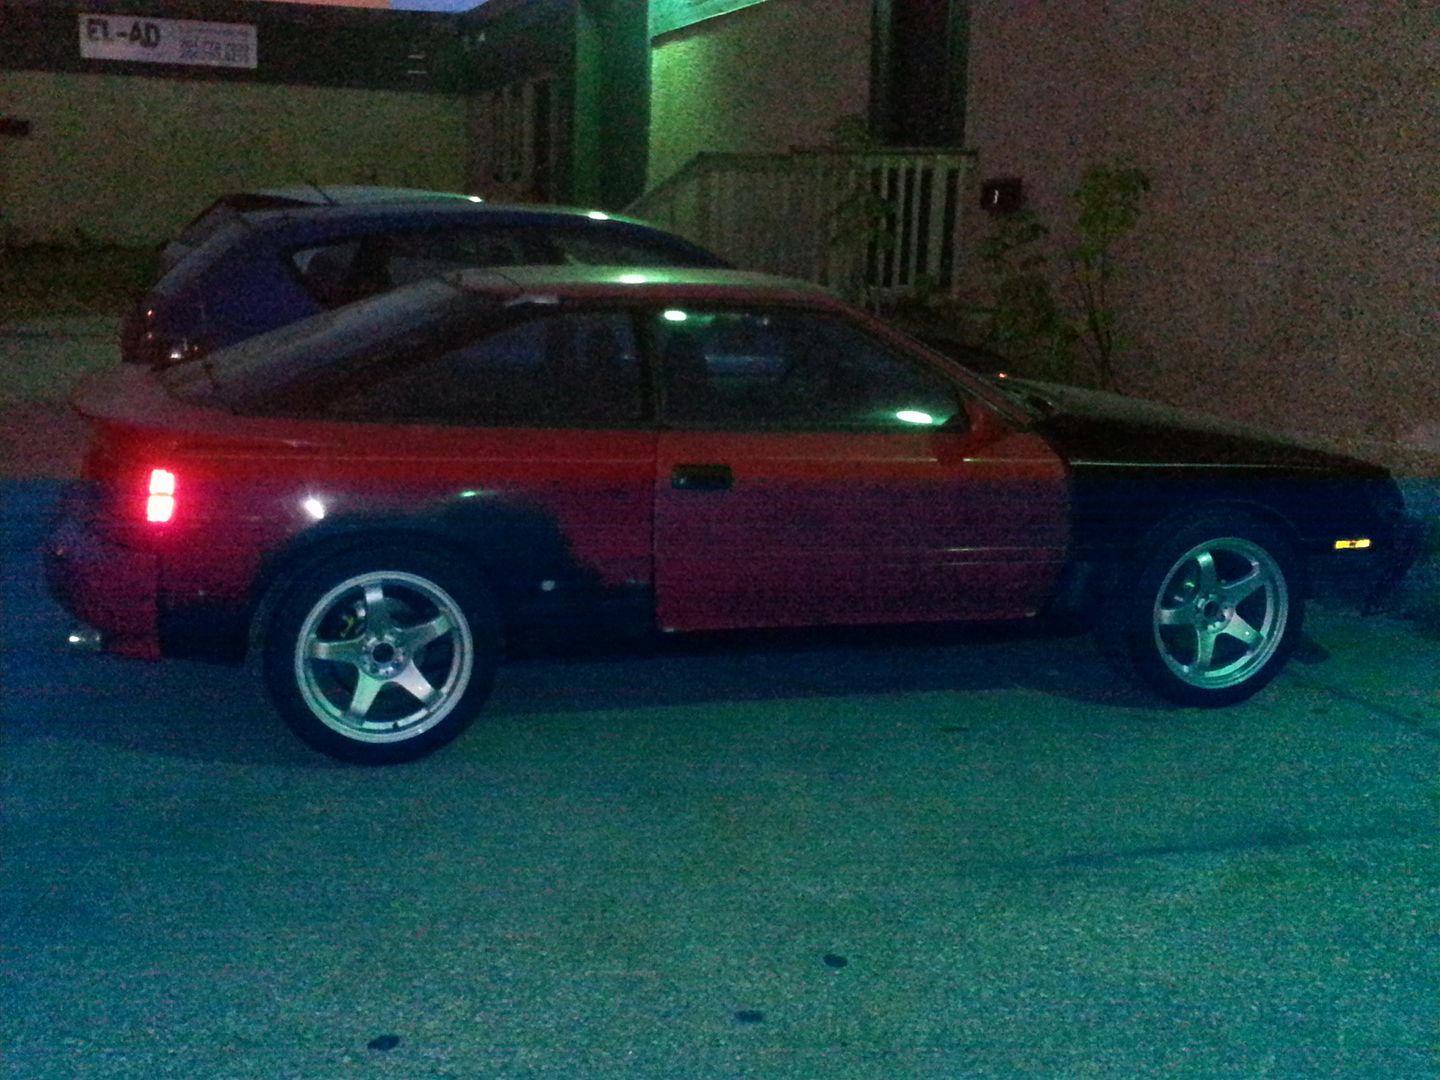
Goal: AutoX and Time Attack monster.

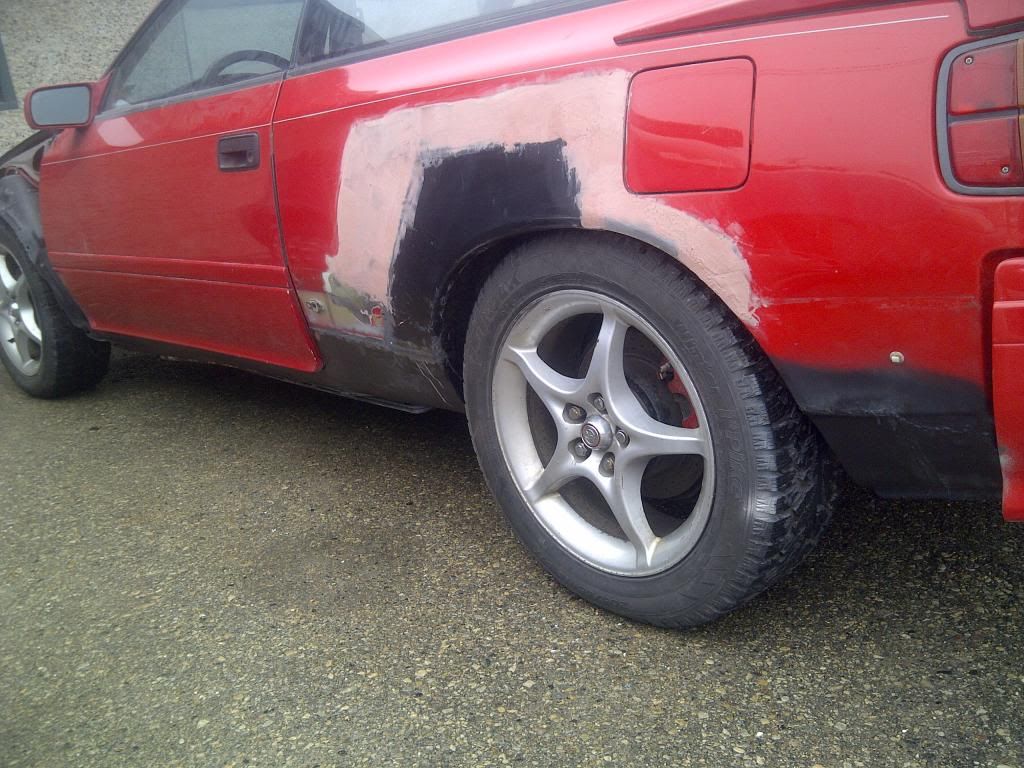
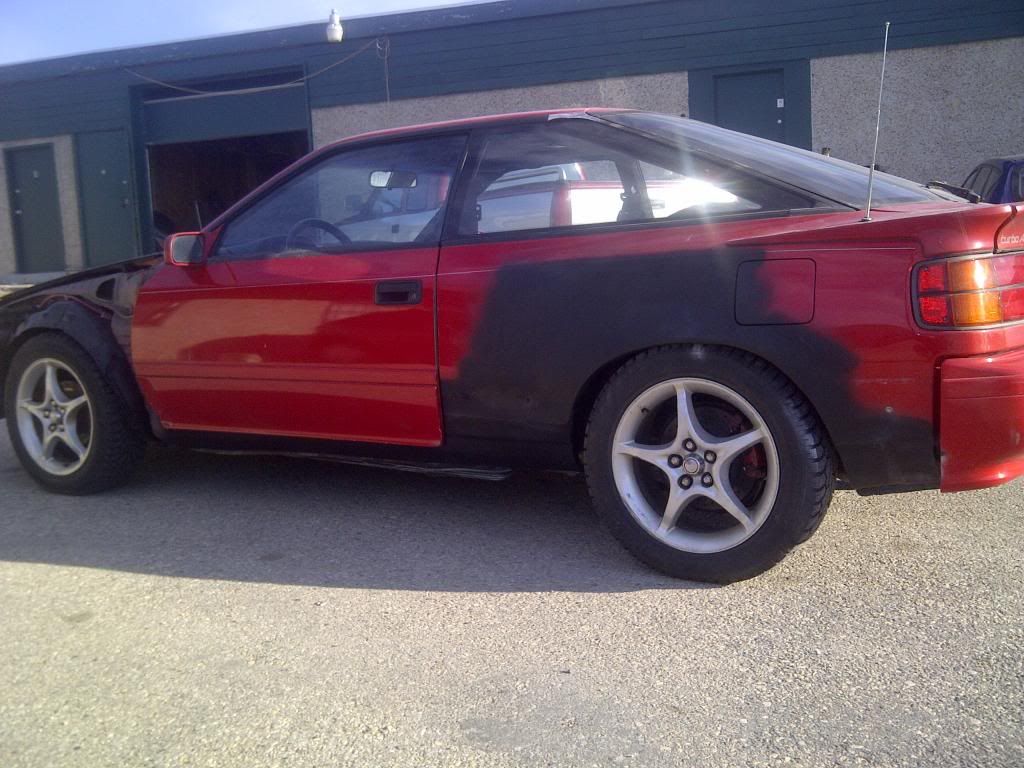
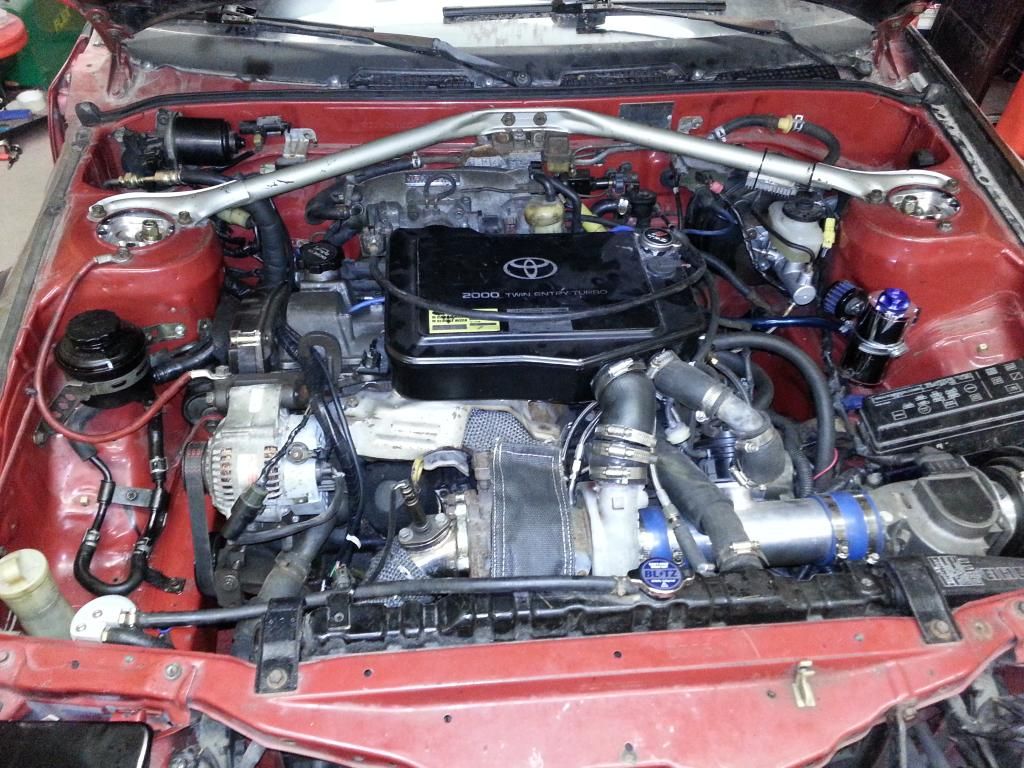
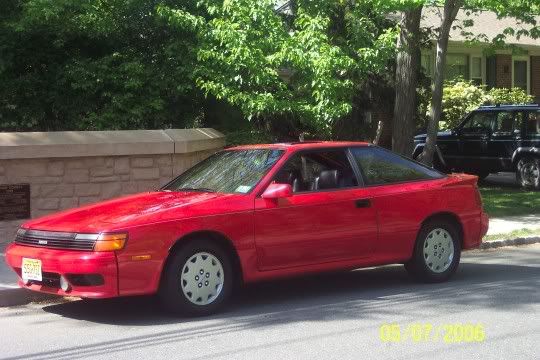
A few of you might have noticed me looking for parts for this car and you might recognize it as belonging to Snyder and it used to look like this:
100_1293.jpg


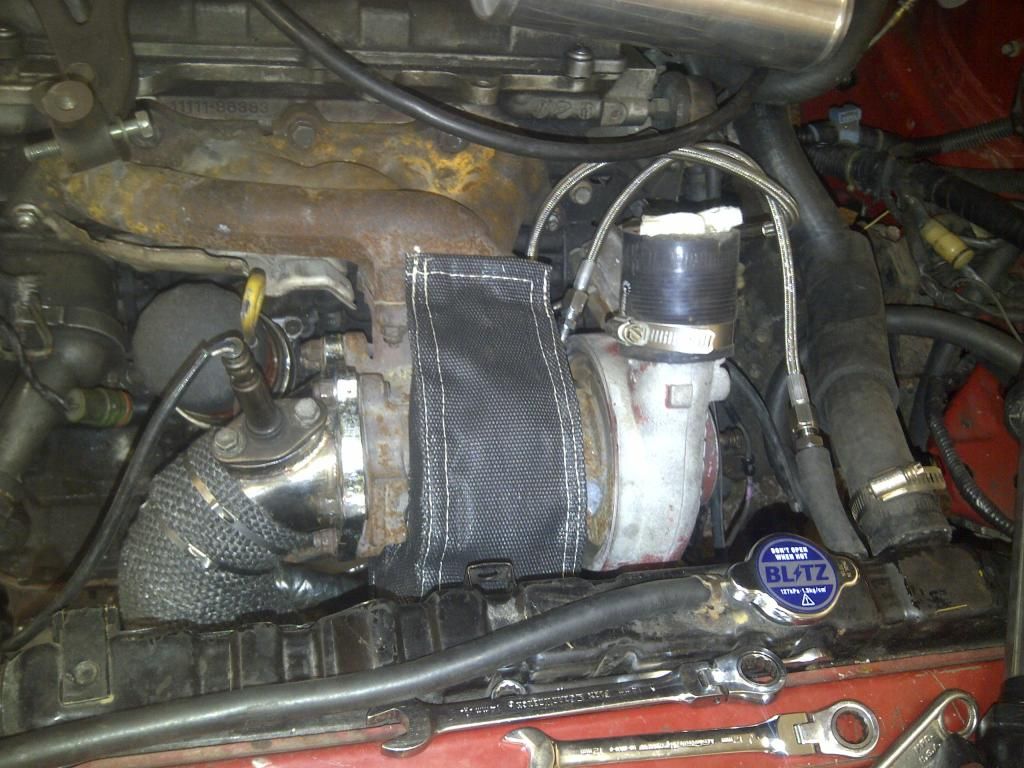
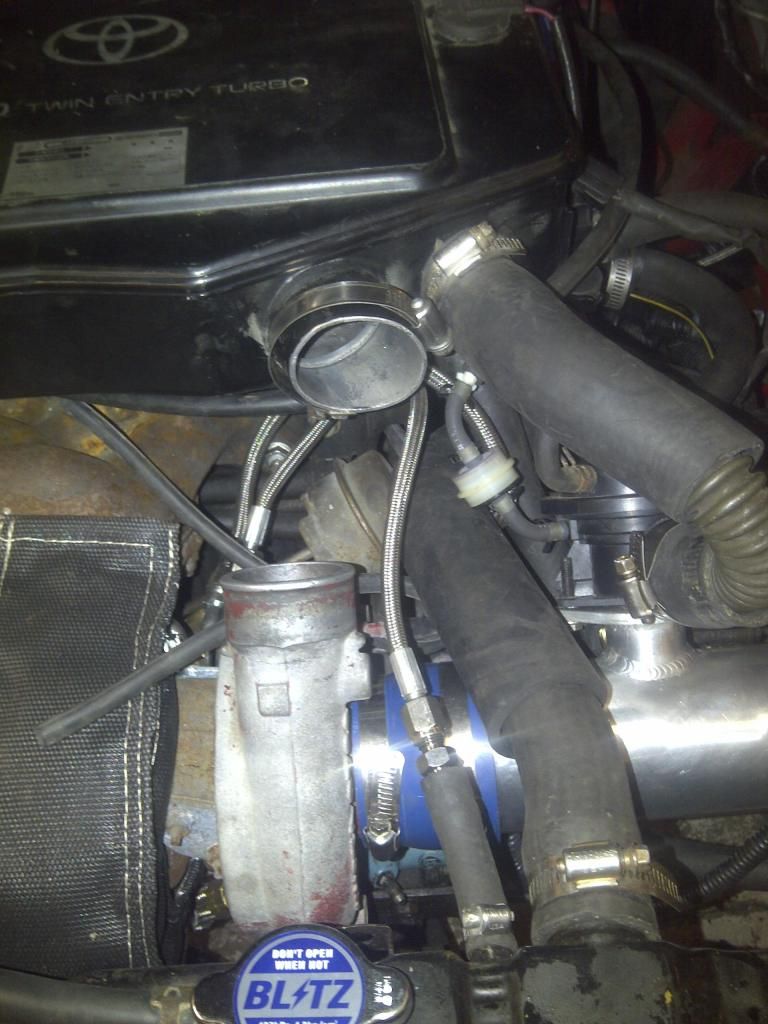
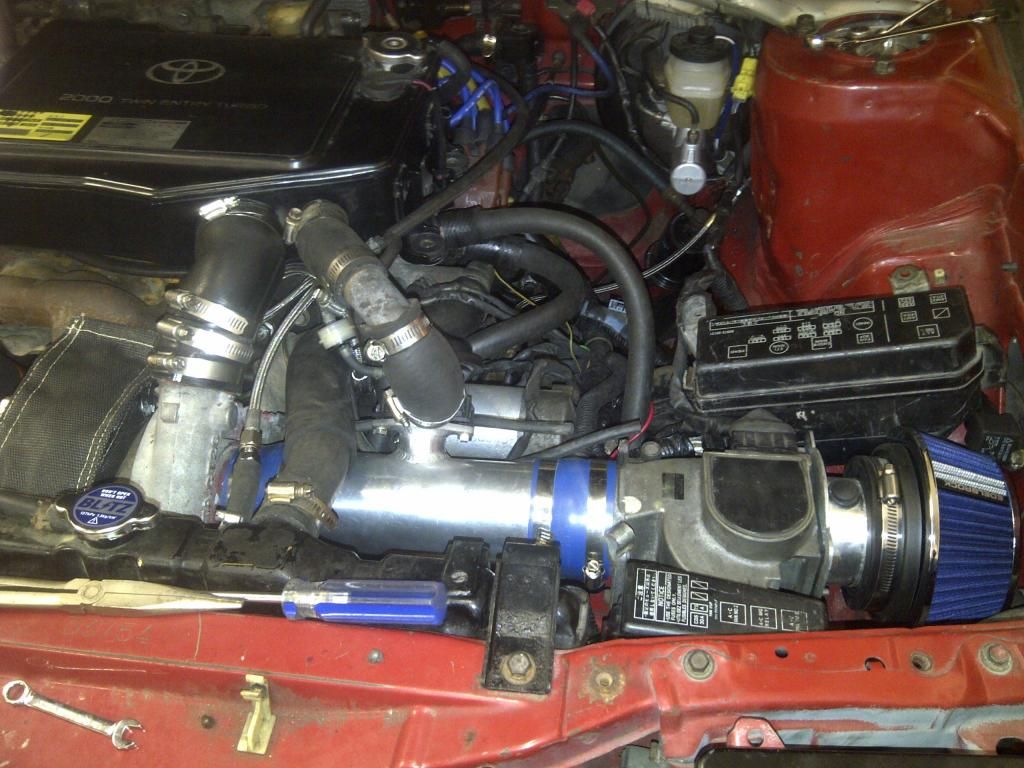
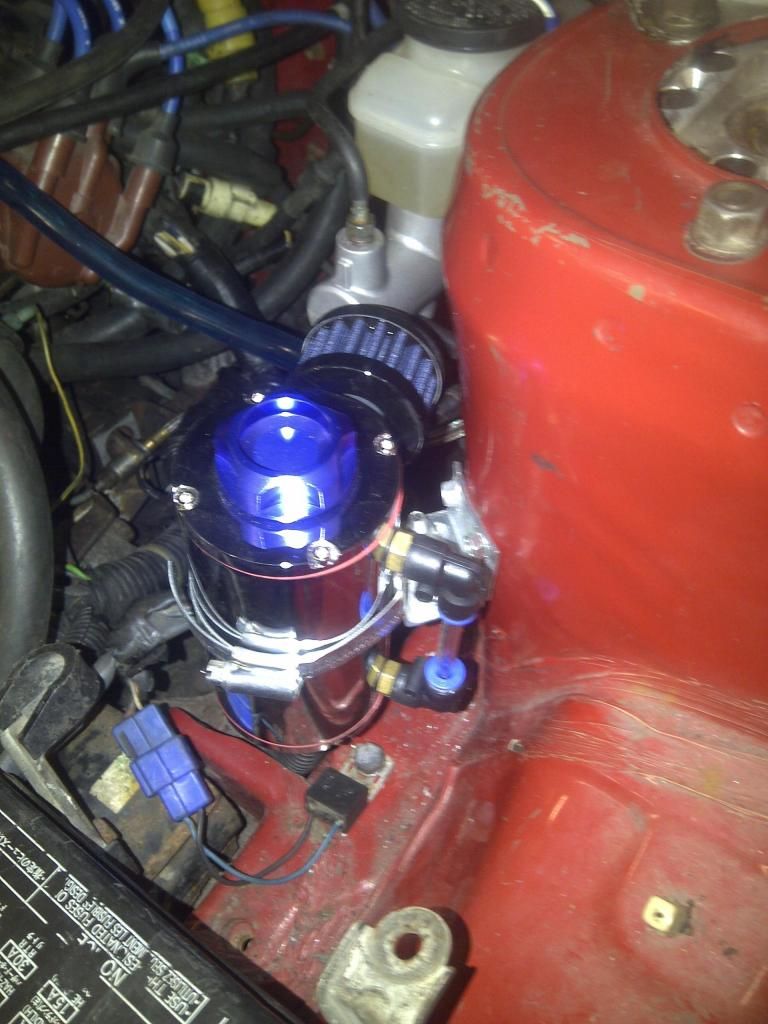
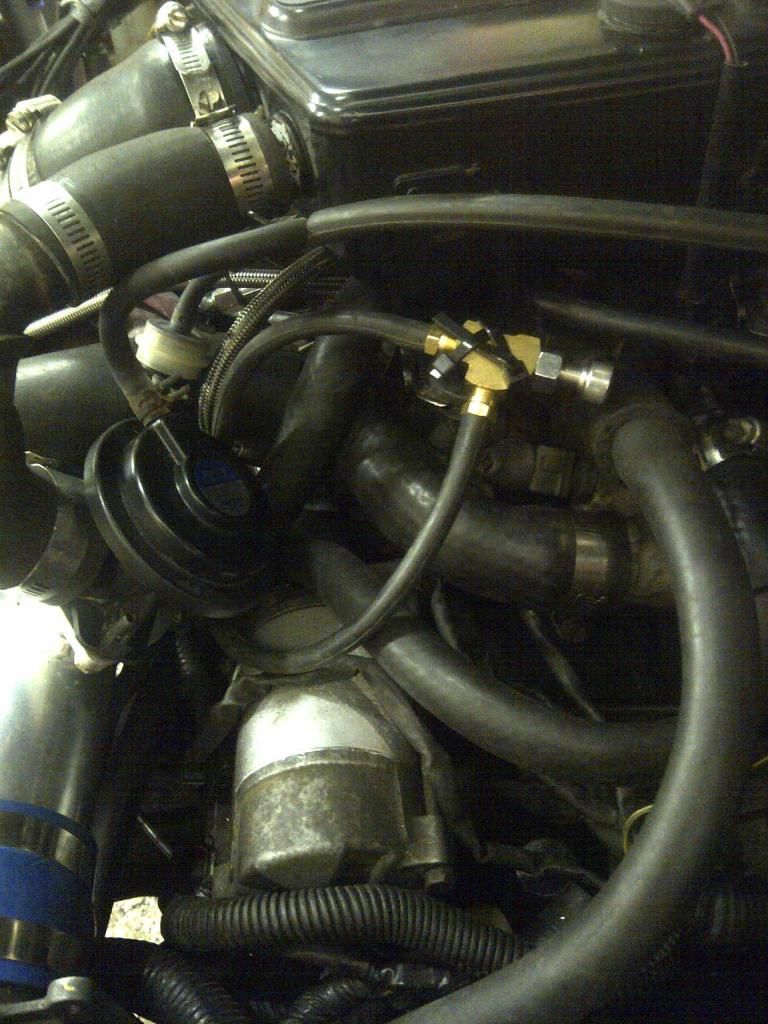
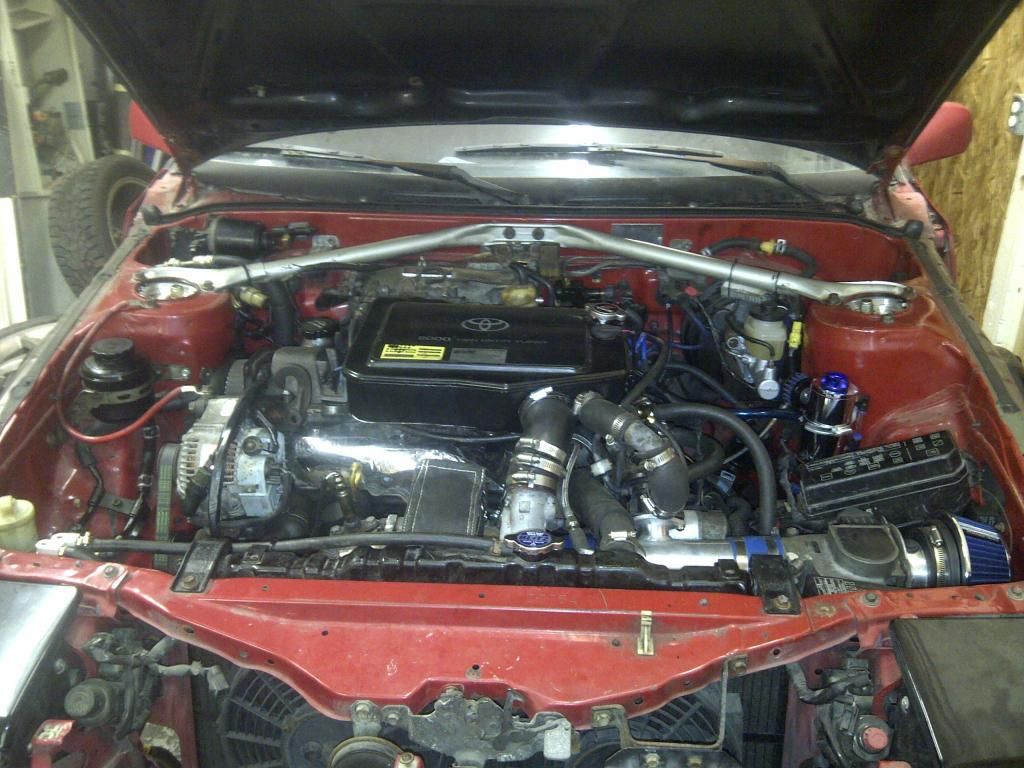
and then he did all this to it: viewtopic.php?t=19016

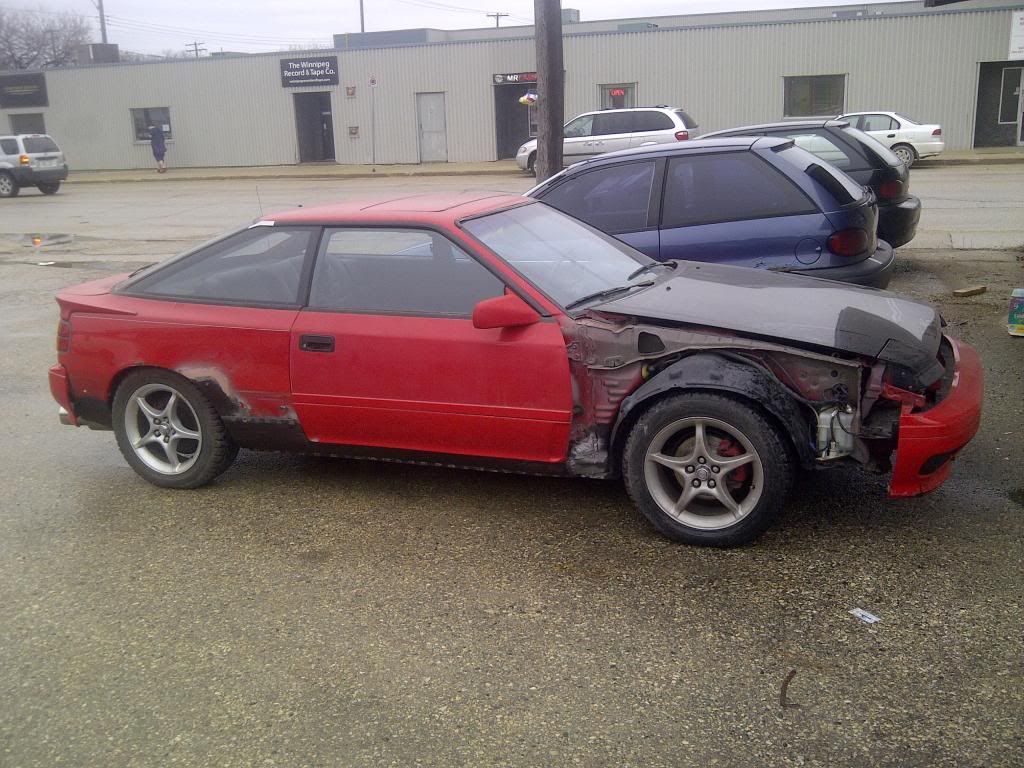
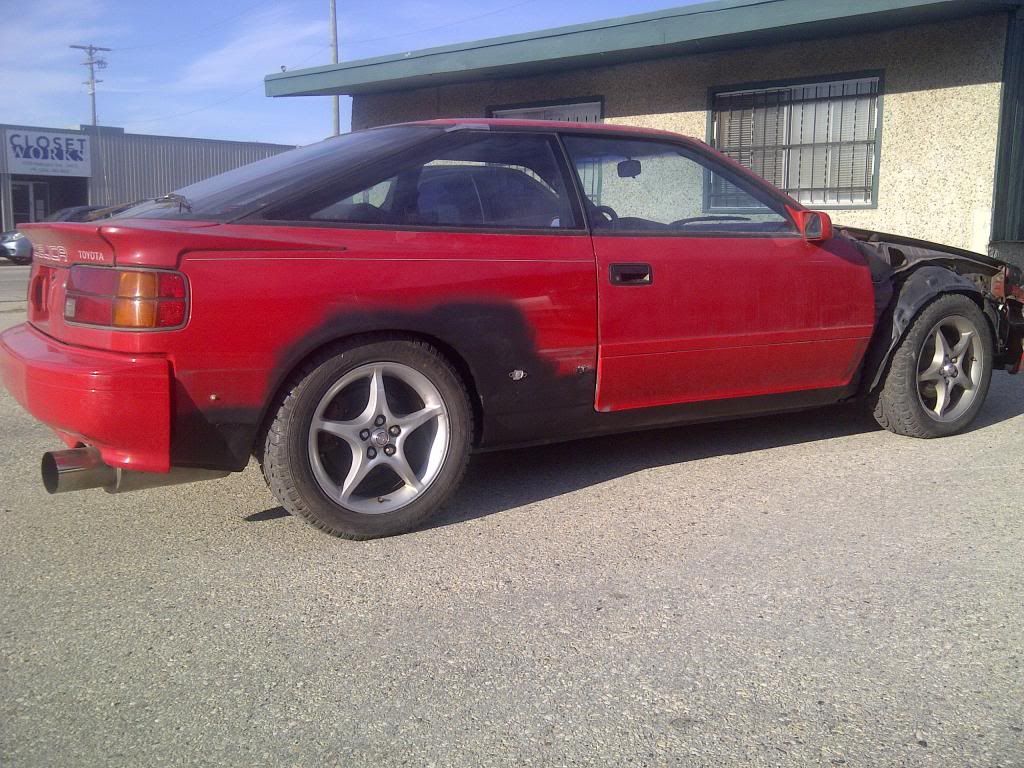
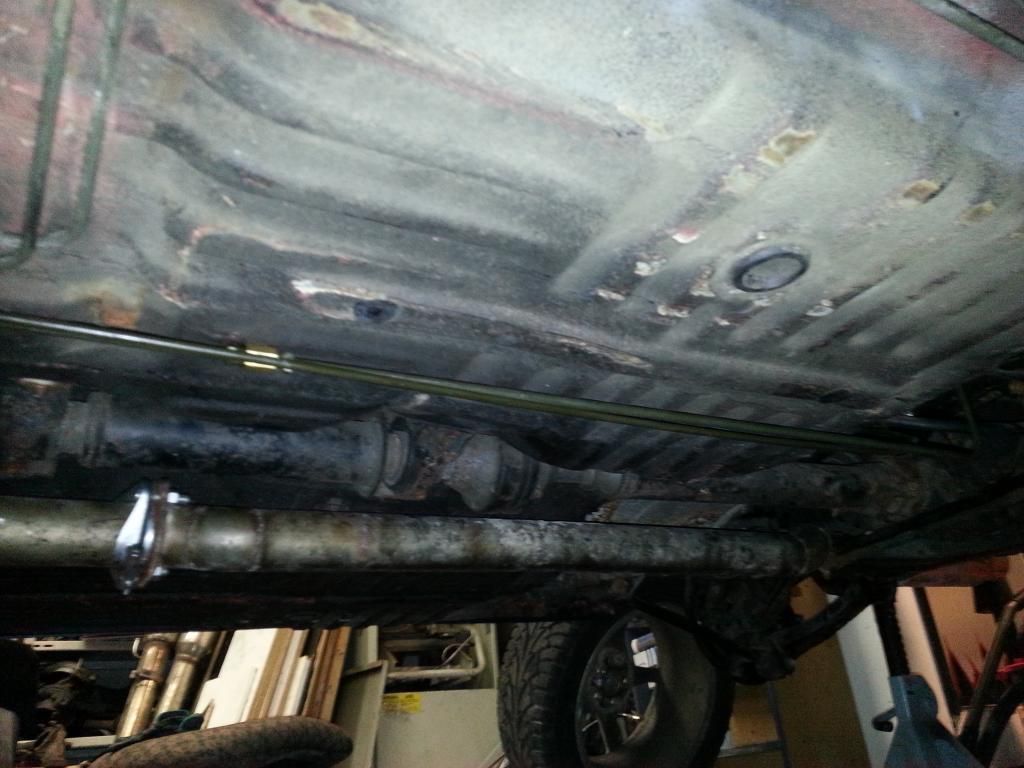
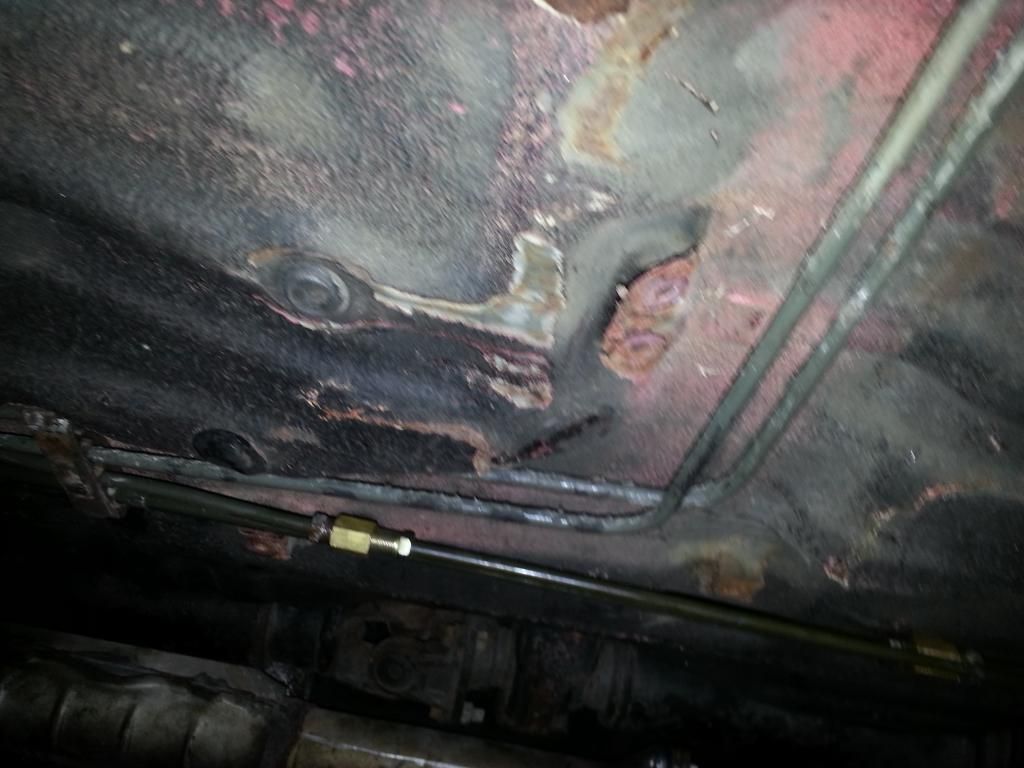
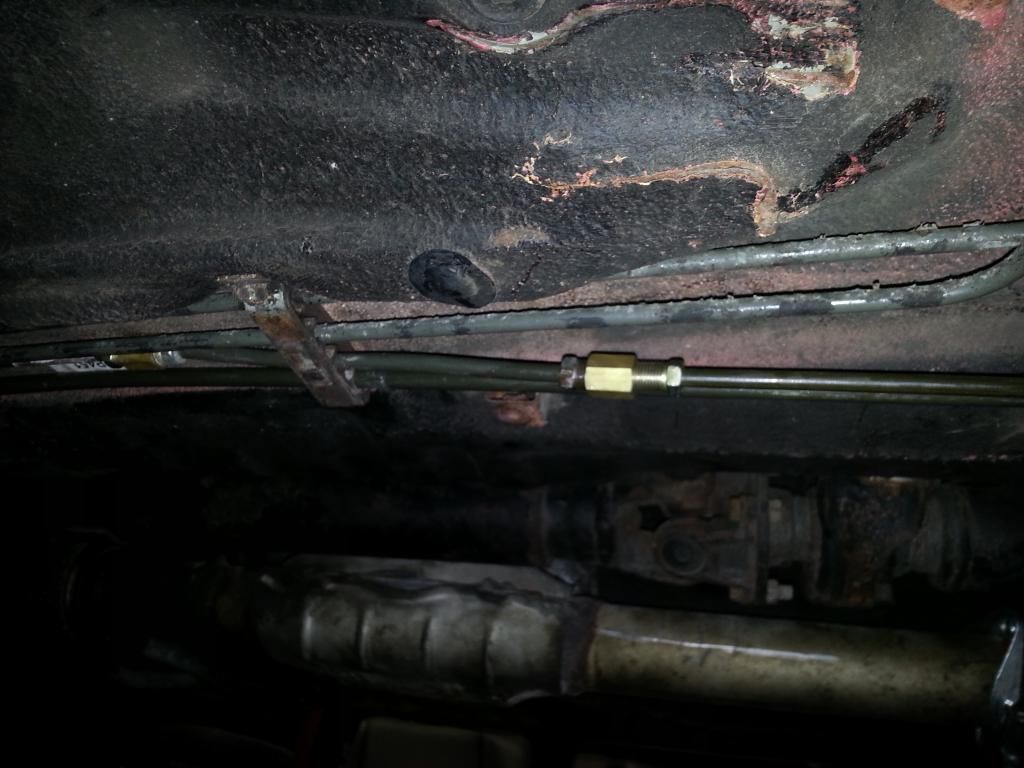
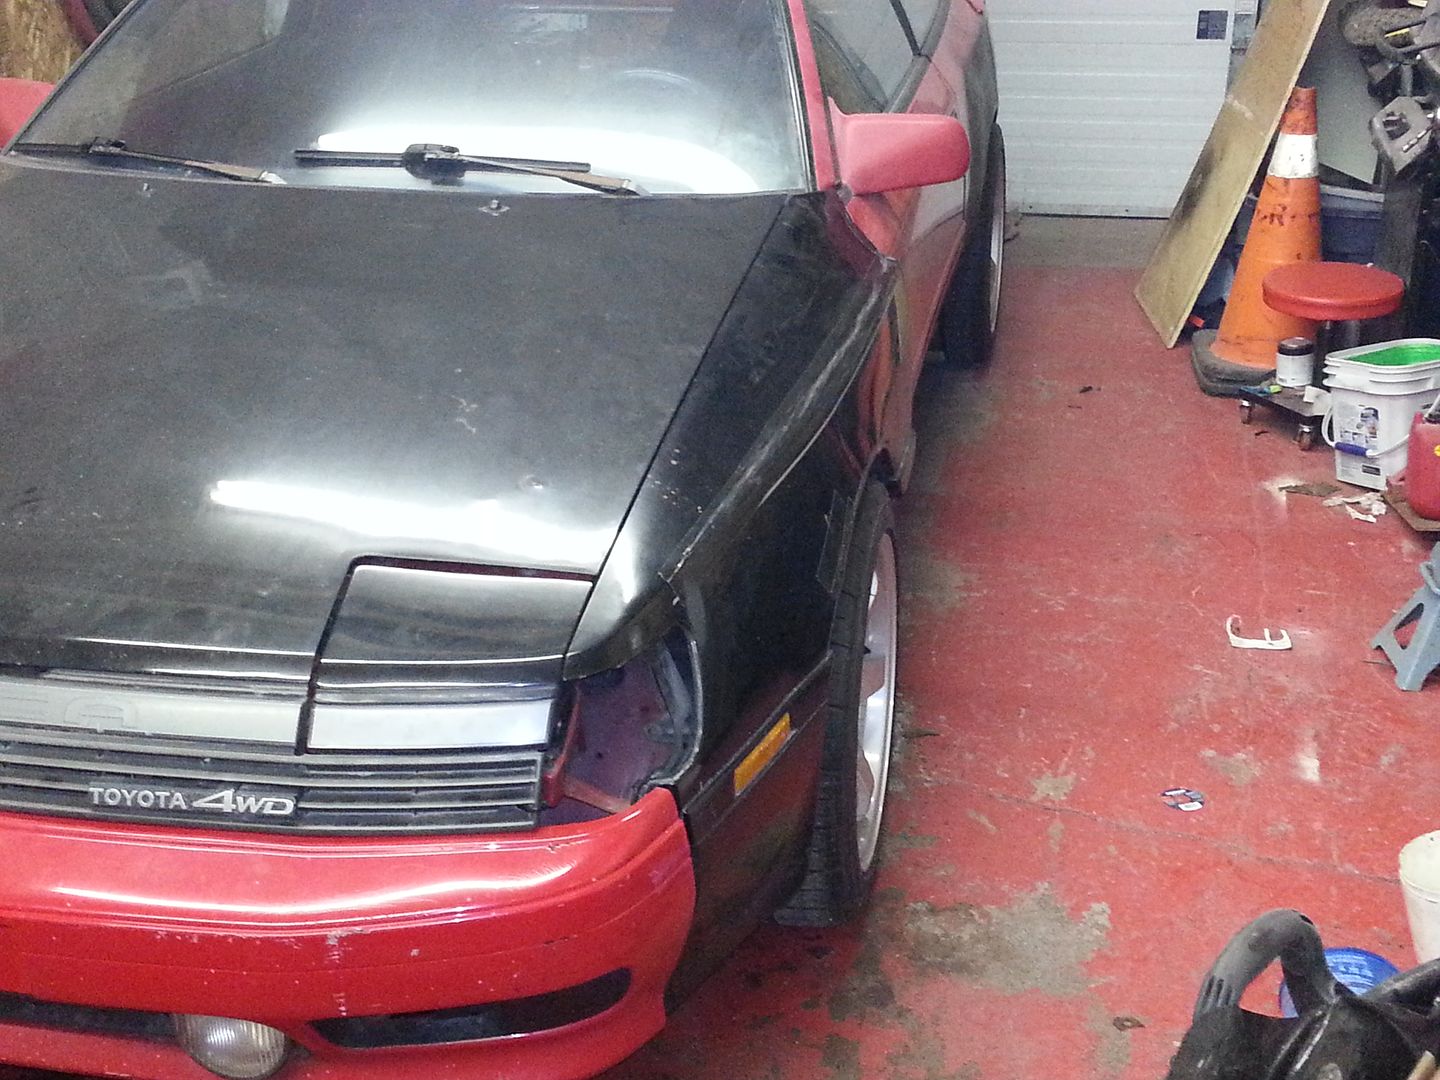
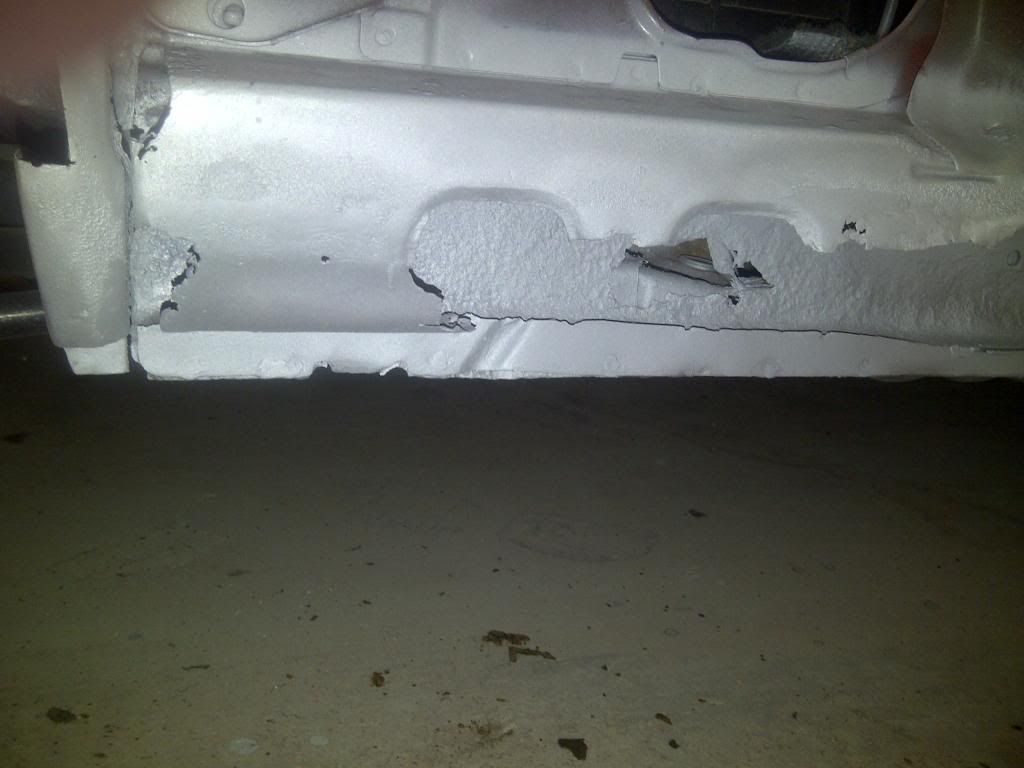
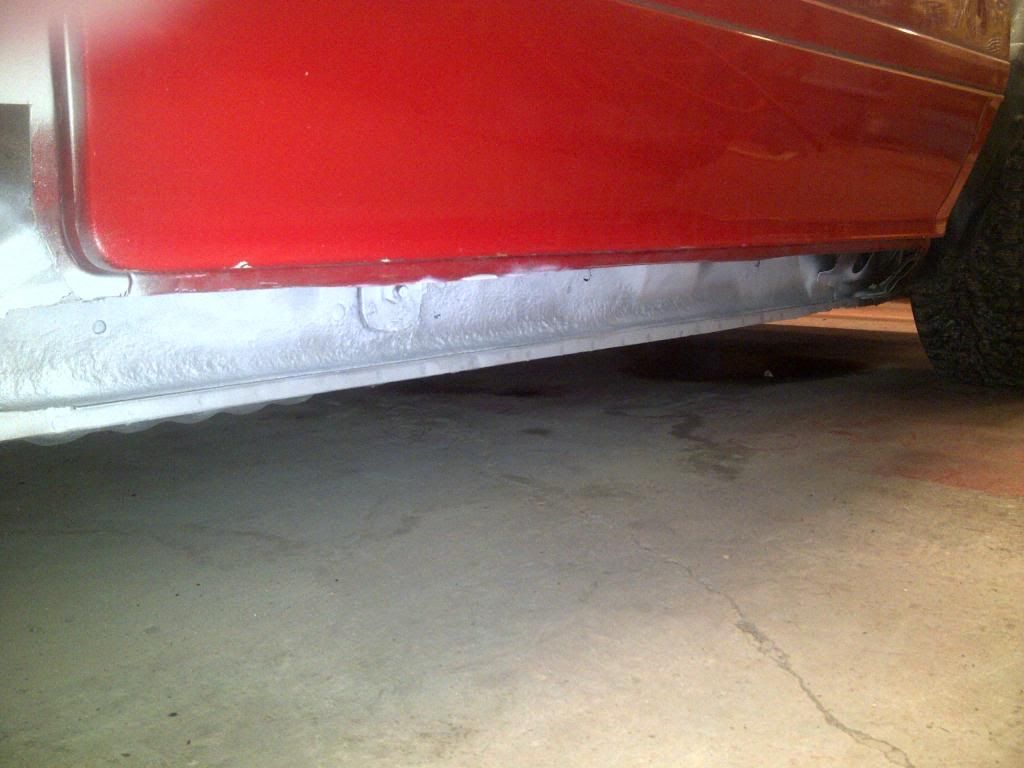
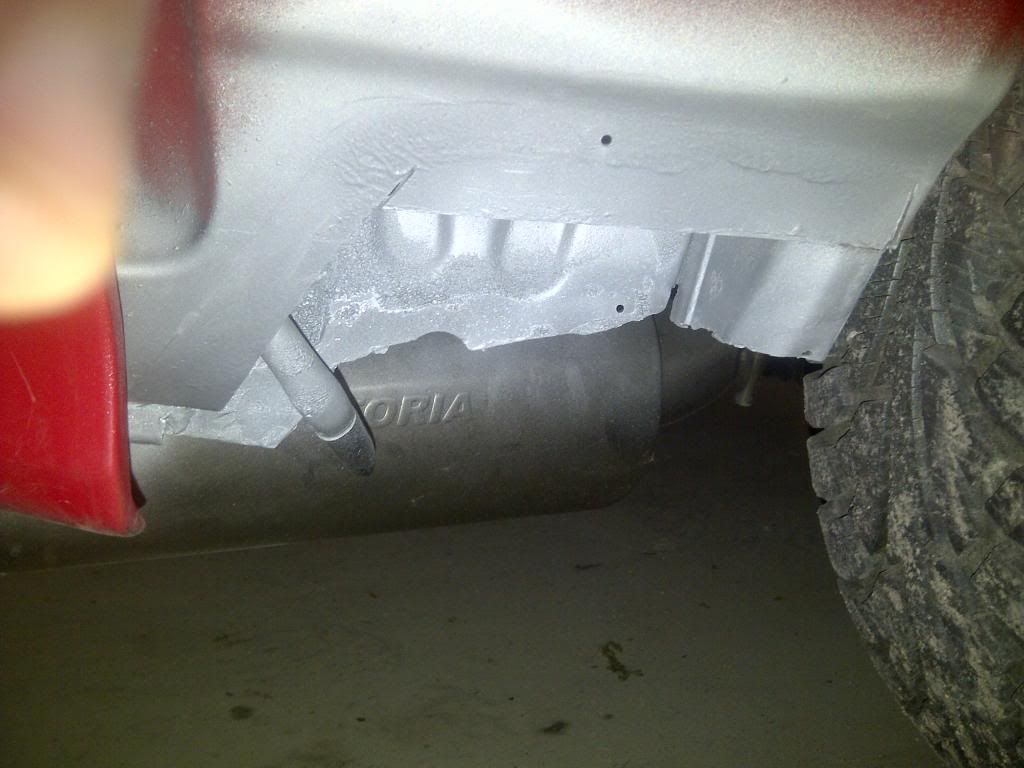
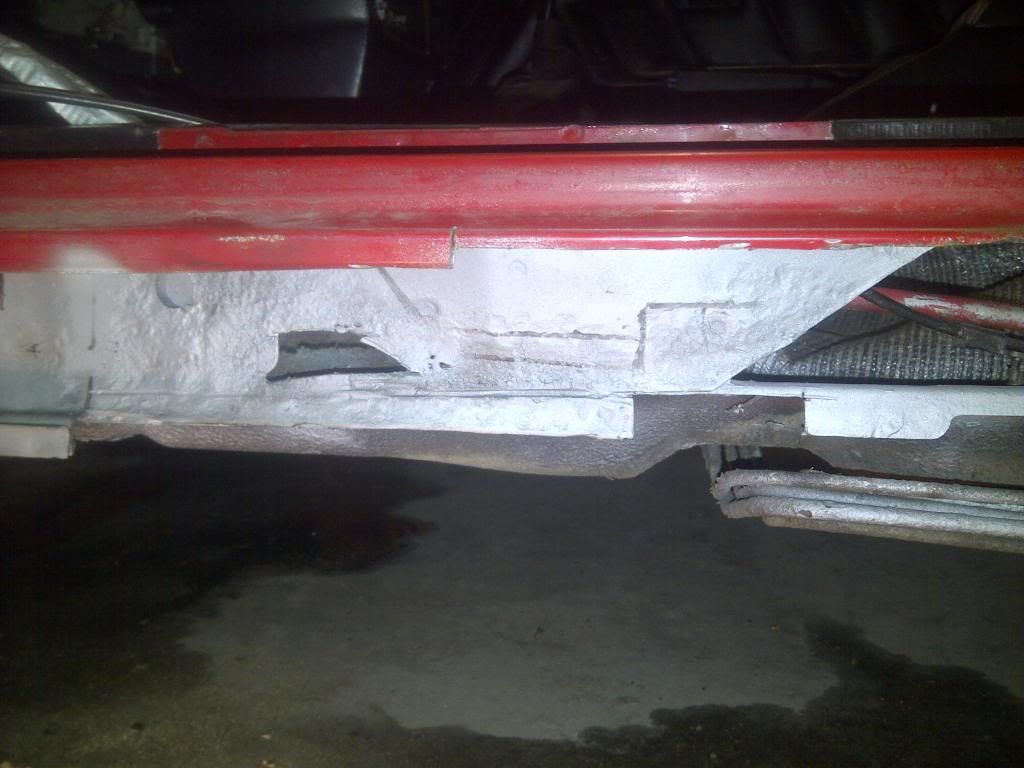
Then it was sold to gearhead313 and after a few years of enjoying it he found this horror:
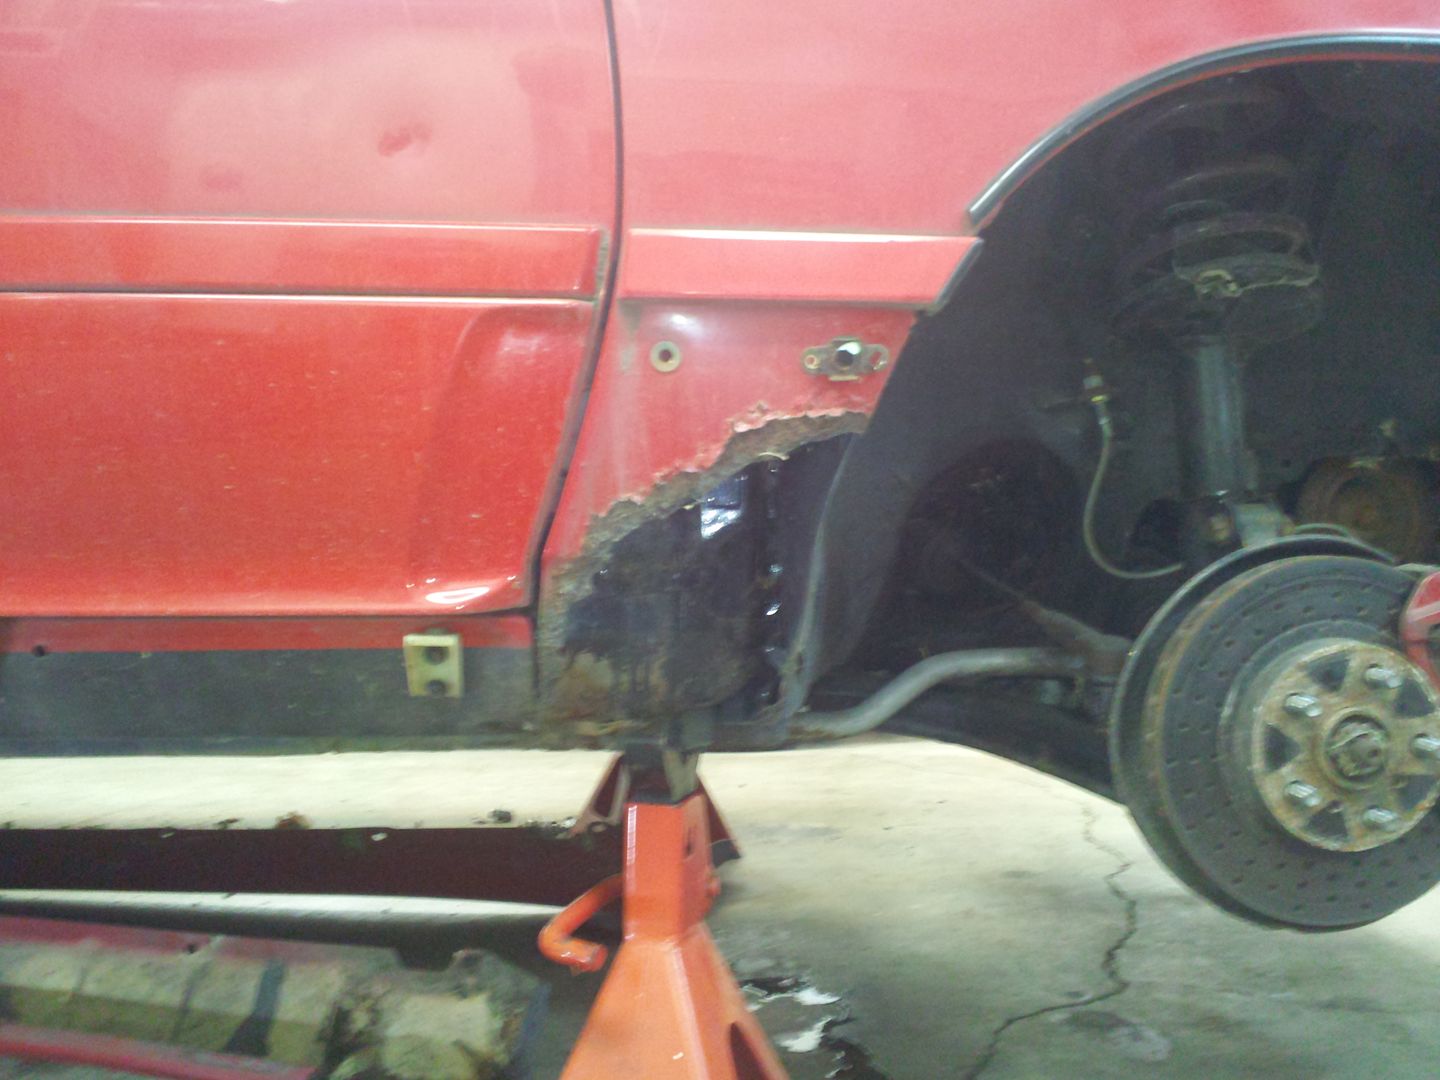
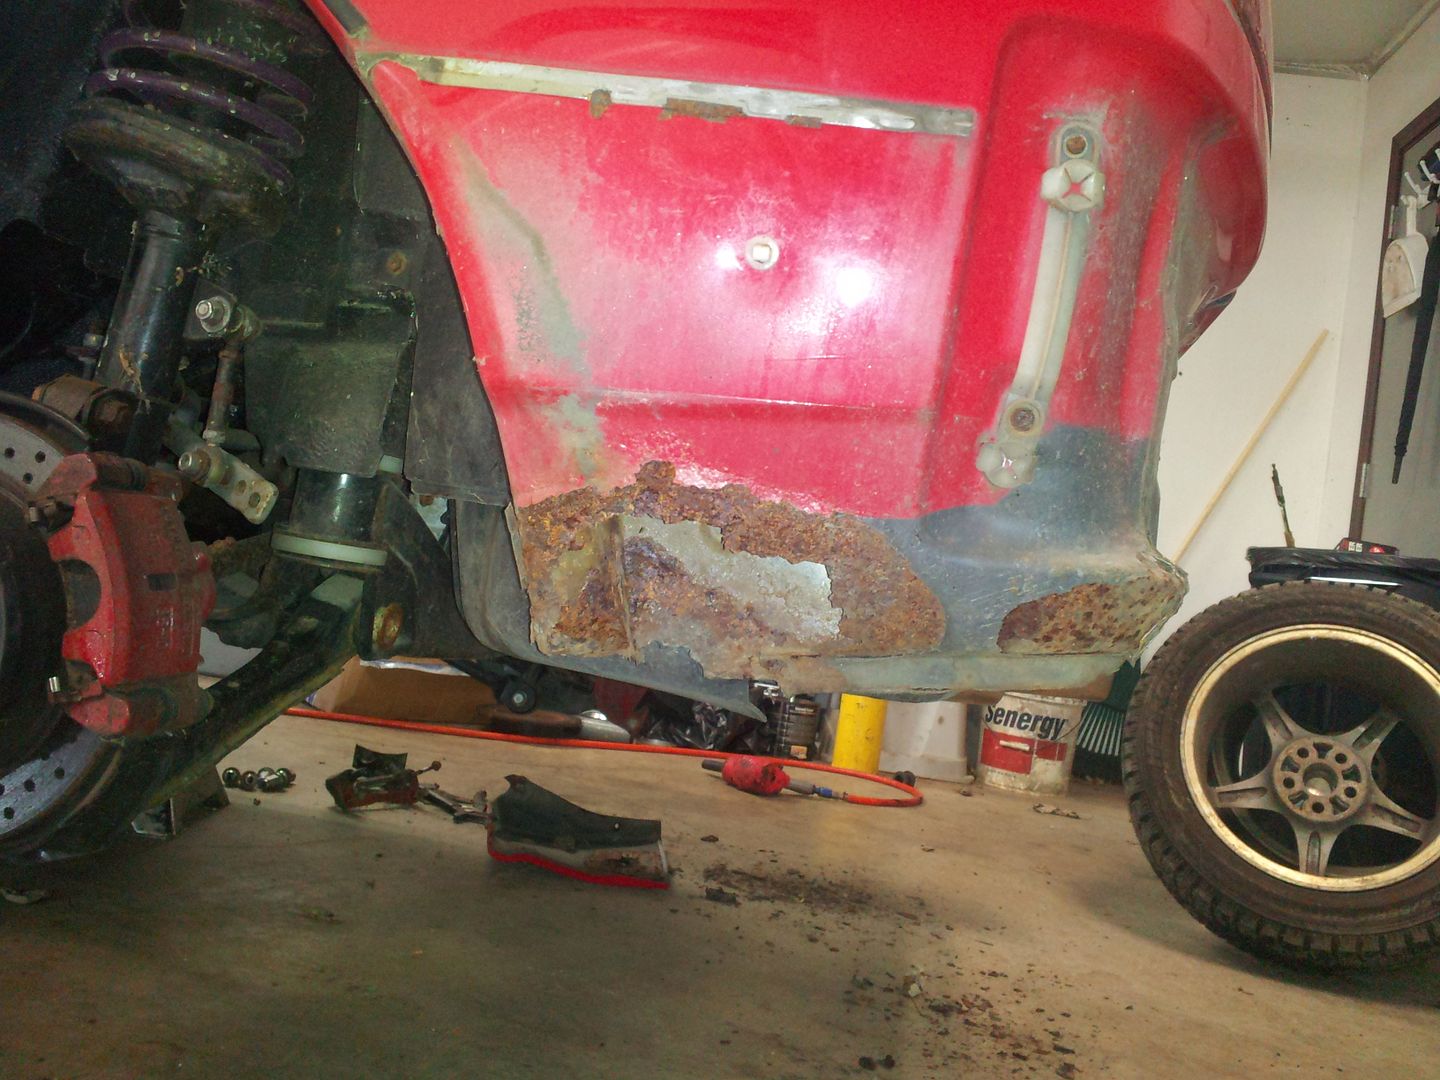
2013-01-19212340.jpg

2013-01-19212330.jpg

2013-01-19211440.jpg

2013-01-19211407.jpg

2013-01-19211502.jpg

2013-01-19211434.jpg

:doh:

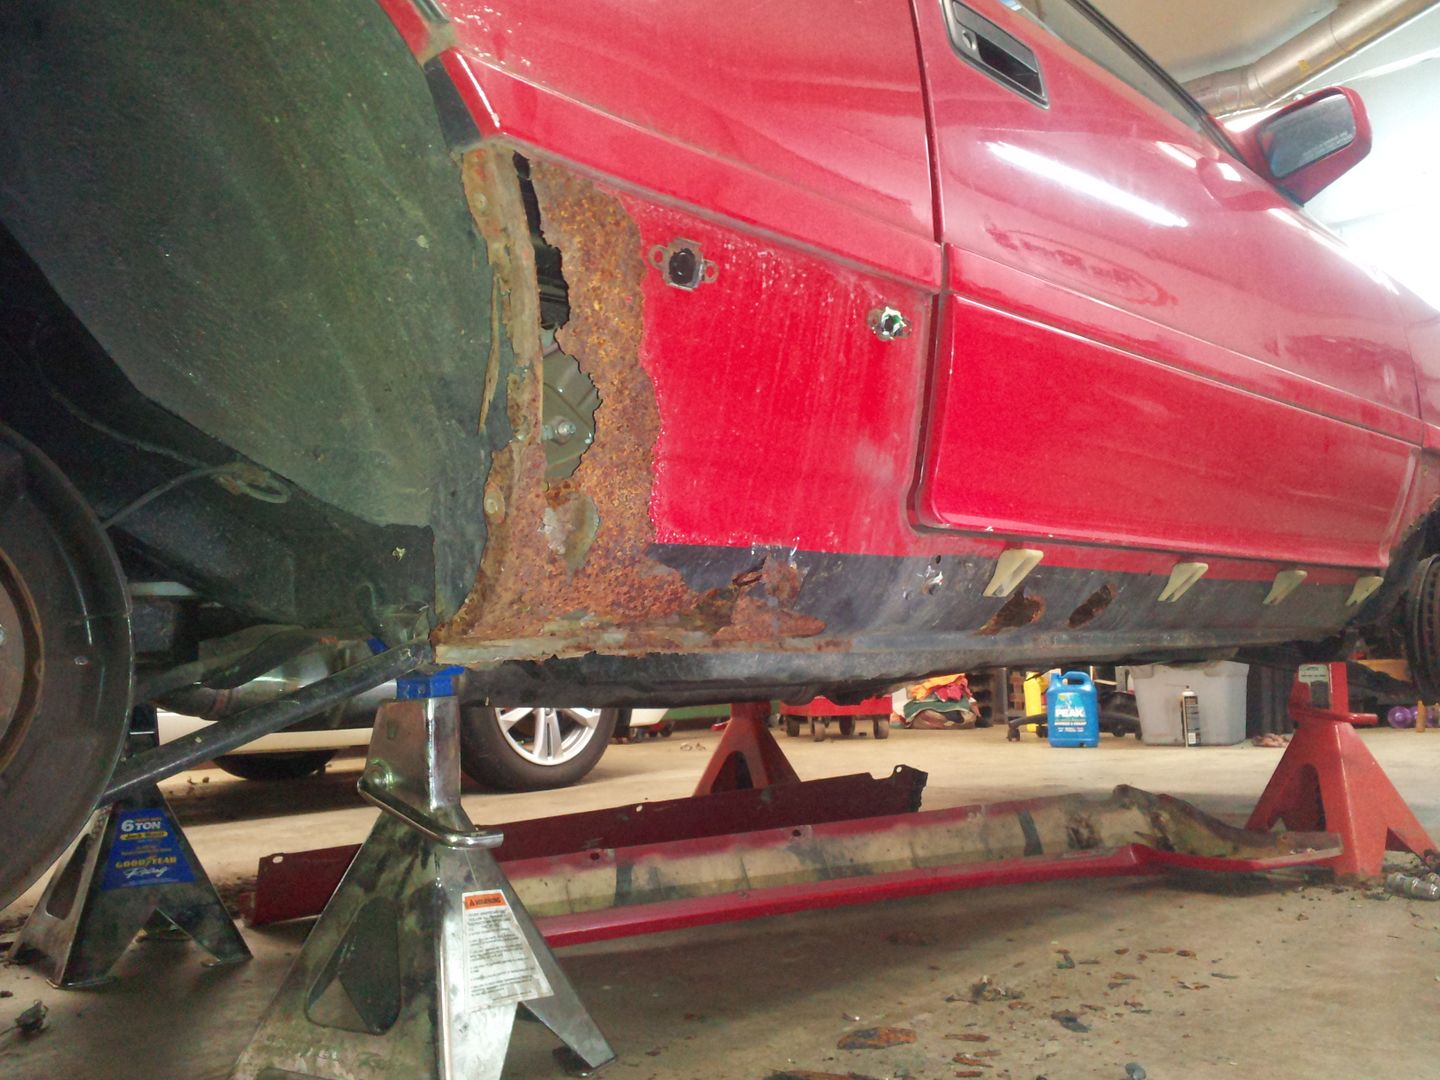
Since he is not that handy with a welder, he sold it to me where ironically I live in the city that could be argued as the capital of rust; Winterpeg, Manisnowba (Winnipeg, Manitoba)

Step 1: Fix nasty rust!

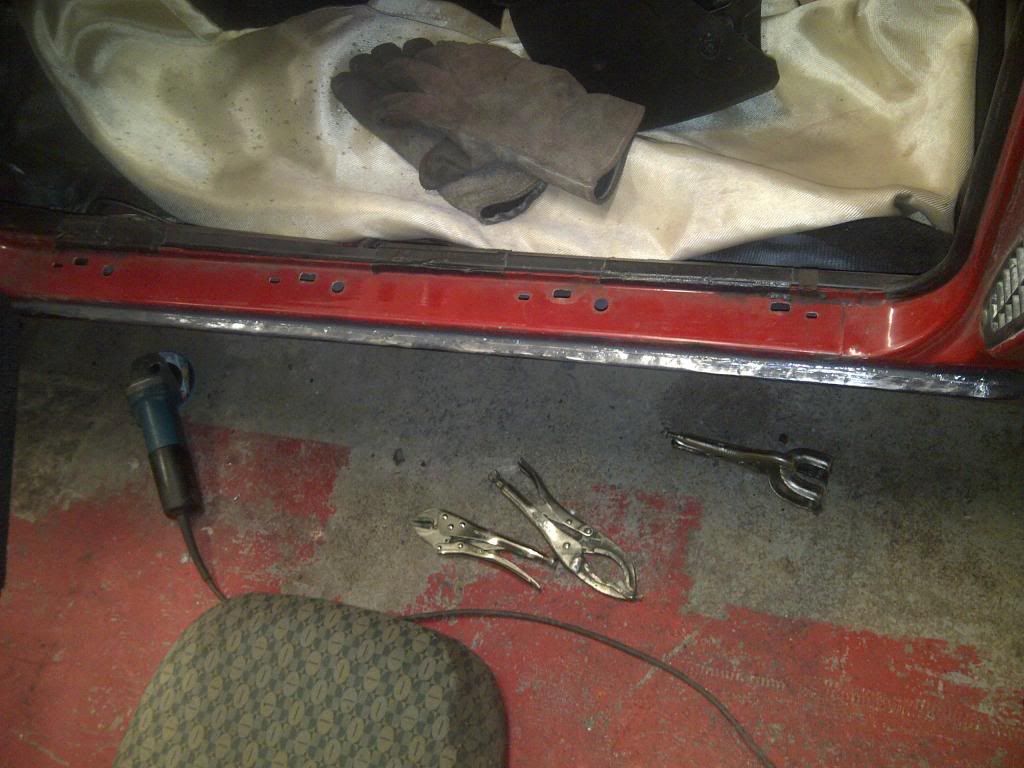
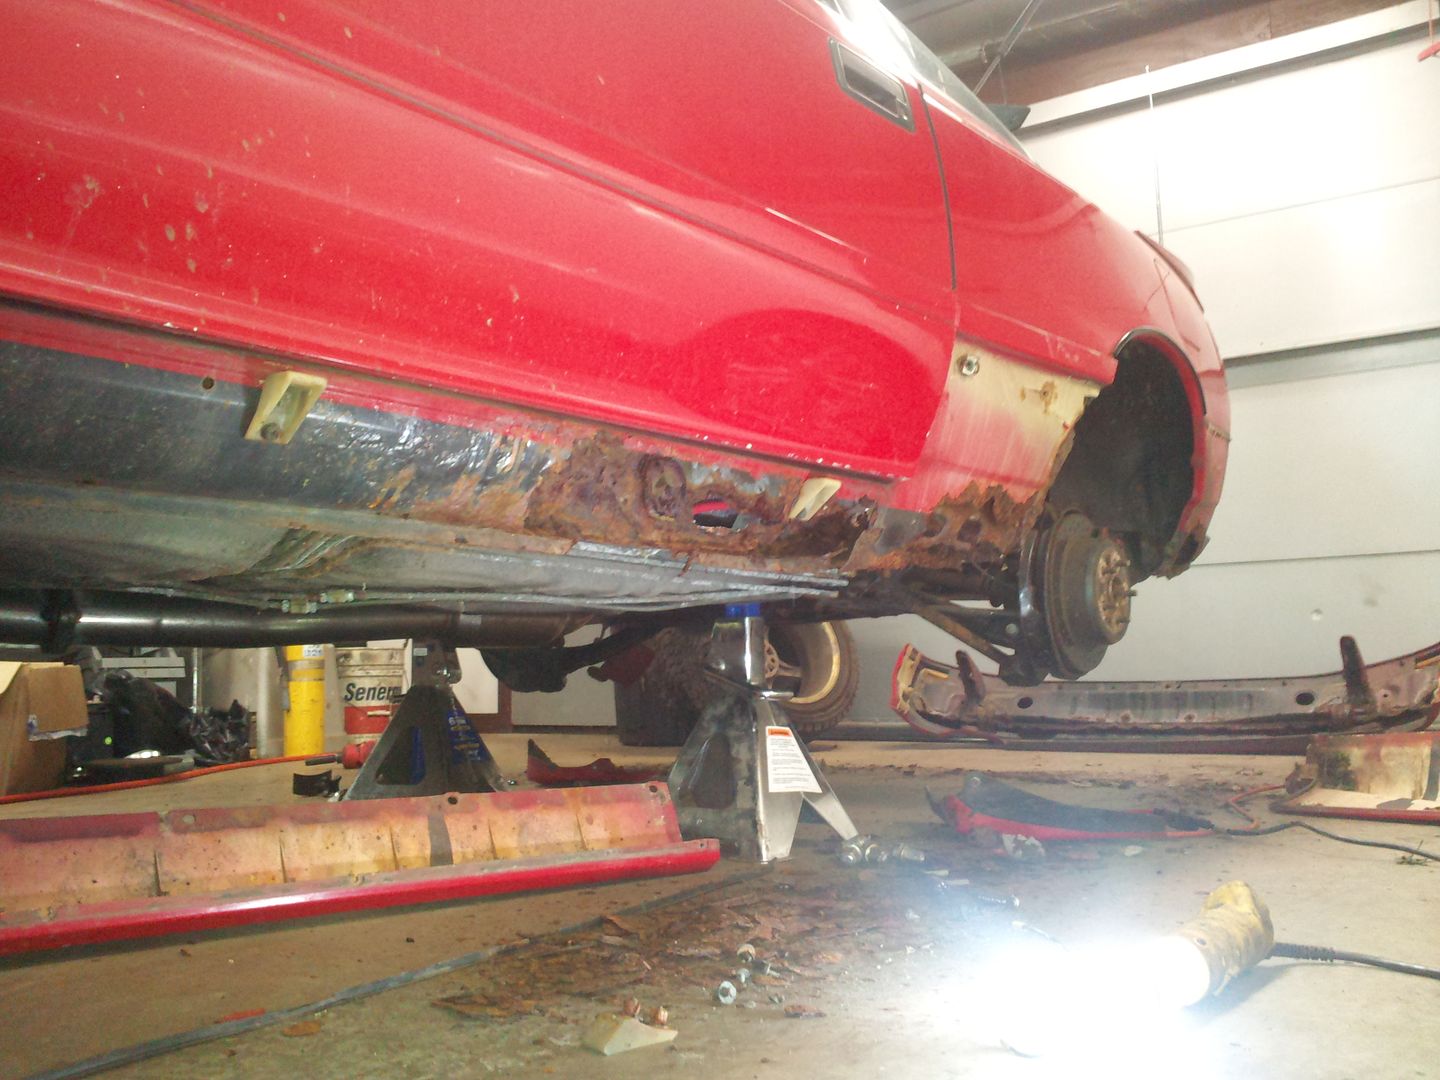
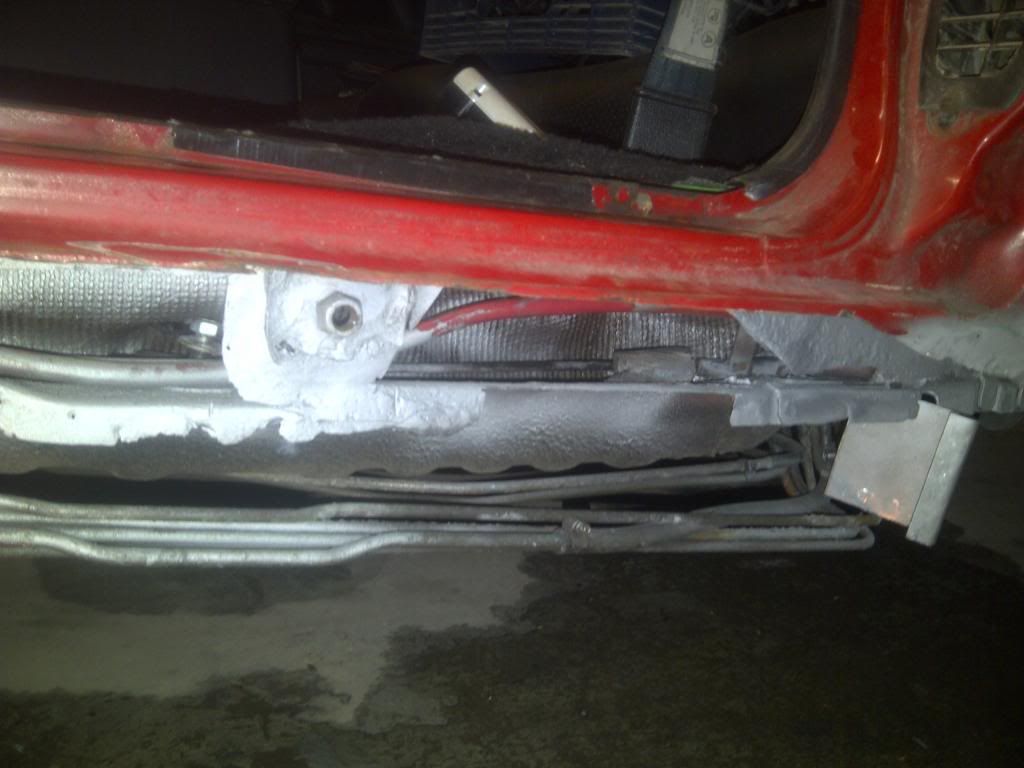
After trailering it across the border I started cutting out the rust but then had to stick it outside for a while where old man winter tried to hide it on me.
IMG-20140309-00083_zps20a4e1a4.jpg

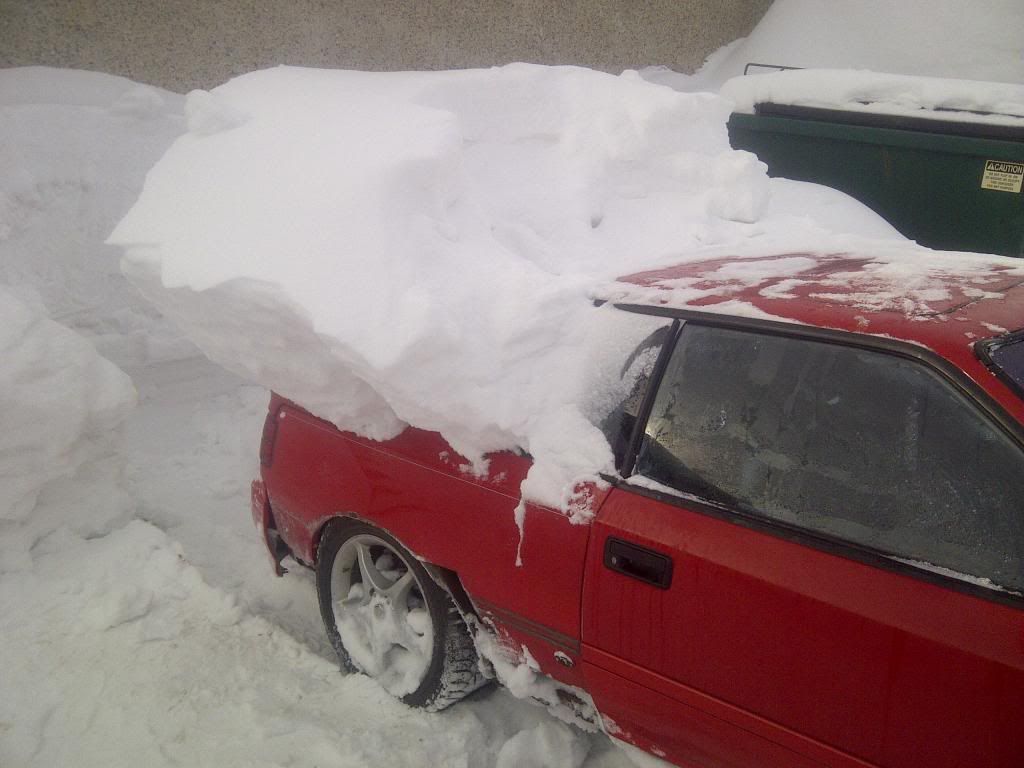
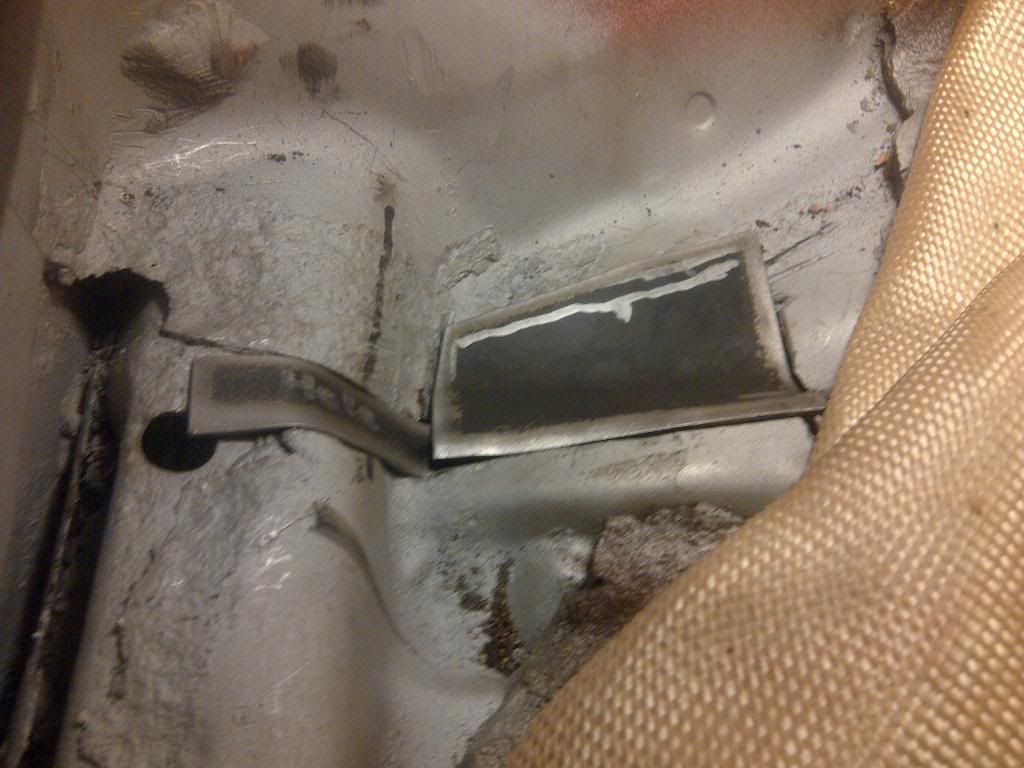
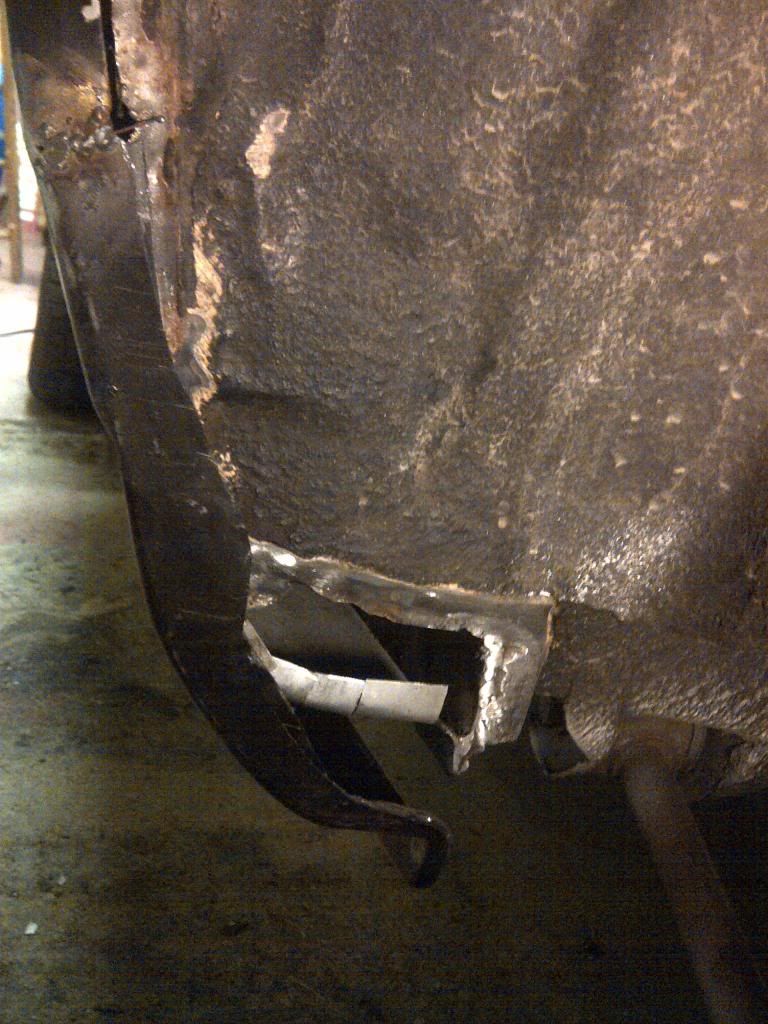
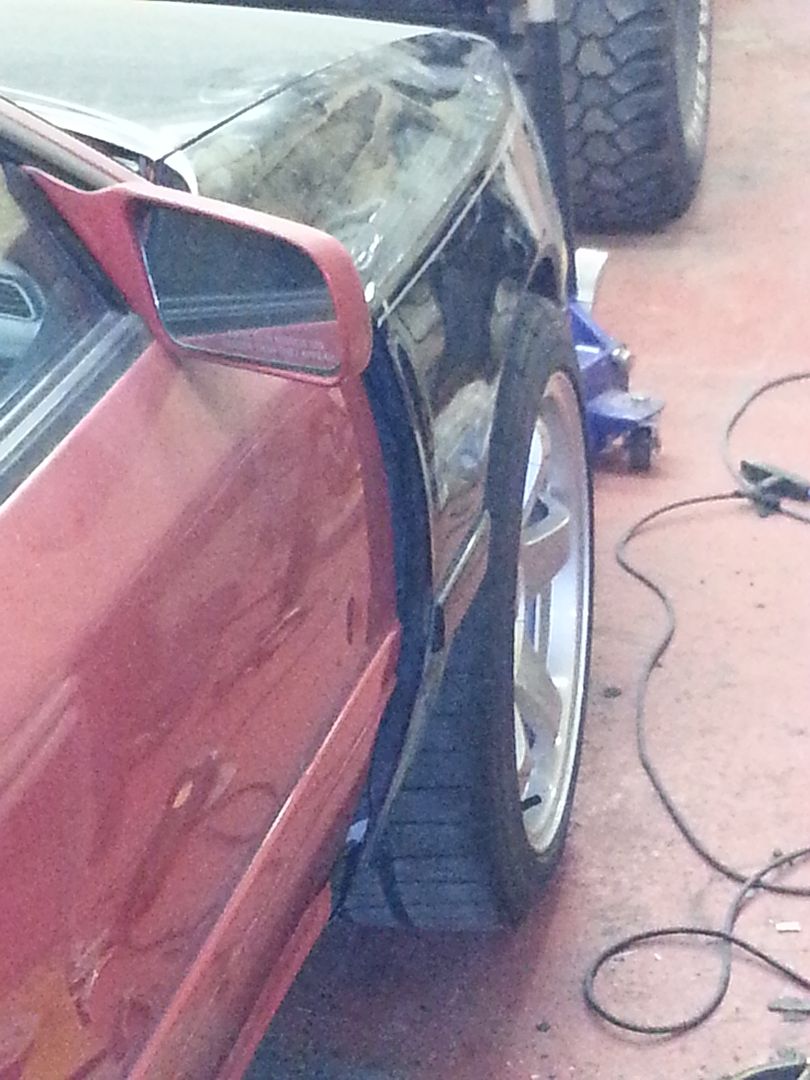
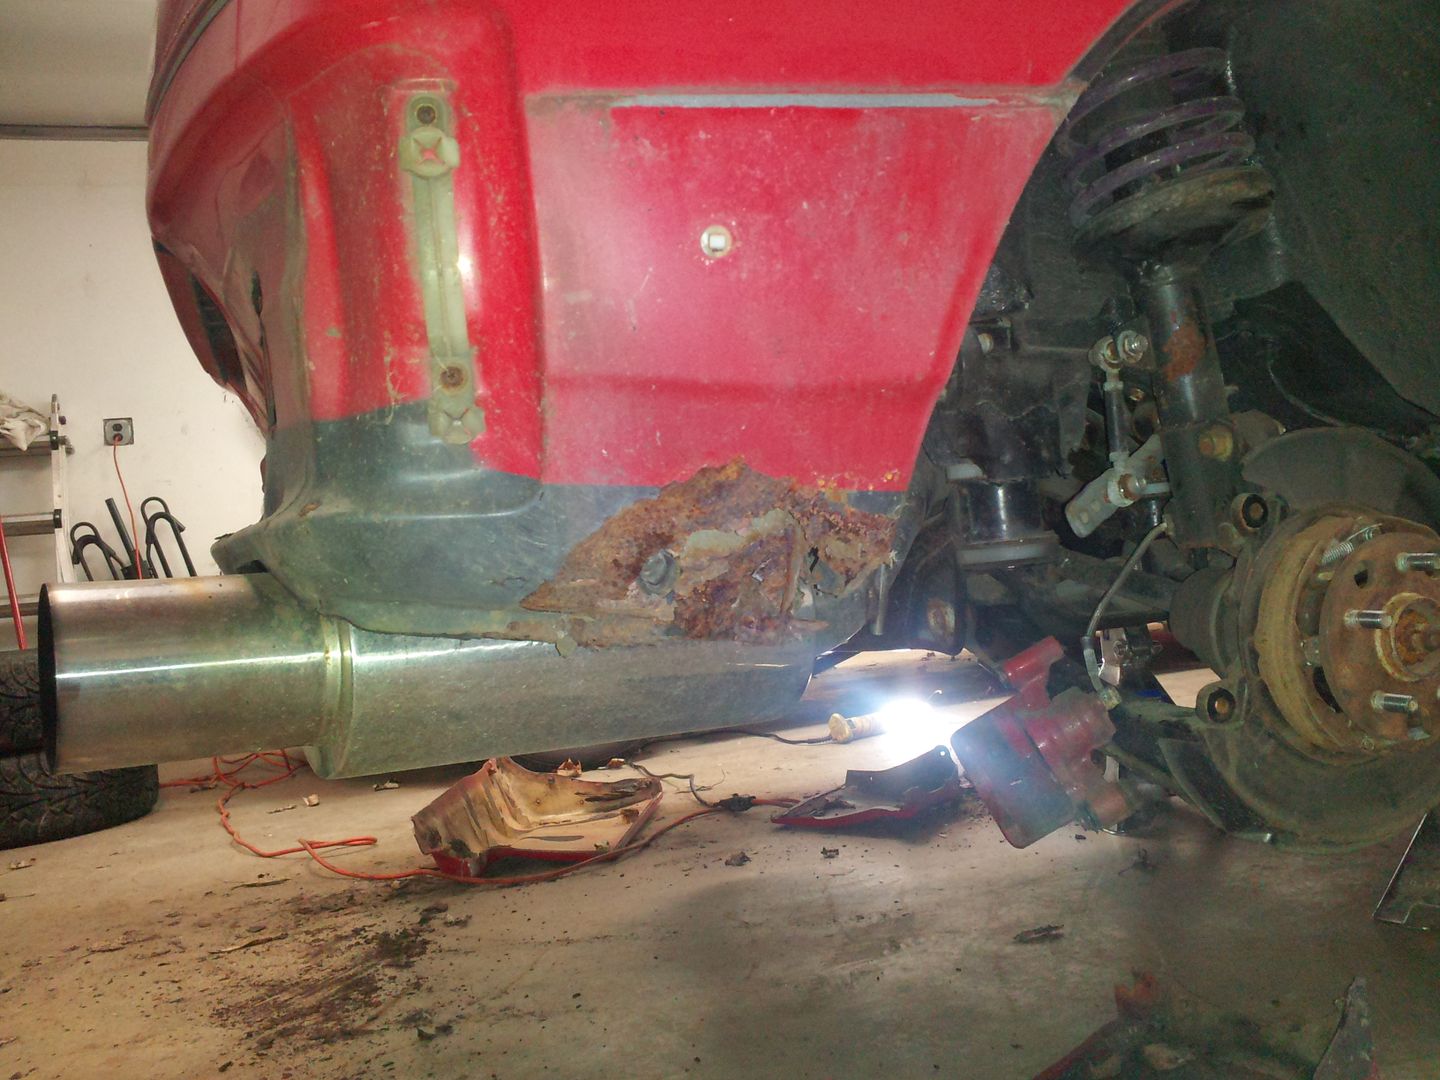
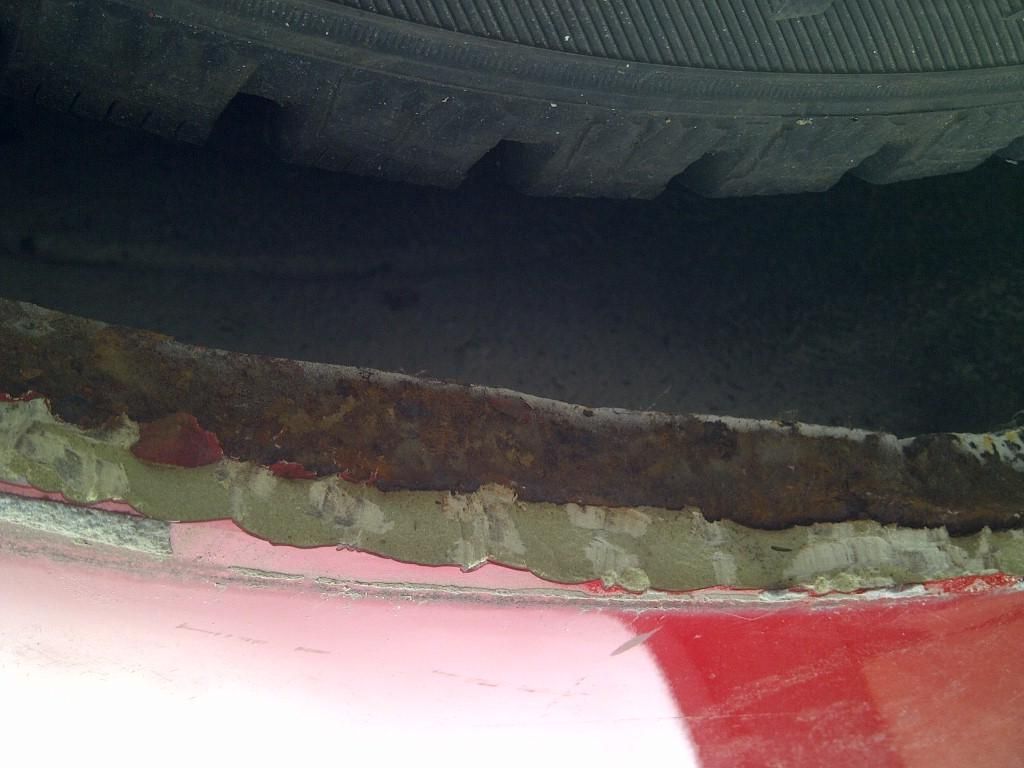
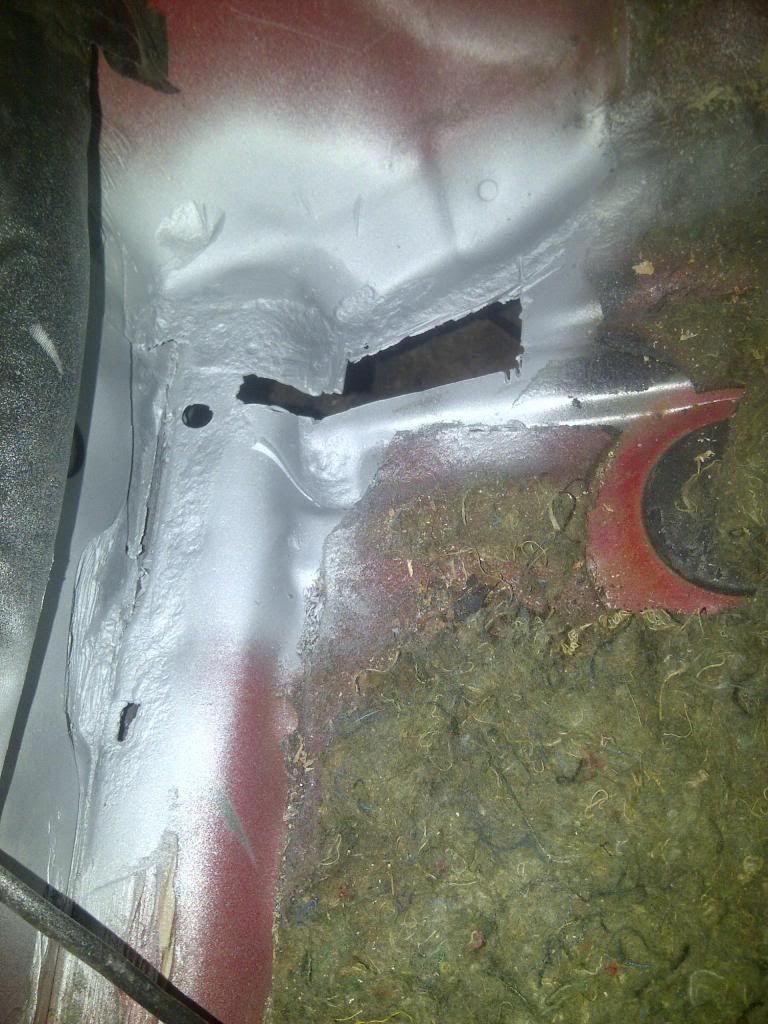
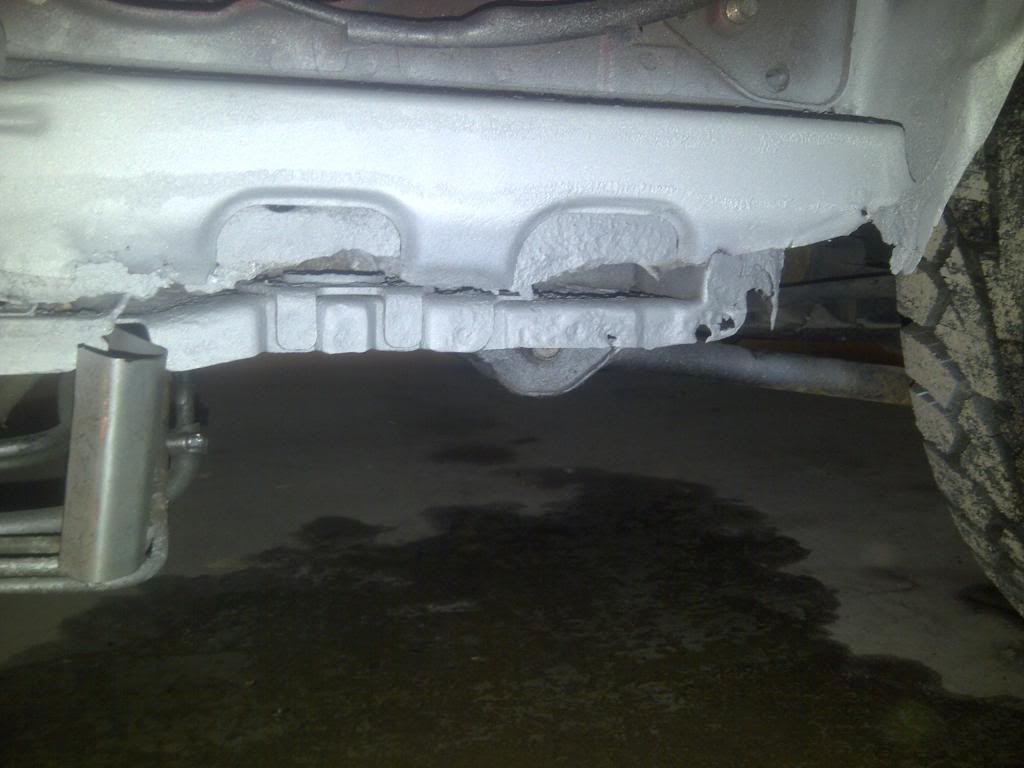
I had to shovel off half of the show then pull it out of the bank and shovel the rest off and the back end came up two inches when the big chunk fell off. Of course when I started to get into it I found a few more surprises as you always do with old cars like a another rust hole in the driver's side floor
IMG-20140329-00096_zps4caf4d01.jpg

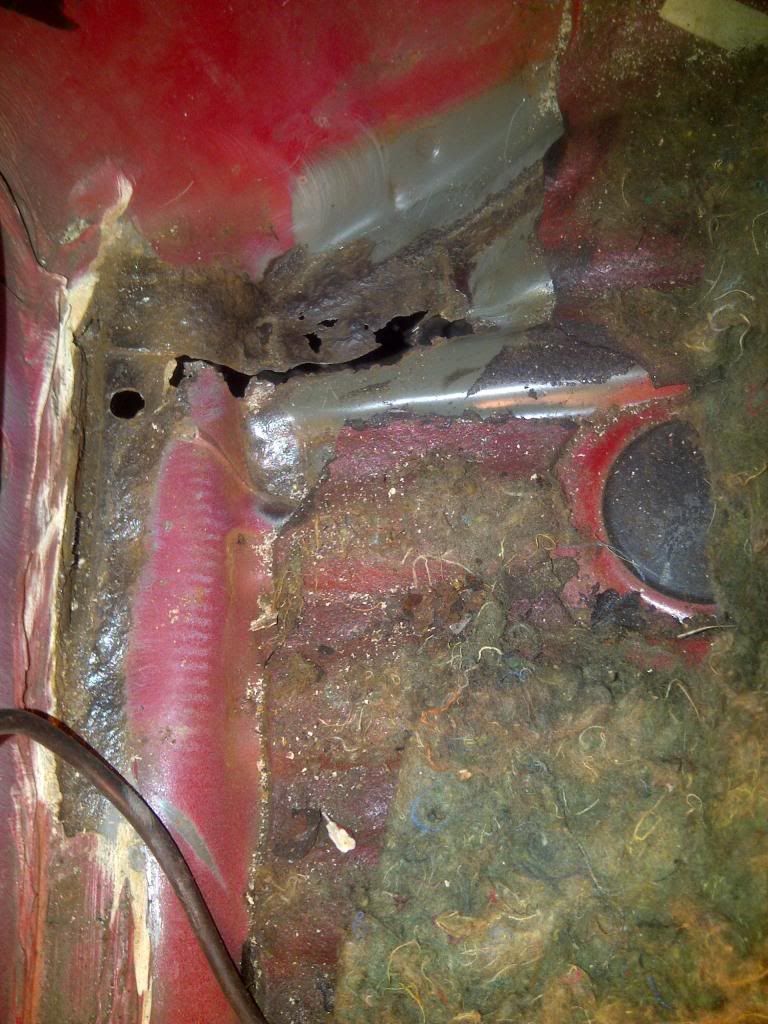
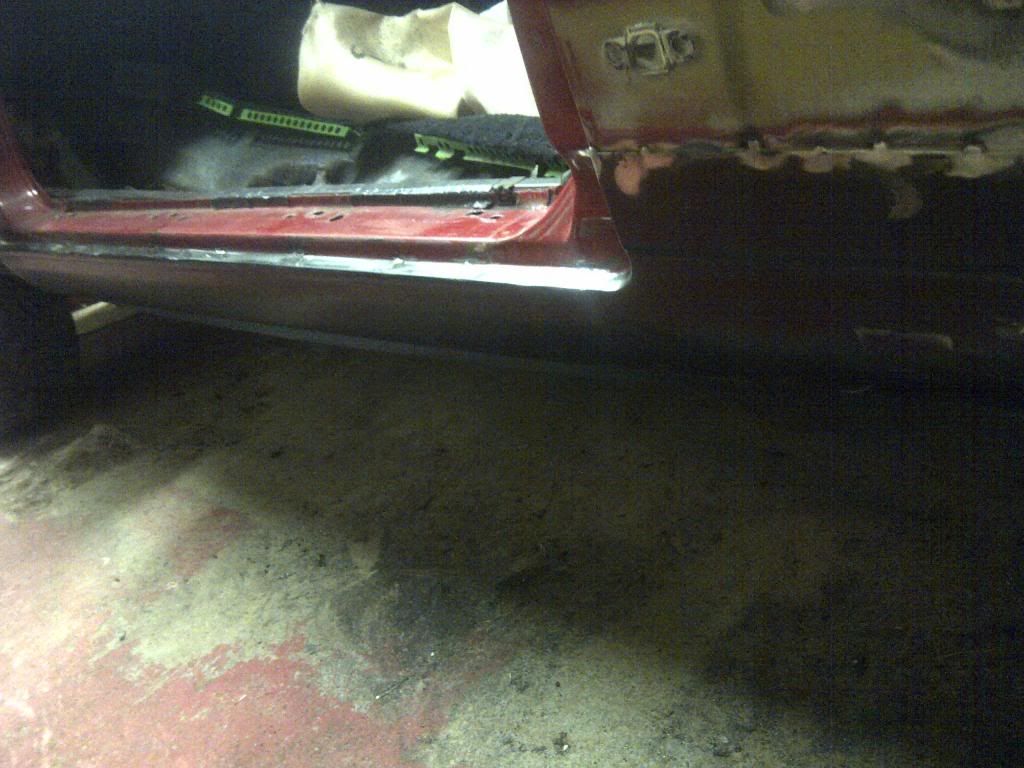
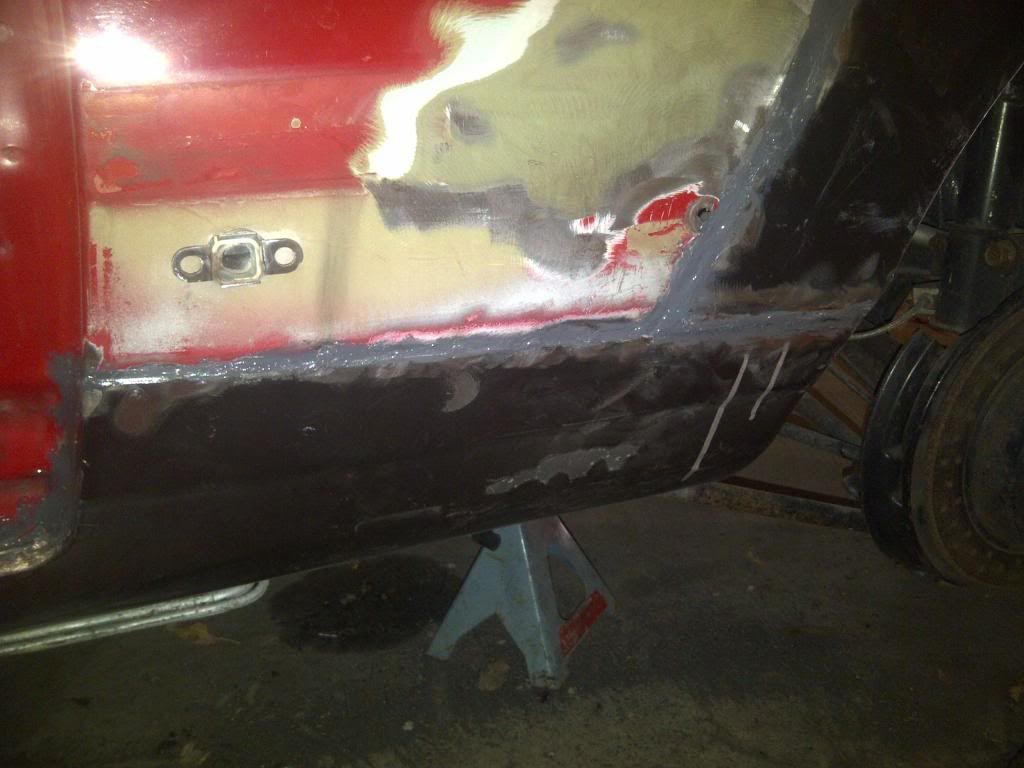
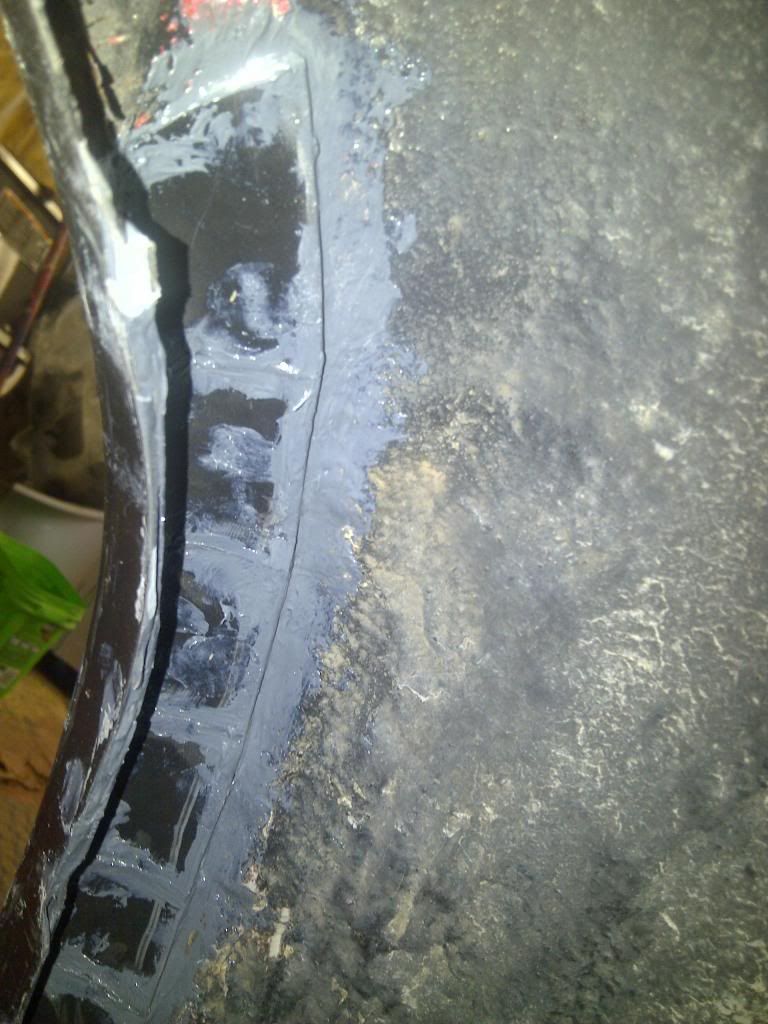
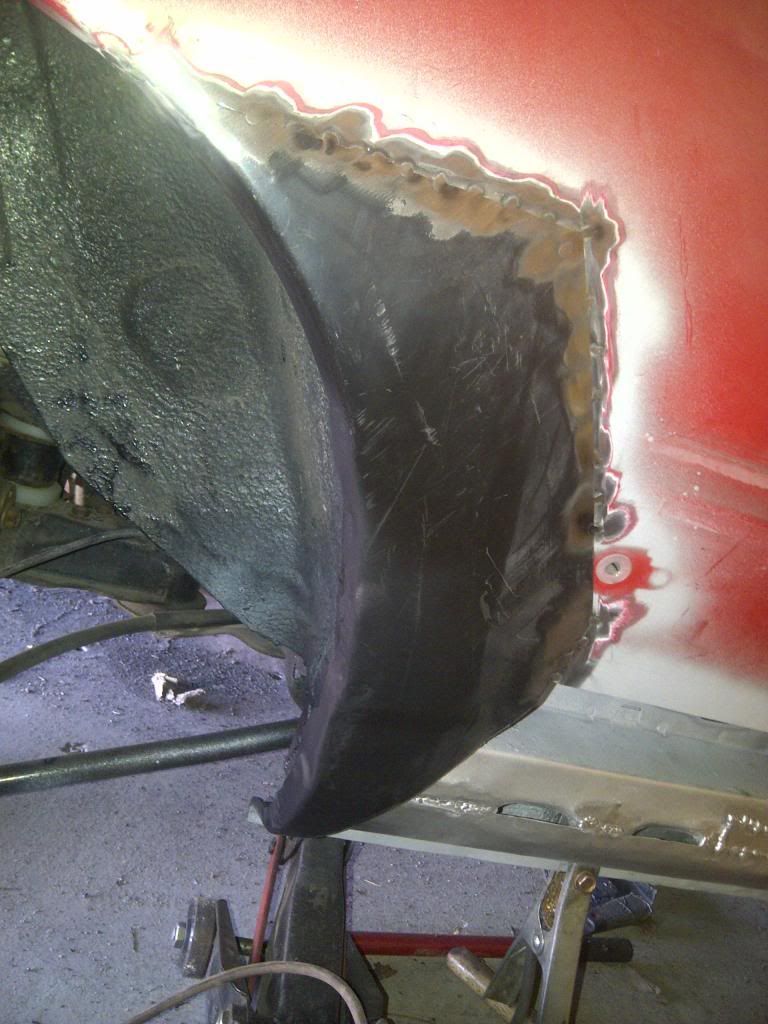
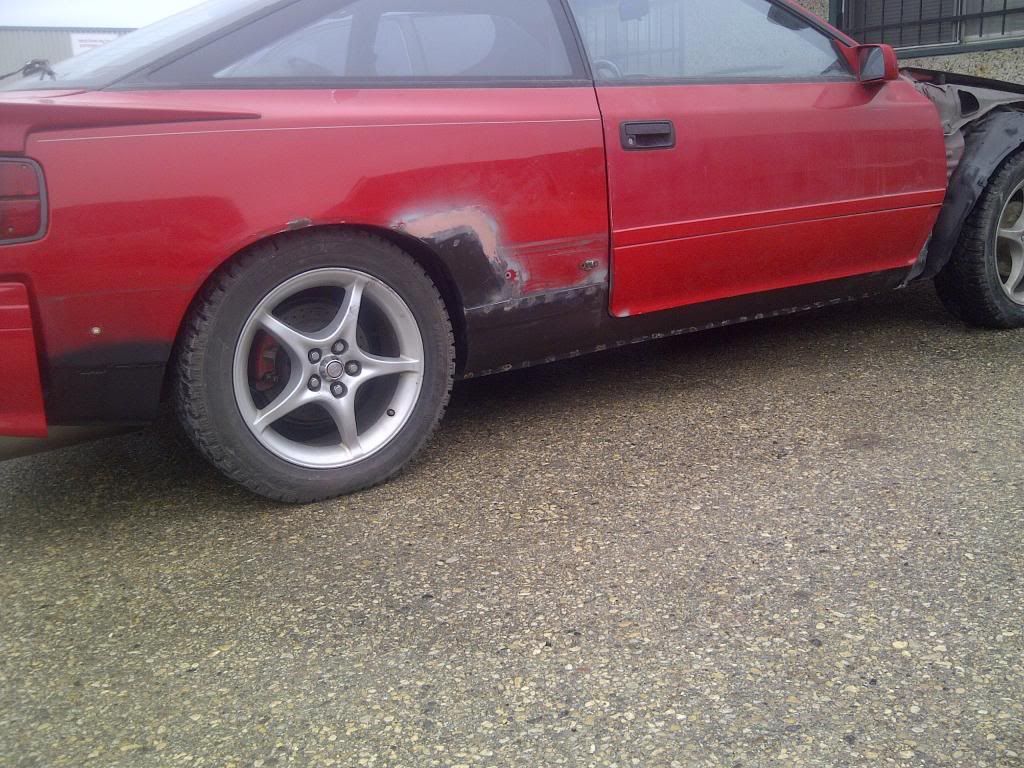
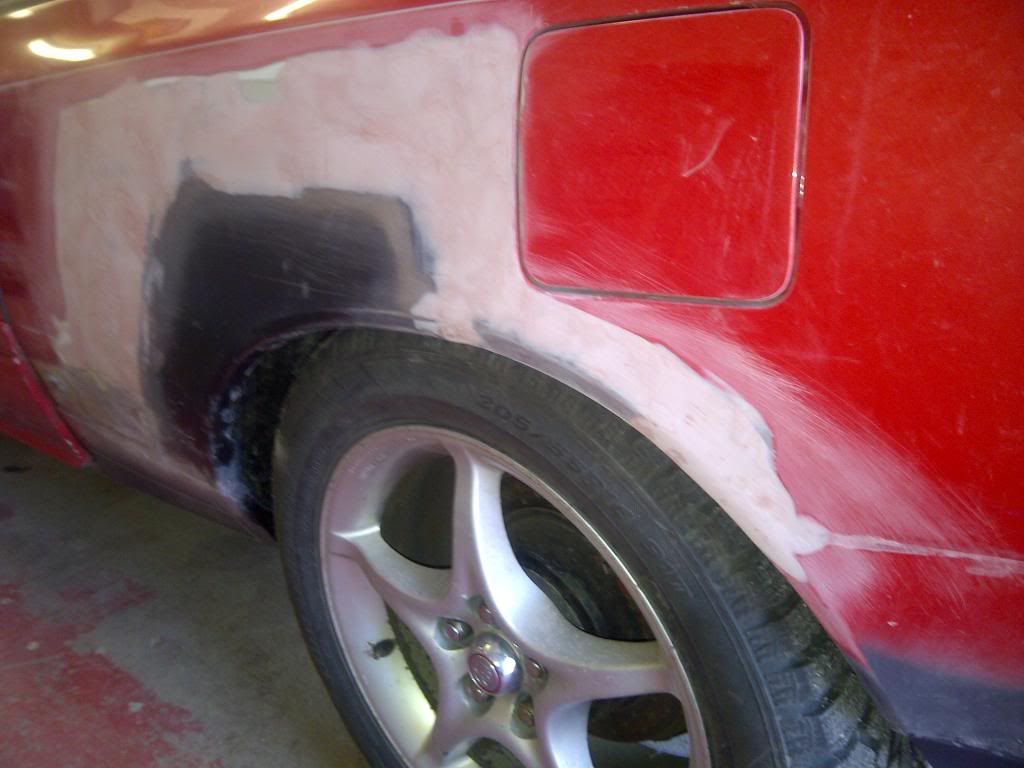
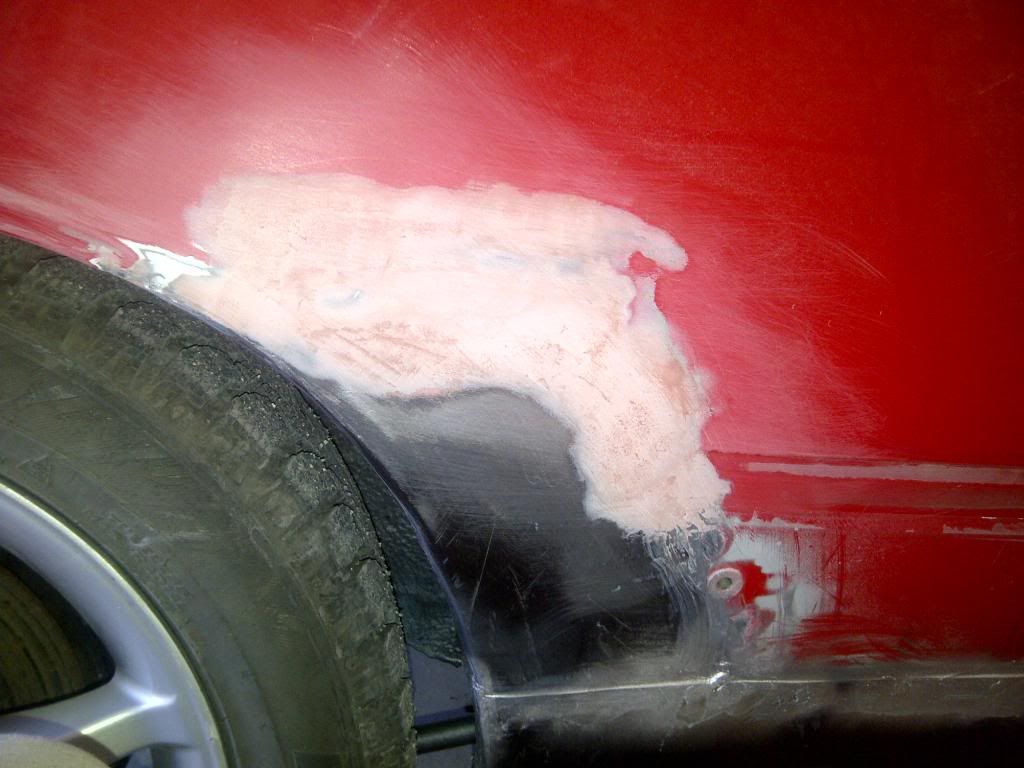
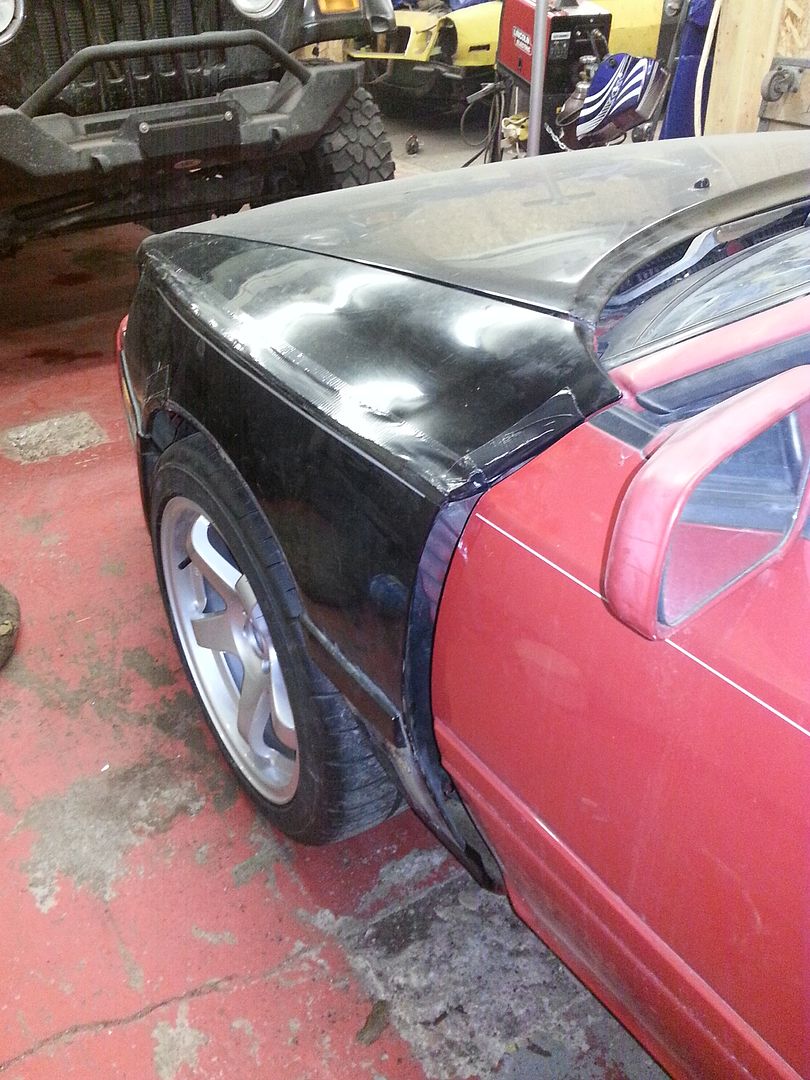
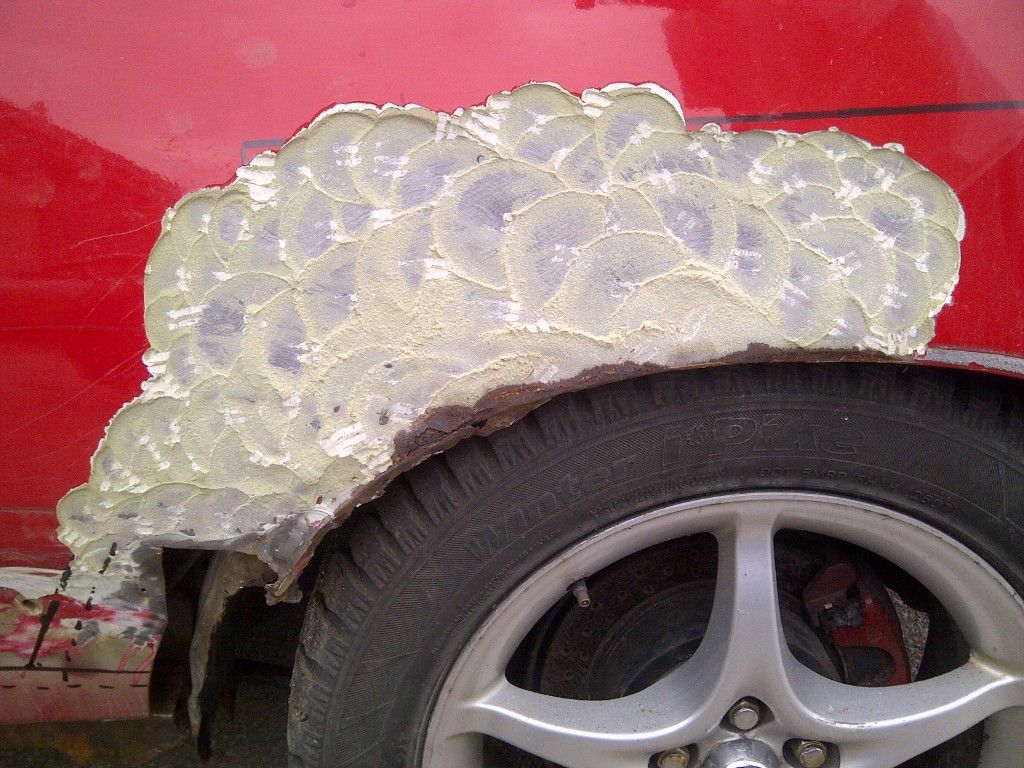
and an old fender bender repair with at least a half inch of bondo on most of the rear quarter panel
IMG-20130908-00062_zps64eb8ba5.jpg

IMG-20130908-00063_zps5a14ea72.jpg


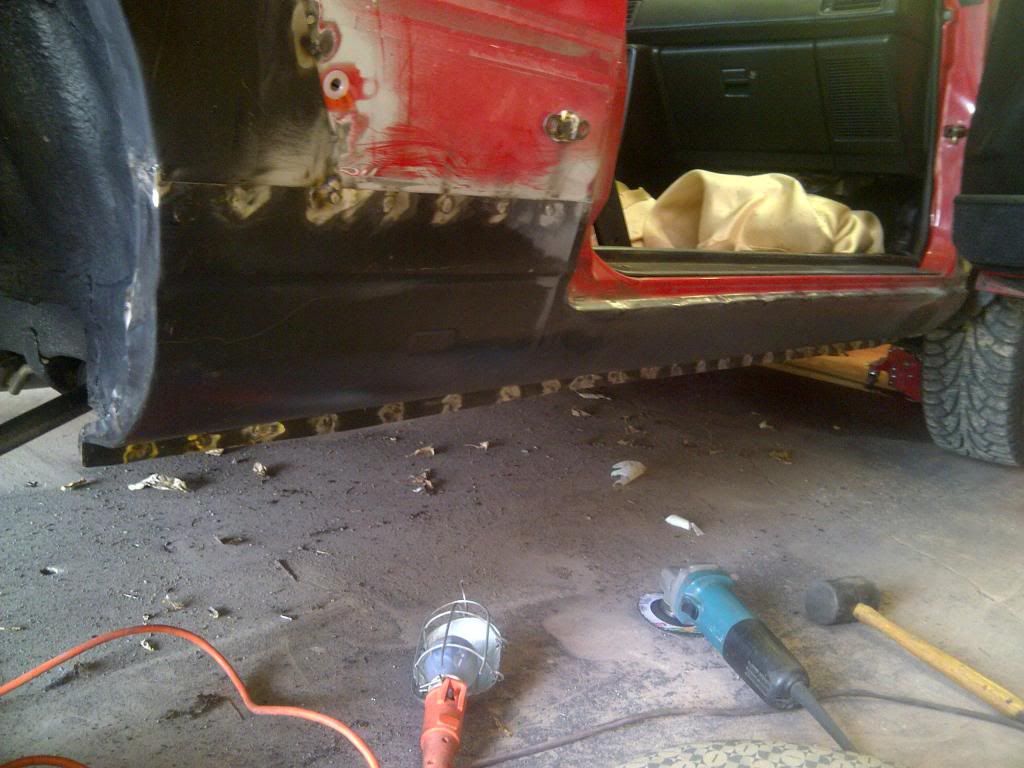
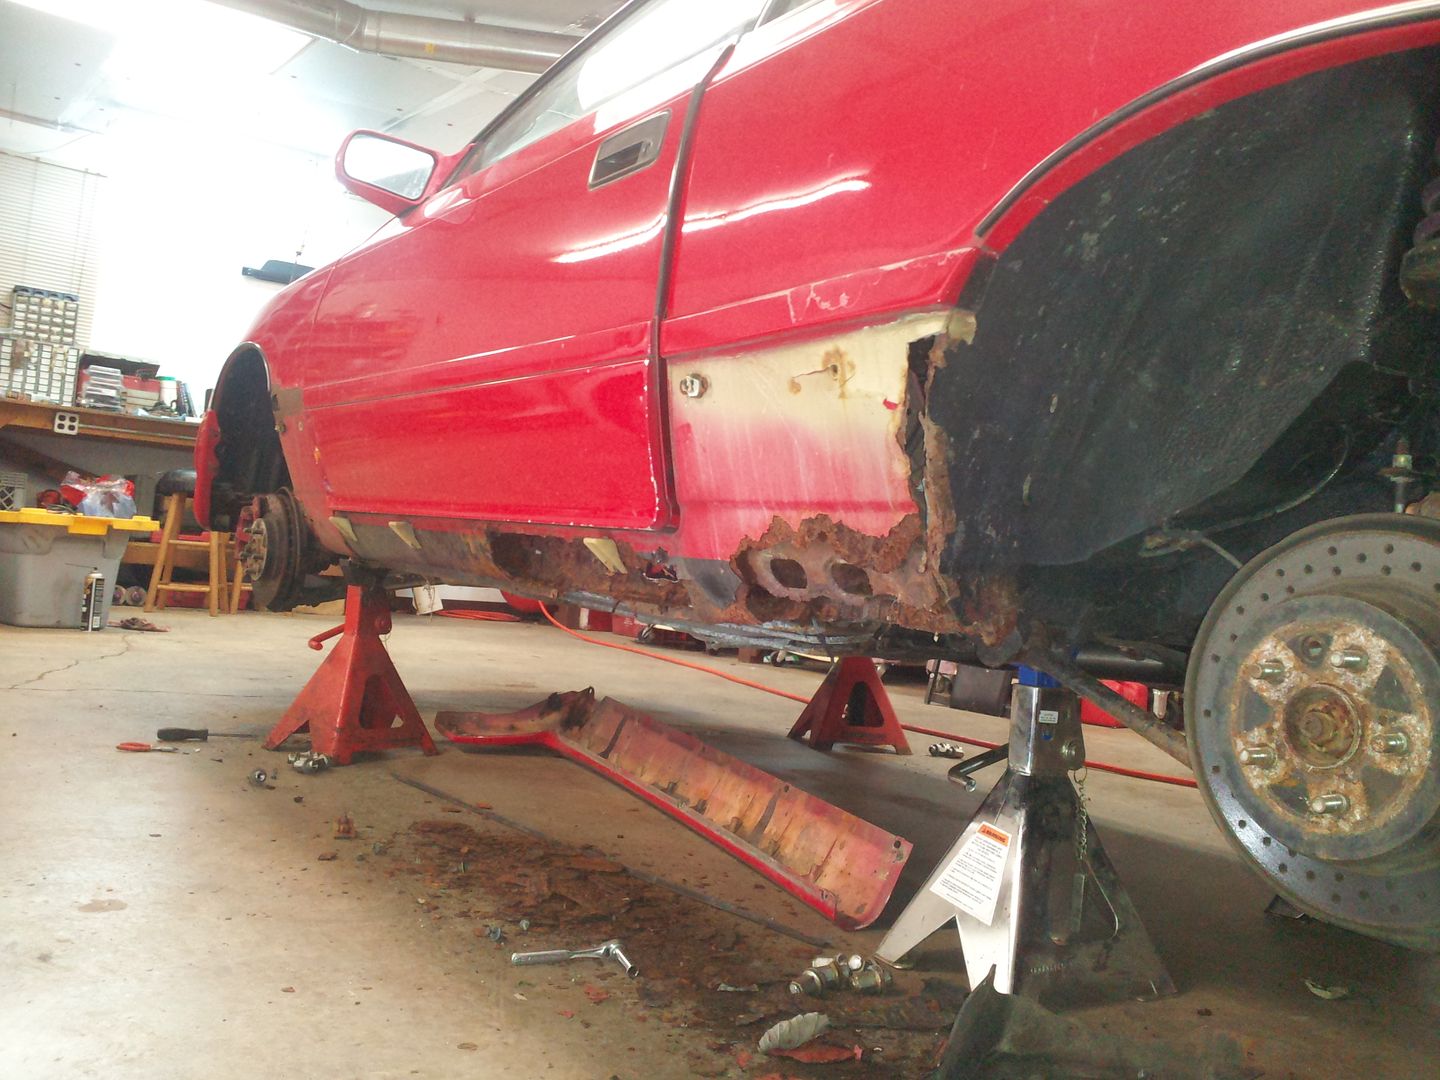
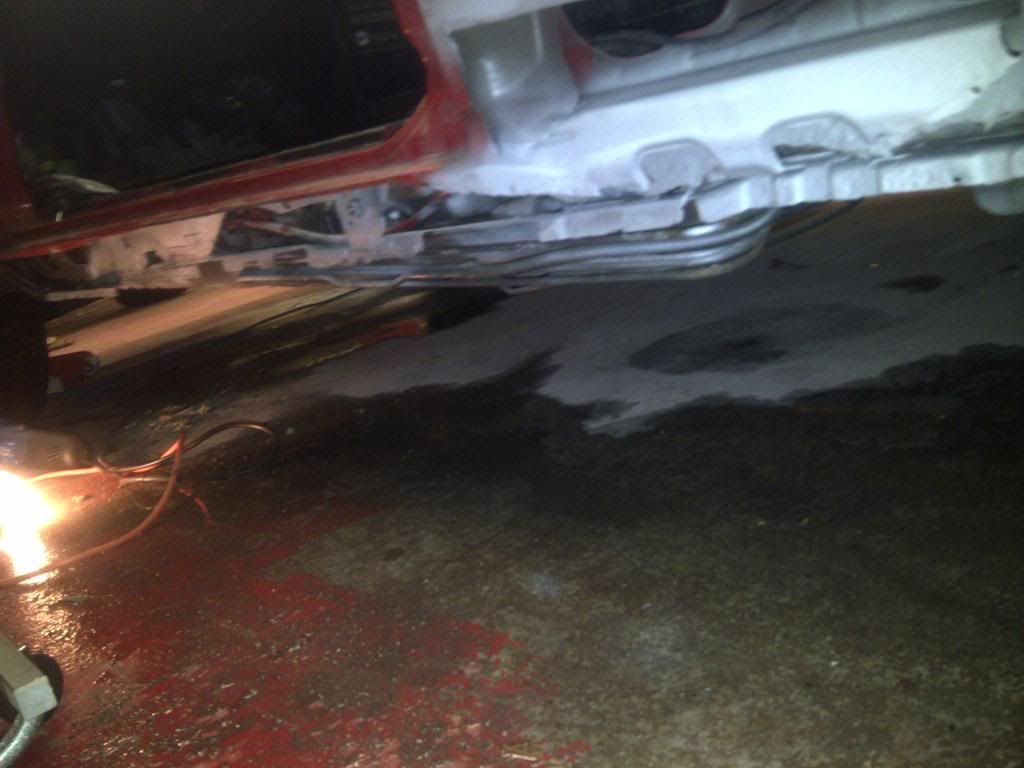
But I have made good progress since then...
IMG-20140315-00084_zps14ed68de.jpg

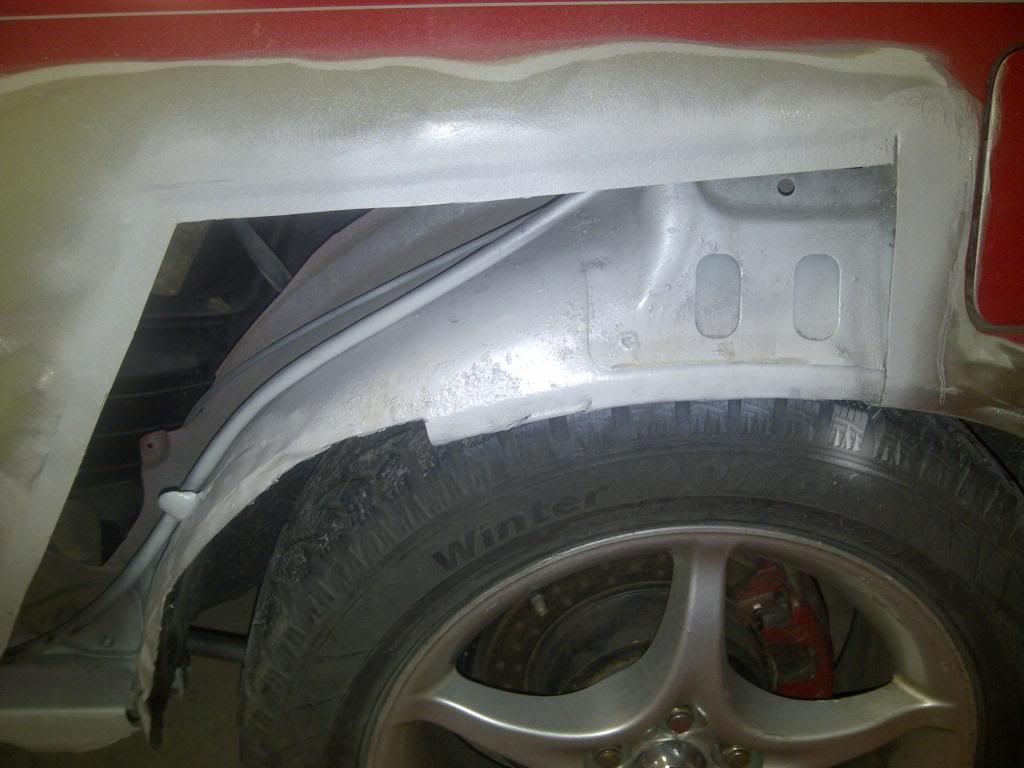
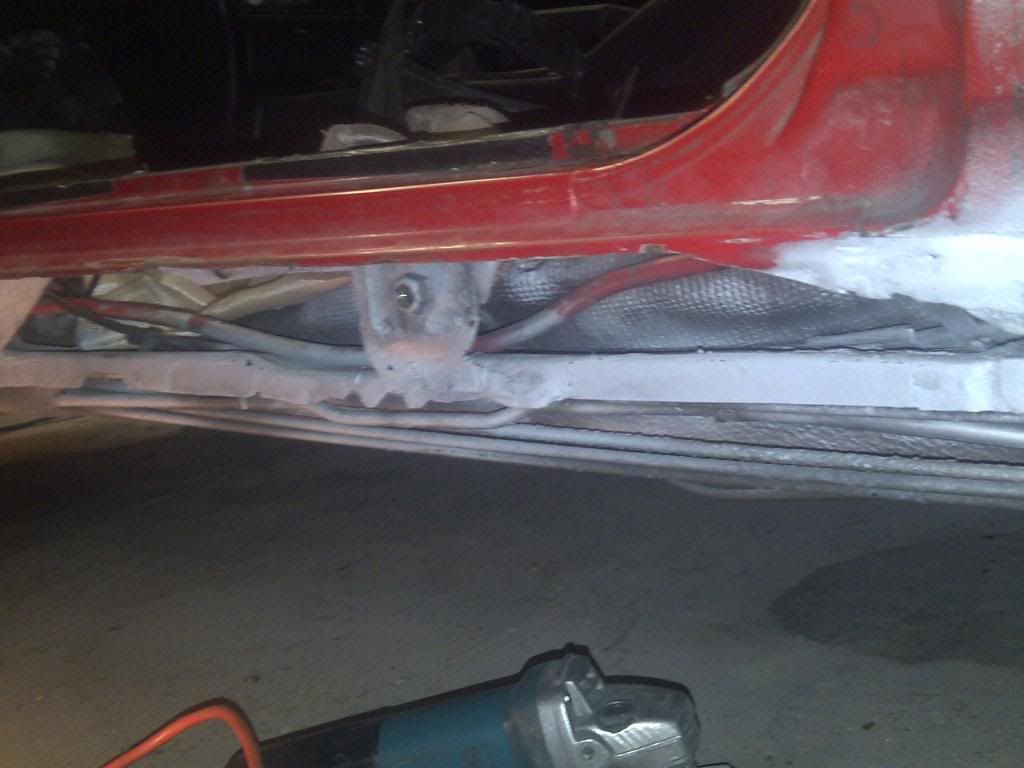
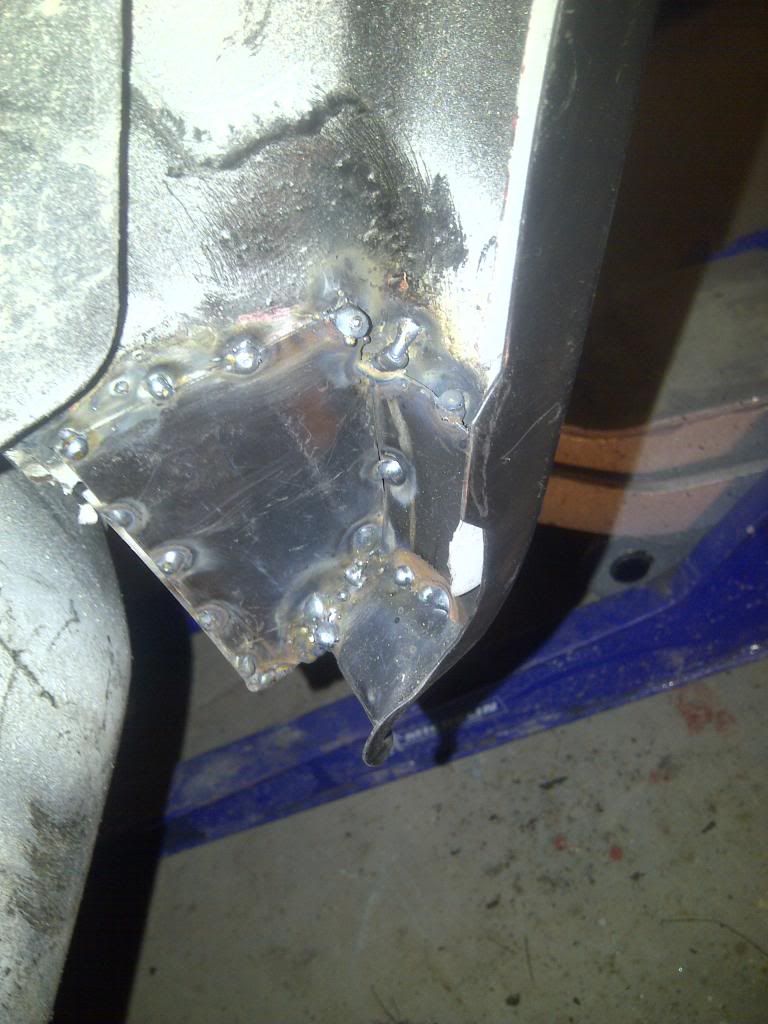
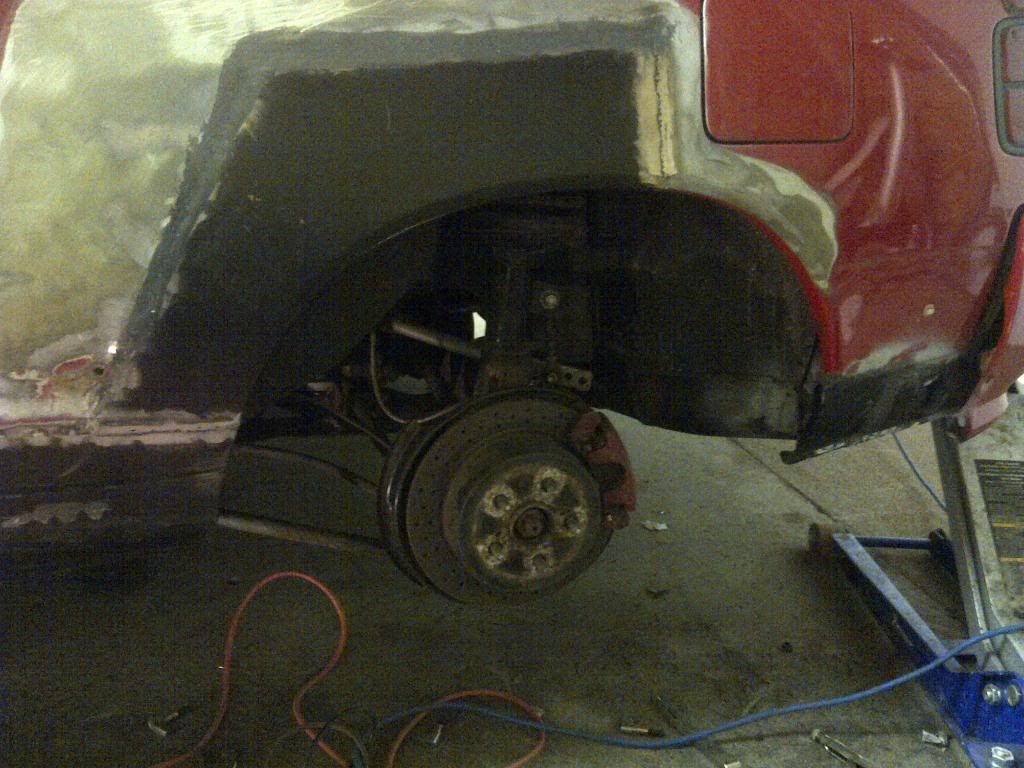
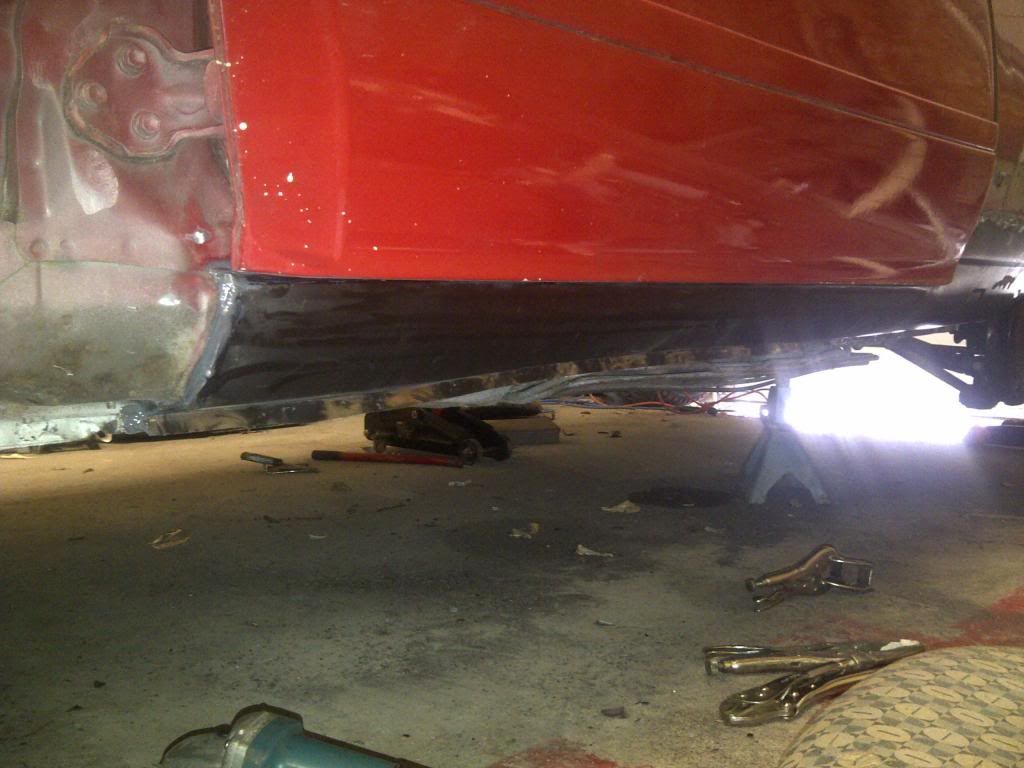
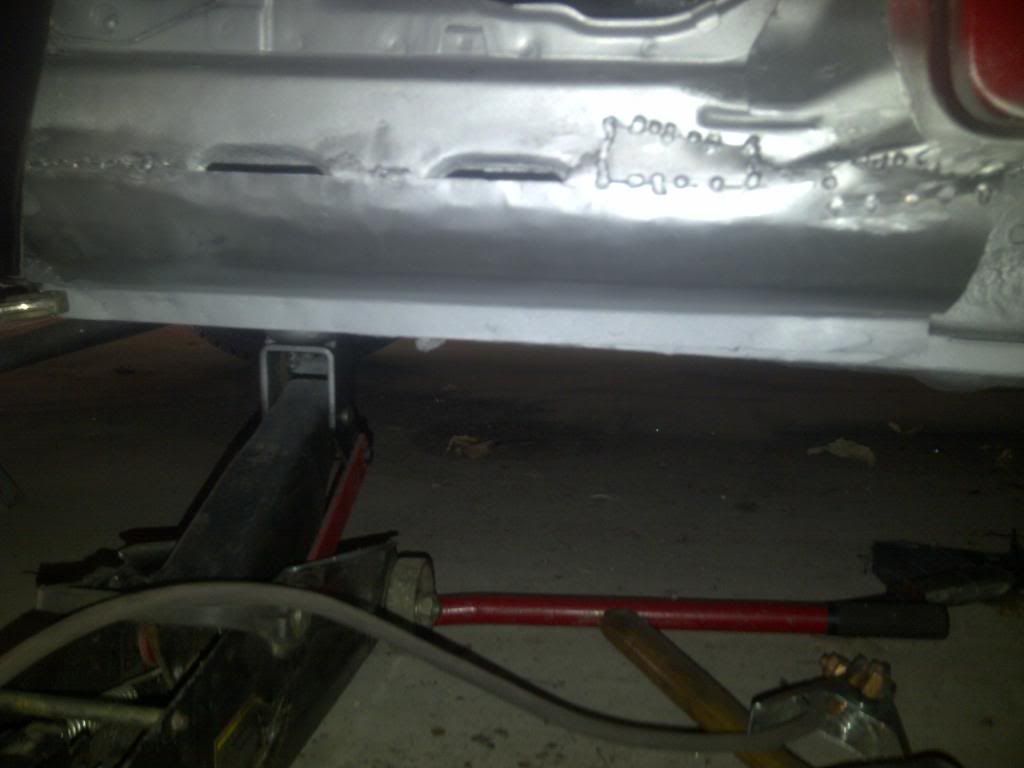
most of the wrinkled and rusted metal has been cut out
IMG-20140315-00085_zps1b91fb4d.jpg

IMG-20140315-00086_zpsad3f27ef.jpg

IMG-20140315-00087_zps9b9b33e9.jpg

IMG-20140315-00088_zpsf02b3b7d.jpg

IMG-20140315-00089_zps938c5a58.jpg

IMG-20140315-00090_zpscc6649ec.jpg

IMG-20140329-00097_zps00187167.jpg

IMG-20140329-00098_zpsba8cc24f.jpg

IMG-20140329-00099_zps2e950f5b.jpg

IMG-20140329-00100_zpsac4332df.jpg

IMG-20140329-00101_zpsd4a0faab.jpg

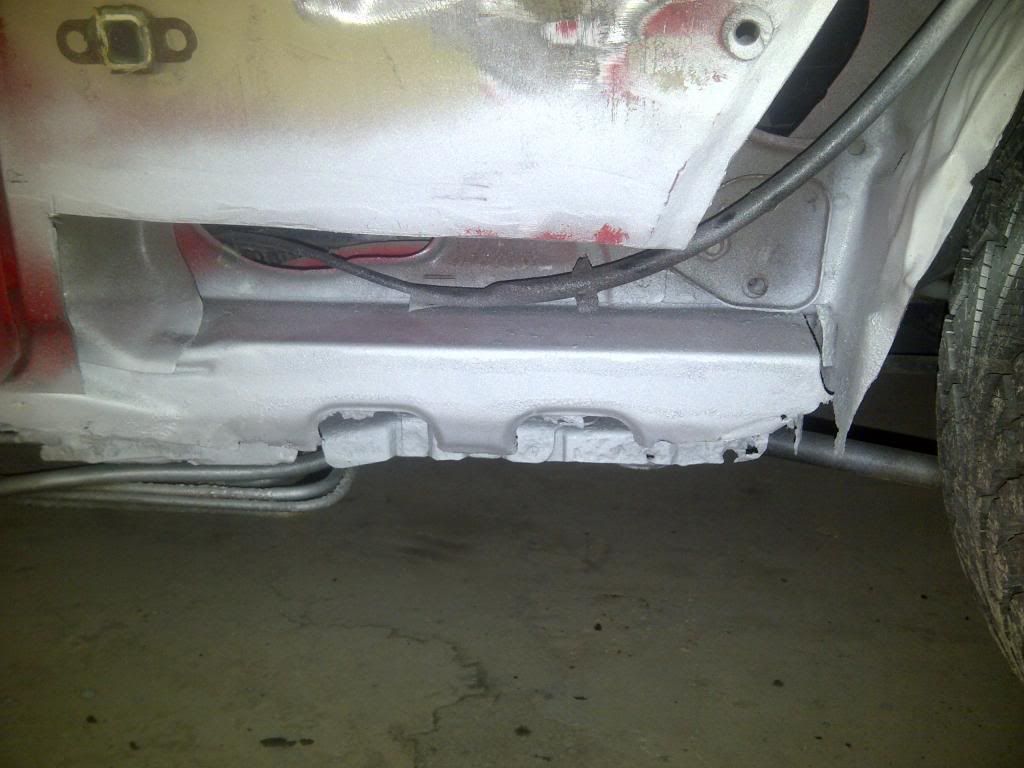
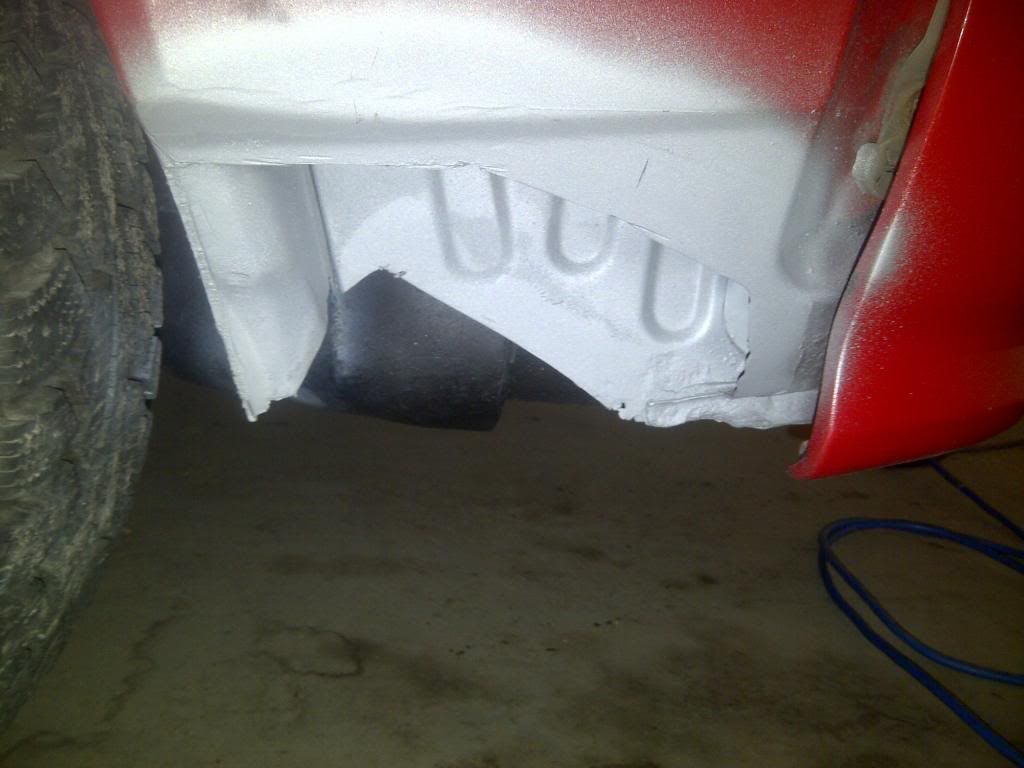
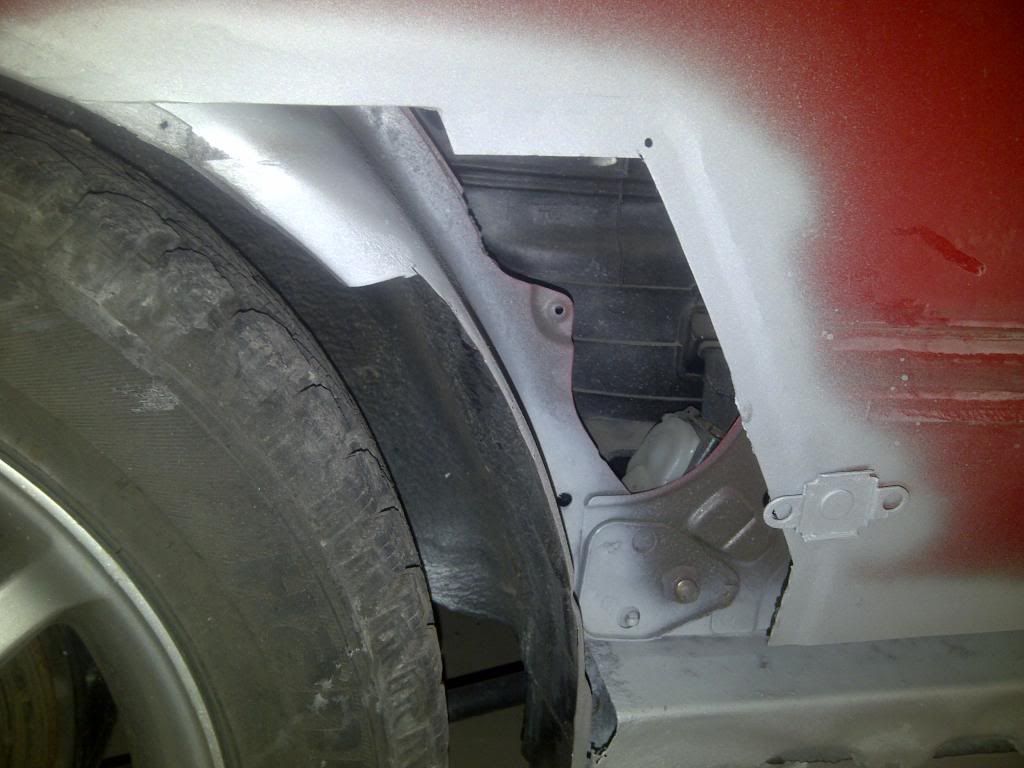
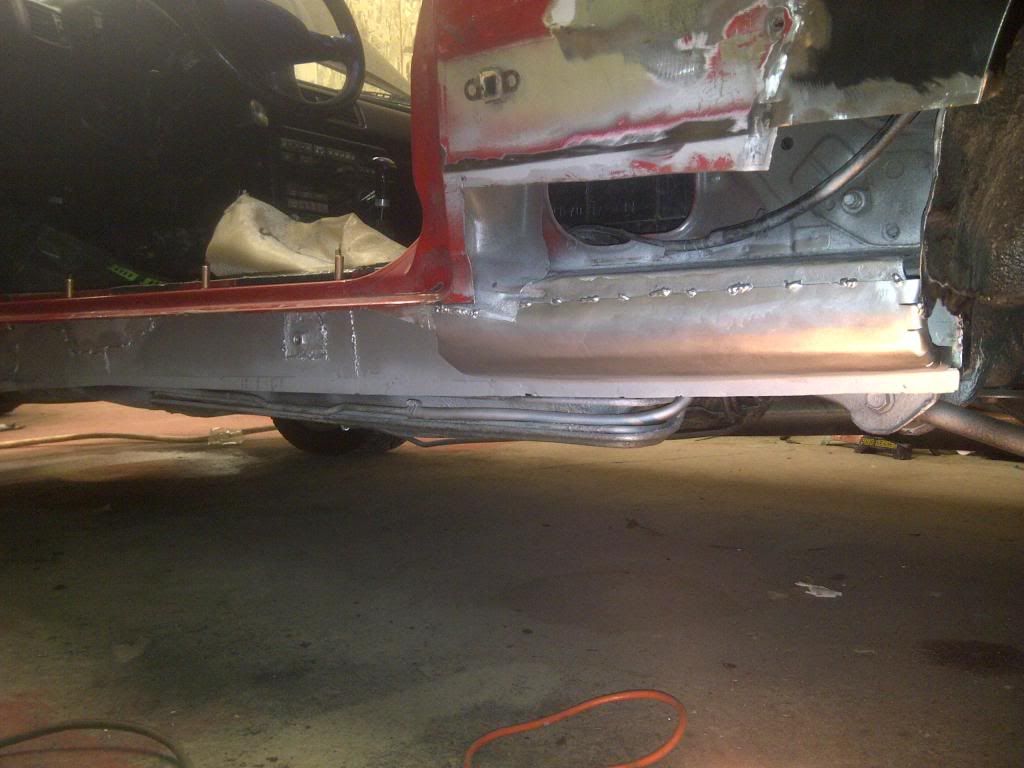
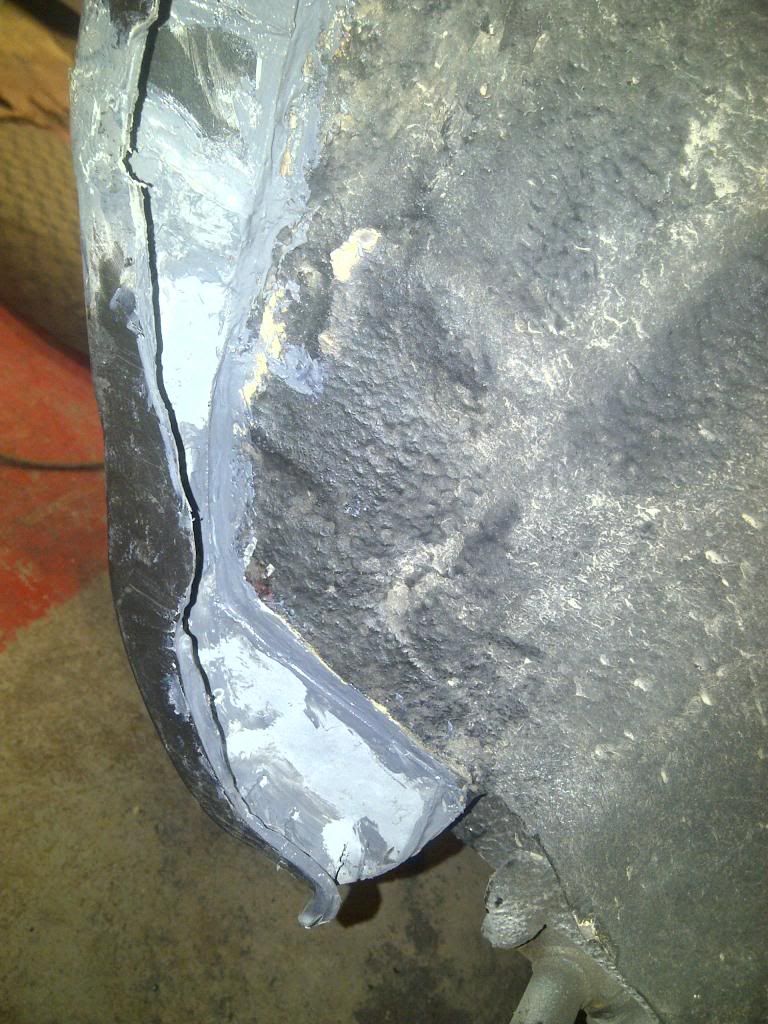
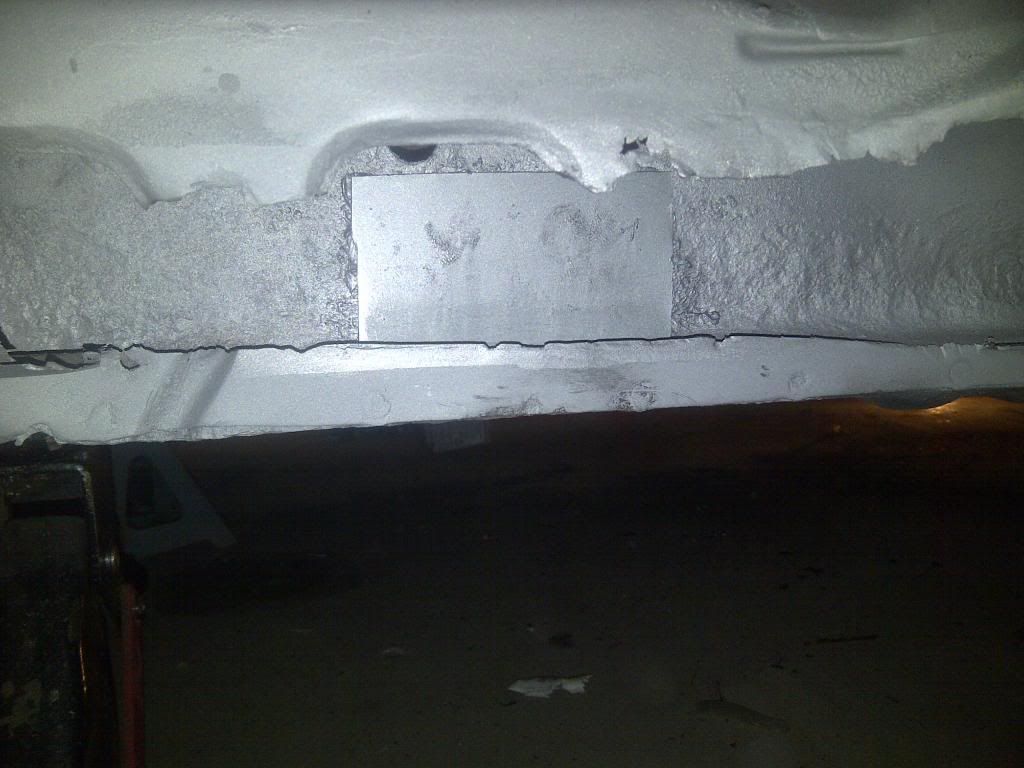
Most of the grey primer is rustcheck rust paint to seal any metal that I didn't cut out for various reasons. But where I will be welding I used zinc weld through primer.
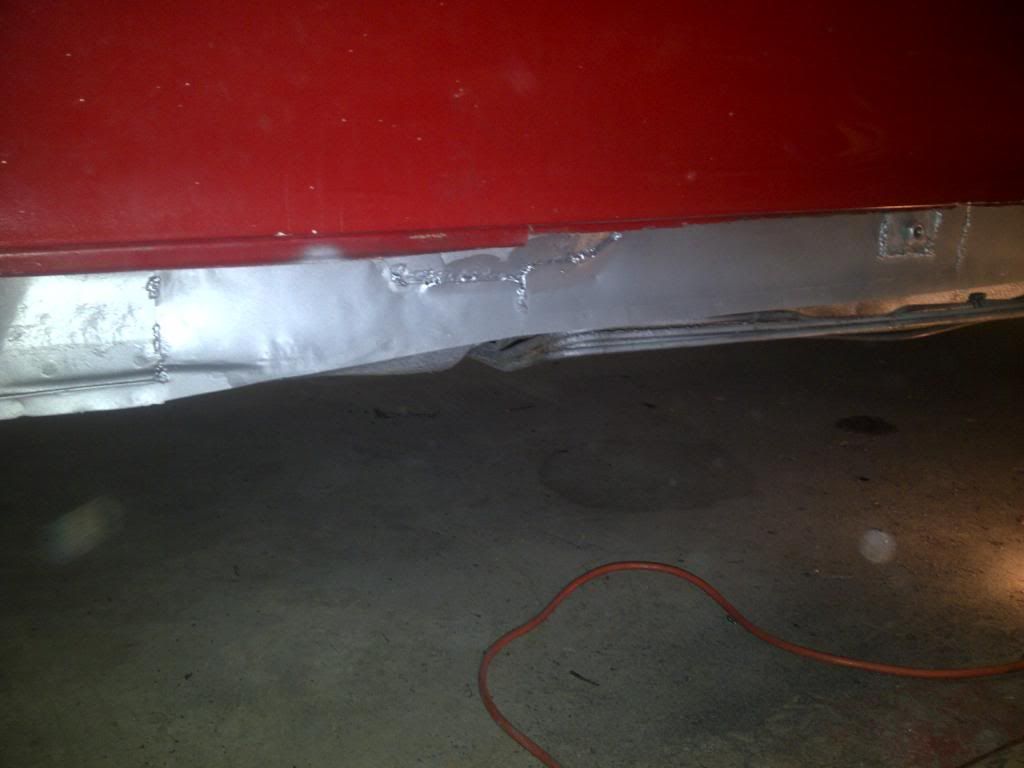
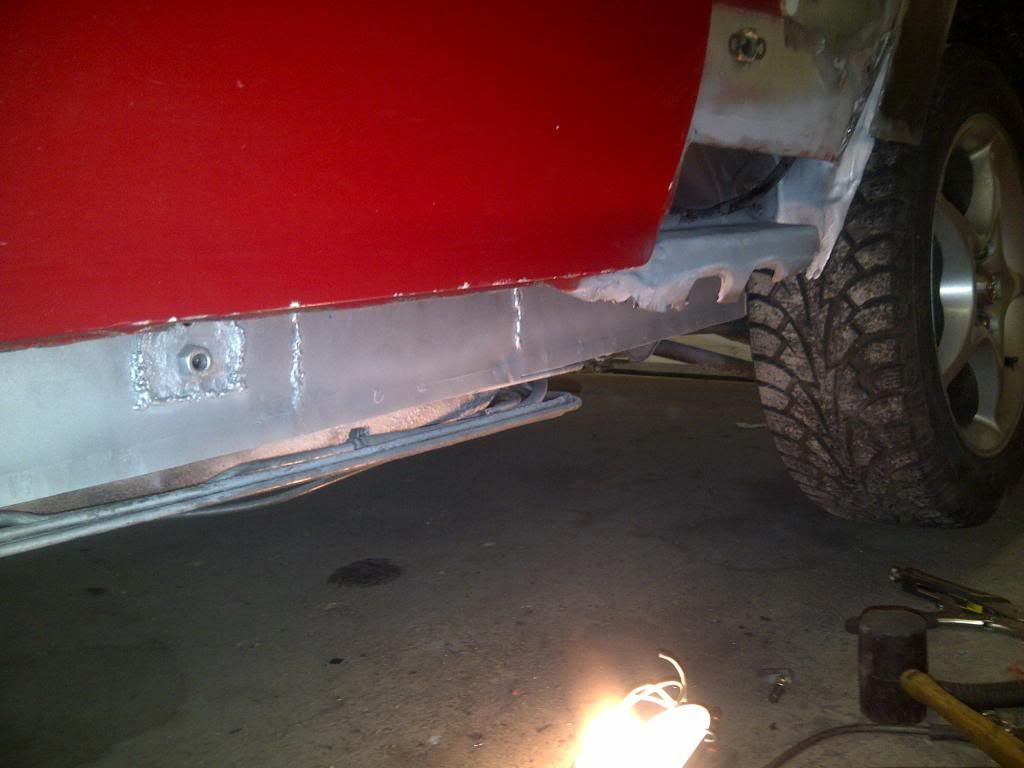
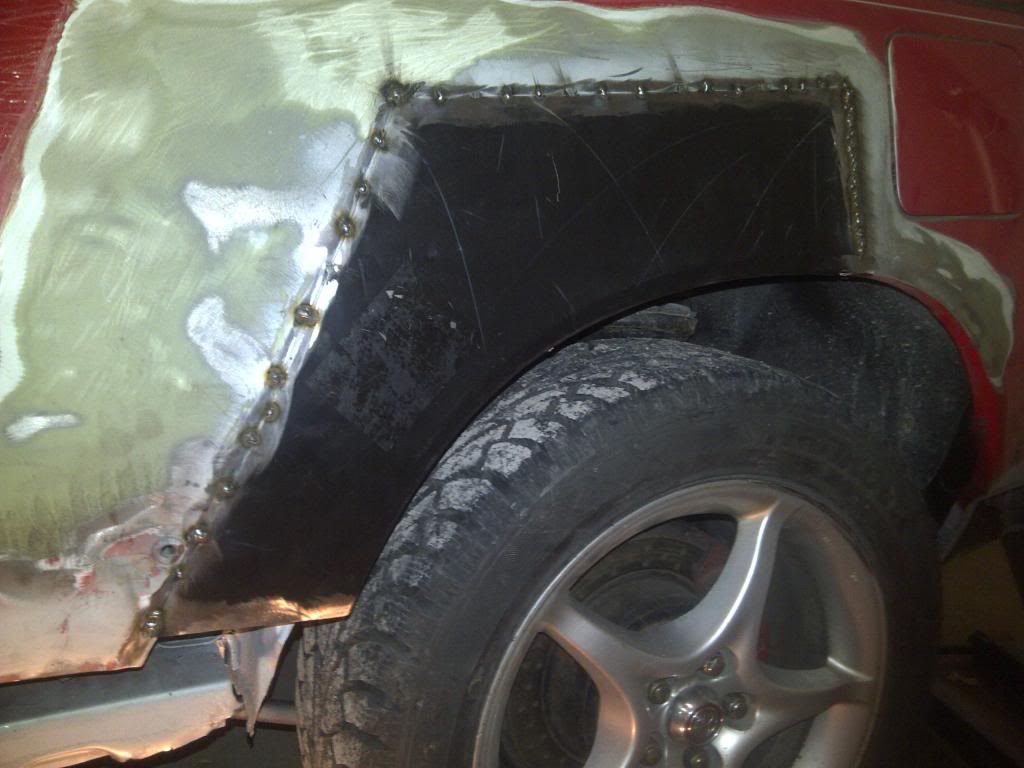
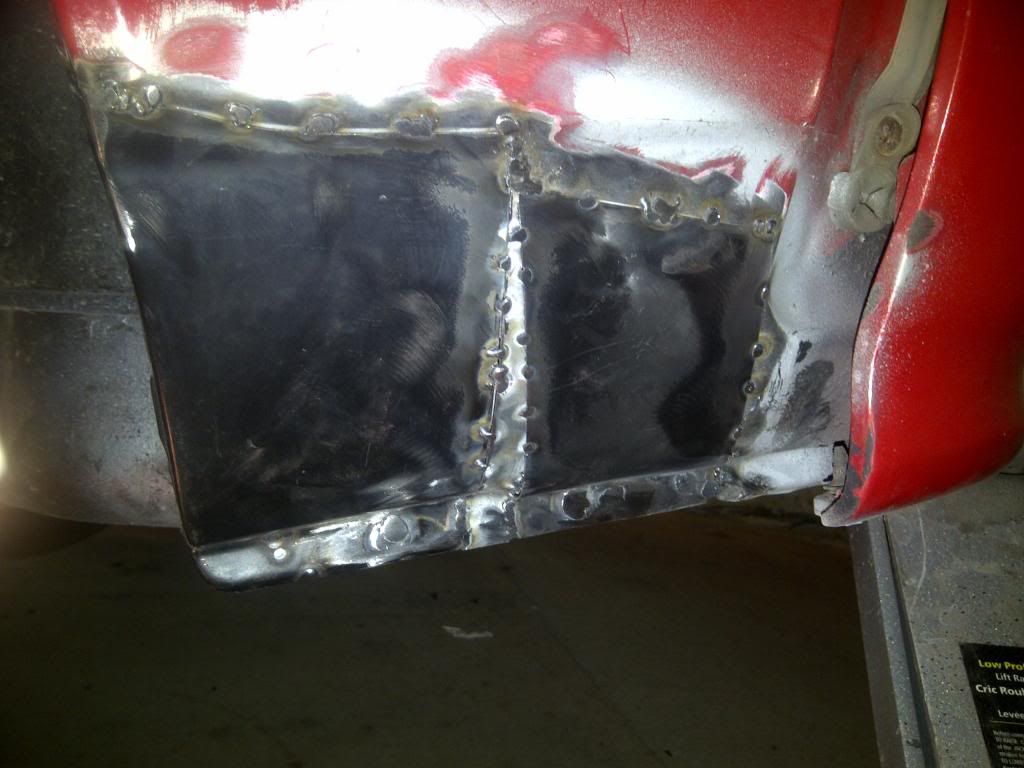
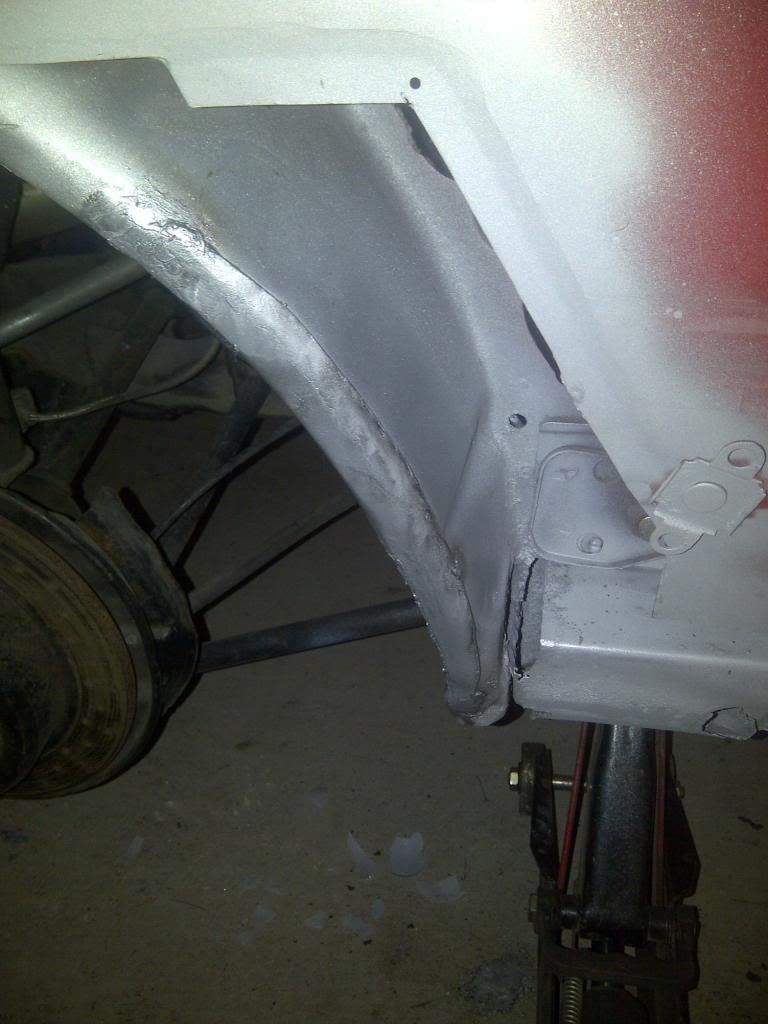
I have fabricated almost all the plates I need to fix the inner structure except for the driver side inner wheel well and the hole in the floor. There is not enough material left for reference in the drivers wheel well to fab the inner lip accurately so I will do that after the outer skin is back on.
IMG-20140329-00102_zpse9eb3f4e.jpg

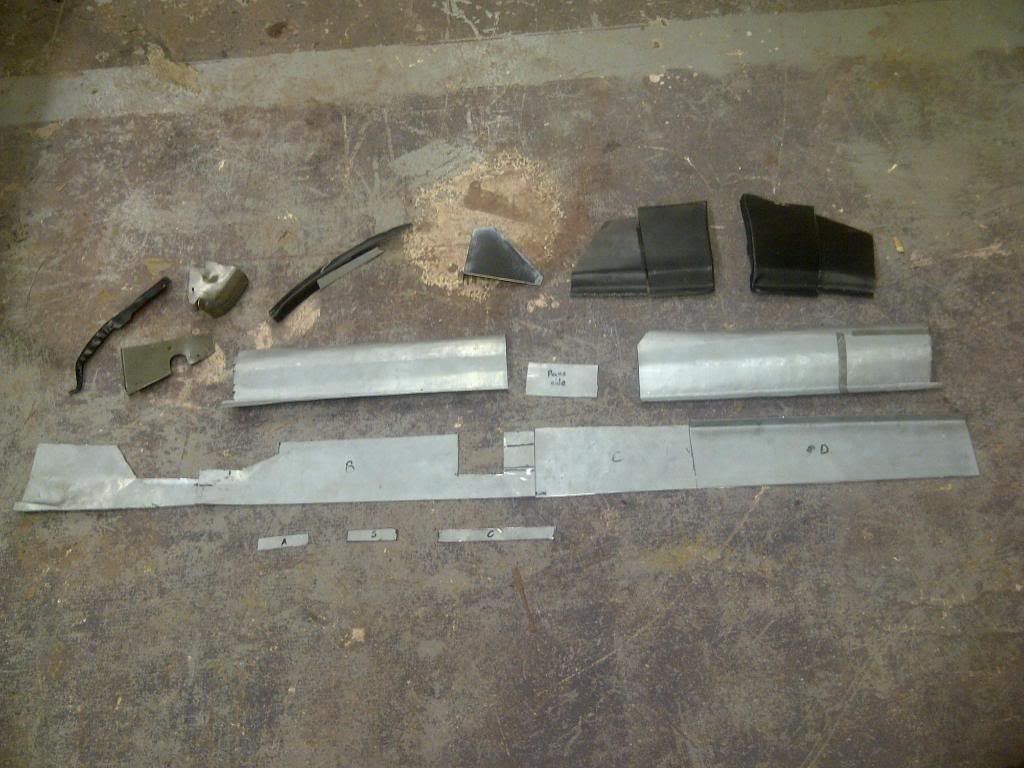
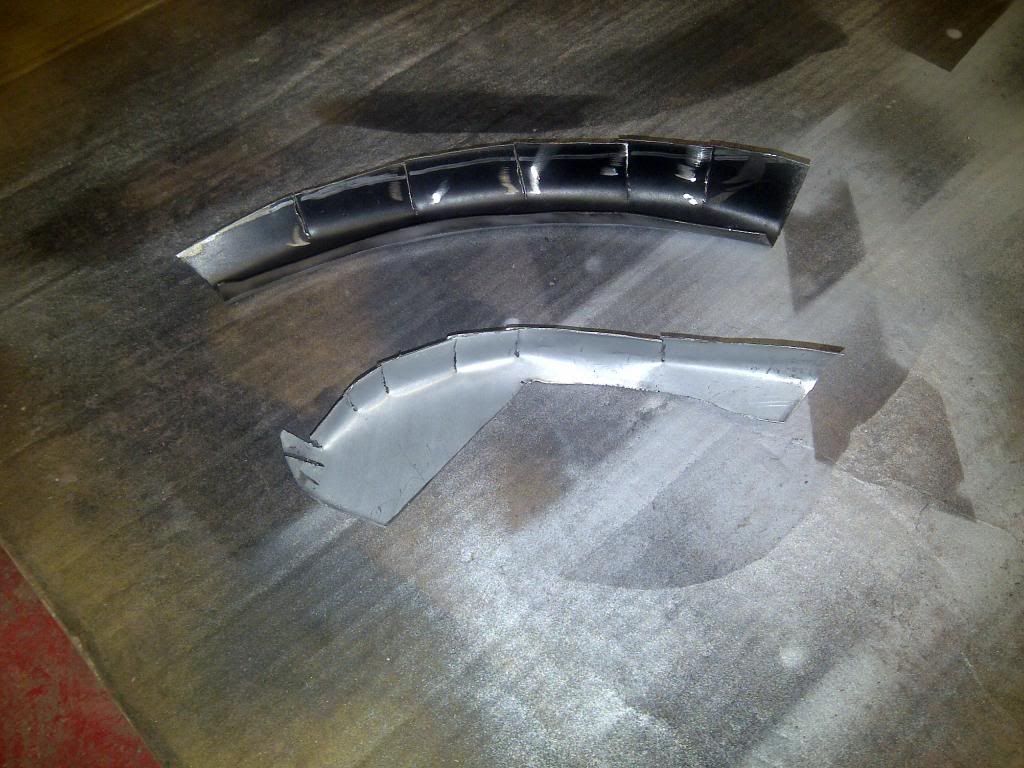
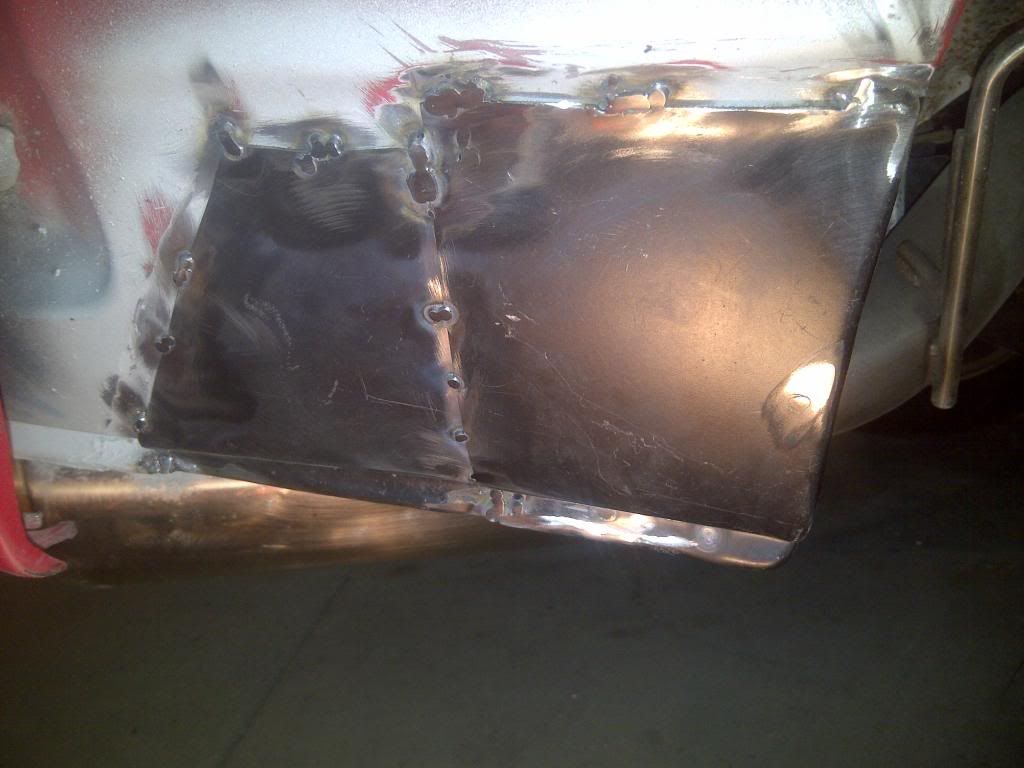
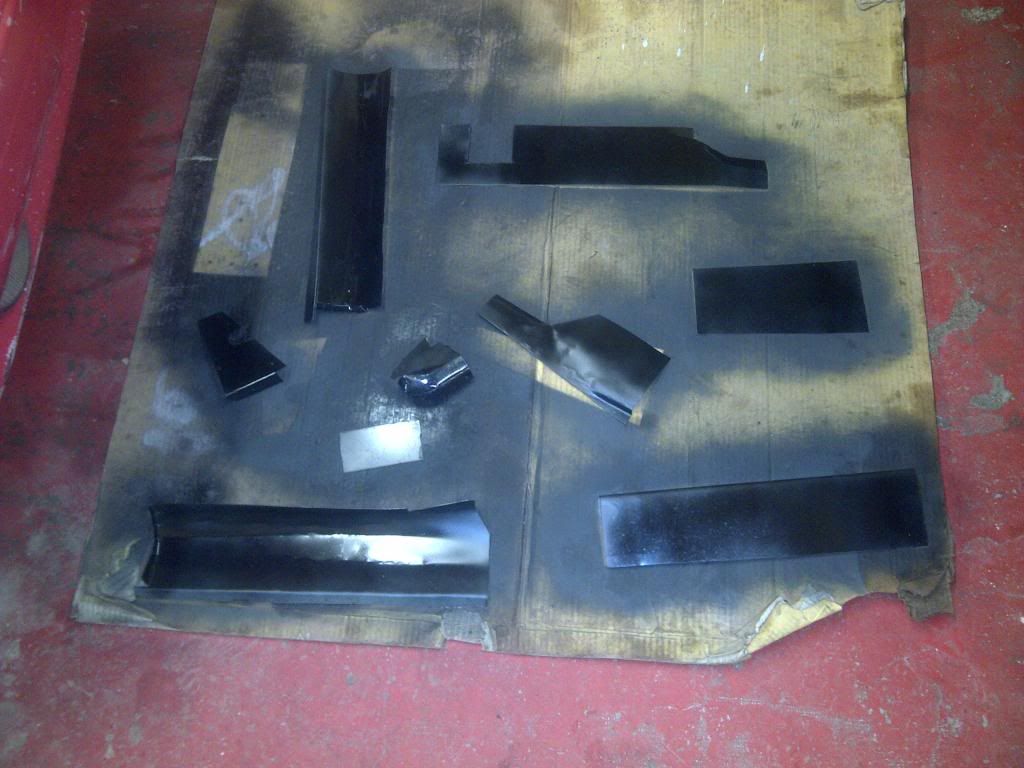
the black plates are cut from pre fabed fender arches that I bought along with new rocker panels to put on the car. I primed the back of the parts that I made from flat sheet metal.
IMG-20140329-00103_zps452816bd.jpg


Next post should have pics of some welding.
 

88gt4DE

Active member
Wow ... I remember that car. I hope when I pull mine all apart after I move I don't find the same. I have kept it out of the salt but who knows what It went through before me and I already know the drivers side was repaired in some sort of wreck ...
 

TRDTurko

New member
Ok got some welding done! :D Now I admit that I am not so great with a welder also, mostly because I haven't used one in several years and I am a bit rusty. hopefully I will get less rusty as the car car gets less rusty haha.

So hole in the floor welded up (welds super ugly but strong)
IMG-20140405-00105_zpscff65058.jpg

IMG-20140408-00108_zps369e5ee2.jpg

I will make that prettier went I pull the carpet for next season. gotta leave it in this season so dont care how it looks right now. :p

floor lip all there again (mostly anyway lol)
IMG-20140408-00109_zps47576892.jpg


and we have an inner rocker! spent sooo much time fabing all this
IMG-20140411-00110_zps4c434712.jpg

IMG-20140411-00111_zpsd6f83278.jpg

the bottom is plug welded to the floor lip about every 2 inches then ground smooth for mating to the outer rocker.

couple other pieces tacked into place
IMG-20140411-00112_zpsd147da30.jpg

IMG-20140411-00113_zpsa881d8b9.jpg


more coming soon
 

TRDTurko

New member
I've been busy...

support piece welded in
IMG-20140414-00117_zps12e3ca9a.jpg


I know this is ugly but it just needs to be strong and all there for the safety inspection. I'm not doing a full restore on a race car with a body kit which will cover up most of the work. Anything above the body kit line will get more tlc.
IMG-20140412-00116_zps738d049e.jpg

IMG-20140412-00115_zps181b1927.jpg


outer rocker welded on! well at least the top seam anyway
IMG-20140414-00125_zpsf5de83e1.jpg


I started gluing seams that I didn't want to fully weld with structural adhesive from Eastwood.
IMG-20140414-00118_zpsfb5912d4.jpg

IMG-20140414-00122_zpsd9fe3e11.jpg

The advantage of this stuff is that you don't have to use as much bondo :)

the down side to cheep prefabbed replacement panels... doesn't exactly match the factory lip at the bottom...
IMG-20140414-00123_zpsc2bbc33c.jpg

had to use a jack and a piece of 2x4 to put it in its place. then the center had a two inch gap so I had to do this all the way along to pull it together.
IMG-20140415-00127_zpsd213a784.jpg


fabed inner wheel well patches
IMG-20140415-00126_zps5f4f3717.jpg


All that's left on the driver side is gluing those in and the bottom of the rocker and then I get to do the passenger side which is at least 50% easier.
 

TRDTurko

New member
Driver Side is DONE!

Rocker all sealed up
IMG-20140419-00131_zpsf5a7e691.jpg

IMG-20140419-00132_zps6e00b27e.jpg

IMG-20140419-00133_zps45c4e497.jpg


inner wheel well sealed off
IMG-20140419-00135_zpse0d802af.jpg

IMG-20140419-00137_zps72bd794b.jpg


now just needs a bit of bondo on the exposed areas above the body kit line and some black primer.

Also started the passenger side


"small" hole in inner rocker covered
IMG-20140417-00130_zps7690aa12.jpg


and inner wheel well rebuilt. 100 times easier than the drivers side!
IMG-20140417-00128_zps7798cd96.jpg


everything else is fabed for the passenger side, just gotta stick it all on.
 

TRDTurko

New member
Welding is done!

rear section turned out nicer than the driver side.
IMG-20140424-00139_zpsf11675b4.jpg


inner support done. had to add a couple small plates because the metal near the front was super thin and i was just blasting holes with the welder.
IMG-20140426-00140_zps799654b7.jpg


IMG-20140426-00141_zps28f5b1b4.jpg


I decided to plug weld the entire rocker on this side. a bit more prep work but its worth it.
IMG-20140426-00142_zps95b607ec.jpg


All that is left is to seal the passenger side then bondo and primer.
 

TRDTurko

New member
Sealed and first round of bondo done

IMG-20140428-00151_zps7b98a02f.jpg

IMG-20140428-00152_zps1b6db202.jpg


put the car outside for a bit for a wide shot of the progress
IMG-20140428-00150_zps2ffeb8a9.jpg


I have Brand new quarter panels for it, those will go on after I pull the engine to fix the brake lines and add the parts to help it last the season.
 

TRDTurko

New member
soarer.jzz30":2moa4ly3 said:
You must really love this car, none of that was easy I know, great work!!

Well can't say I have much attachment to this car in particular since I haven't had it very long and haven't really been able to drive it since its had a leaking brake line the whole time I've had it. BUT I do love these cars. My very first car was a 88 GTS. Been a fan ever since and I just can't let one die if I can save it so I am.
 

TRDTurko

New member
Body work is done!

final bondo work finished off with glazing putty:
IMG-20140429-00154_zps5df6aa3c.jpg

IMG-20140429-00153_zps150cd906.jpg


primed
IMG-20140429-00156_zps7133e11b.jpg

IMG-20140429-00155_zps07711ac3.jpg


the under body needs a little bit of attention still but that will happen at the same time as the brake lines get redone. Also once I get the 17x9 wheels and the safety done I will have to flare the fenders. Appearance is last on the list right now so body kit and full priming of the car to black will happen once its fully functional again.
 

TRDTurko

New member
You guys must have thought I fell off the face of the planet lol but actually I was just postponed by renos to our new house. But I now that I am done, the car is getting attention again...

Went across the border and picked up all my parts! :D
IMG-20140509-00162_zps79368101.jpg


My wheels and tires are here too! NS Series 17x9 +15 offset and 255 BFG Rivals 8)
IMG-20140512-00167_zps717e1ab0.jpg

IMG-20140512-00168_zpsa298414d.jpg

IMG-20140511-00166_zpsddf22b68.jpg


so Step 2! Operation helmet room

aka new seat brackets to relocate the sliders between the humps on the floor and lower the seat so that I don't have to slouch in my seat to avoid my helmet banging into the sun roof support while racing.
IMG-20140508-00161_zps23c6bf39.jpg

IMG-20140510-00165_zps8ad58693.jpg

IMG-20140603-00176_zps3b430d29.jpg

IMG-20140603-00177_zps4f43d5a7.jpg

IMG-20140607-00178_zps3a4b4716.jpg

had to move the brackets over a bit because with them the middle the seat is too far to the left and touches the door.
IMG-20140628-00189_zpsa4c100cf.jpg

now its pretty much as close to the center console as I could get it to get my head as much in the sun roof as possible. Gained 1.25" of helmet room by doing this.
 

TRDTurko

New member
well its 6am and can't sleep thinking of all the stuff that has to get done TODAY as I am booked for a pro solo driving school tomorrow at 8 am, so figured I might as well update this.

Stage 3: Coilover install
here we go... built my coilovers. universal Mooked top plates, camber/caster adjustable, drilled and stock mounting bolts pressed in.
IMG-20140703-00202_zps38902d41.jpg


had to slot the mounting holes on the frame a bit inward since the plates are slightly smaller than stock
IMG-20140703-00203_zpse65a7f83.jpg


first dry fit of full assembly, used the stock spring perch location on the fronts, just cut off the excess.
IMG-20140703-00205_zpscb2862a0.jpg


adjusted one slot over and back, have to get an alignment done to see how much camber and caster this will give me, might have to go more but this looks like alot already
IMG-20140707-00209_zps215f055b.jpg


test fitting the rears. completely cut of the spring perches and tac'ed the new perch in place on a guess, turned out to be just above the tire where I wanted it. top caster adjustable plates came round so they were cut to fit on three sides.
IMG-20140708-00210_zpsf91c3c29.jpg


test fit of my new wheels on rear (17x9 +15)
IMG-20140708-00212_zps7c4a0493.jpg

as you can see there is barely any room to the strut, just enough for the tire lol
IMG-20140708-00216_zpsd7a5effd.jpg

and they will stick out a bit... yay flares! :D
IMG-20140708-00219_zpseee6d662.jpg


rear top plates
IMG-20140708-00221_zps2103f622.jpg


since the rear top plates are basically a hole into the interior I tried giving them a rain coat from a rubber glove but it just split so I went a bit more domestic, can anyone guess what they are? hehe
IMG-20140712-00232_zps208903bb.jpg

IMG-20140714-00236_zpsff4ef012.jpg


and the fronts with an improvised dust boot/bump stop. I'll get real boots later but couldn't wait for them. the yellow bump stops were too big and at the lowest spring setting there would only be 1" of travel with them in so I used a piece of sump hose lol. it only compresses so much so it acts as a bump stop.
IMG-20140715-00239_zps167afaaa.jpg


new 92-93 brakes! dust shields almost disappear, have to be very careful with clearance. pads are ebc yellow stuff
IMG-20140708-00225_zps5f224b90.jpg

IMG-20140716-00240_zps38c866de.jpg


before I pulled the engine I wanted to check a few things so I put on my fancy ebay manifold and stuck the 205 intercooler on top and :bangshead: hood wont close. at this point pretty much the engine is ready to drop.
IMG-20140718-00244_zps45e30596.jpg

so on goes the stock 165 manifold and ct26 turbo. I am getting a 185 stock manifold and turbo to match the engine from someone locally when I get the cash since the ct20b that I bought seems forever stuck in Texas.
IMG-20140720-00253_zps024db79b.jpg


so I made a block off plate for my new aluminum baffled oil pan's oil sensor and installed the 12an oil return fitting from KO racing. filled it with water to check for leaks and the outside was bone dry so lets hope everything stays that way under pressure.
IMG-20140720-00245_zpsa1531db4.jpg

IMG-20140720-00246_zps264aa0ee.jpg


ordered this 3" pipe and adapted the 205 bpv to fit into it. I drilled and tapped a fitting into the other side for the hose that goes to the intake.
IMG-20140720-00250_zpsf5f71b77.jpg


Stage 4: Engine Dropping
ok time for mr engine to take the plunge!
IMG-20140721-00258_zps72e7550b.jpg

IMG-20140721-00260_zps18080fe0.jpg


wohoo such a relief to get that out lol. odd thing with this engine is that the top part of the egr was attached to the manifold but there was no place on the head for the bottom part to bolt to... thinking jdm block with us manifold? anyway I put a really nice block off plate that actually has an o ring installed in its place and tried out my new intercooler. had to do some chopping of the output tube on the intercooler and the gorgeous throttle body inlet I got from KO racing to make them short enough to fit together when the intercooler needs to sit.
IMG-20140721-00262_zps1986b278.jpg


Stage 5: Abs Removal and fuel lines
and now the part I have been dreading, redoing the fuel and brake lines, so here is a before pic with a lovely stainless clutch line from speedsource.
IMG-20140721-00263_zpsedb3d898.jpg
 

TRDTurko

New member
Time to update. I obviously missed the school since the car is still on jack stands in my shop but I am getting ahead of myself.

Brake and fuel lines re-plumbed. fuel filter is now attached instead of floating where there was supposed to be a bracket. front brake lines are t'd off and rear line goes through a aftermarket proportioning valve. I may run the line right to the valve and do away with the stock fittings altogether in the future since the valve takes the larger line size with adapters. I will probably move the front t higher as well to make it more accessible. I still have to take pics of the under side and rear of the car. Most of the lines now run down the middle instead of over to the side skirt for some dumb reason. I left the fuel return and vent lines stock since the were the only two in good shape. At the back of the car I was not able to get the abs brick out yet since the bolts holding it in are directly above the rear crossmember and covered in under coating. So I simply bypassed the brick and t'd off the lines to the rear calipers. I'll let you know how this system works.
IMG-20140725-00276_zpsb2764f7b.jpg


Step 6: engine re-install and goodies!
With that taken care of and power steering lines and pump in the car after being absent for a few years, the engine went back in. I did not open up the engine to put in new oil and water pumps ect because of time constraints and doubt they need to be done at this point anyway. So just new plugs and the 160 degree trd thermostat atm. Didn't take any pics since its just reverse of coming out. Anyway, got a stock 185 turbo, manifold and custom back half 2.5" exhaust from a local guy for $300 which I thought was a screaming deal. So I popped the new pan and turbo on and installed the stainless oil and coolant lines and a turbo blanket.
IMG-20140805-00297_zpsa3c96b75.jpg

and also wrapped my ebay dp and installed that
IMG-20140805-00298_zps89662acf.jpg

after that I poped on my intake pipe and tried to figure out how to plumb in the 205 intercooler since it sits about 1" to the right on a 185. ended up cutting off the turbo pipe.
IMG-20140813-00302_zps75c7a9b9.jpg

Ended up in two sections for both the turbo pipe and the bpv and looks like crap but I'm pretty sure I am going to a front mount next season anyway so just has to function for now.
IMG-20140815-00308_zps4b107b1b.jpg

You can also see in this pick that I had to reroute the clutch line because it was leaking at the stock fitting behind the engine. Stupidly I rushed putting the engine in before testing the brake lines because of time and I had a buddy helping for the specific reason of putting the engine in. Because of the location I had to use a long screw driver and a hammer to break the hard line and chisel open the fitting to get it out and move the hard line over to under the brake cylinder where it is much more accessible. And of course the brake lines leaked at the stock fitting as well as the proportioning valve because I used the wrong fittings so I had to put some adapters into the valve and kinda pull the front t from behind the engine to tighten that. I thought I had it all done but there was still a leak somewhere and I found bubbles coming from the bottom of the cylinder where it meets the booster. turned out the bottom bolt was stripped and two attempts to re-thread the bolt coming out of the booster failed becuase the material was too weak. so I ended up grinding off the bolt and putting a self taping screw in to create a good seal. :bangshead: All the leaks probably cost me 10 hours to resolve when taking half an hour to test before putting the engine in would have saved so much headache and time. #lessonlearned lol

ok back to the fun stuff. Installed a nice overflow can for the rad. which of course leaked out of the sight tube when I put coolant in. quickly fixed by pushing the tube in properly.
IMG-20140818-00310_zps159bf7f2.jpg


oil catch can with breather
IMG-20140818-00311_zps301d6ed8.jpg


and manual boost controler.
IMG-20140818-00313_zps203dce03.jpg


threw in the alternator, put a thermal sock on the oil filter and made a heat shield from header wrap and heat tape then added the rest of the fluids. Just need to install exhaust and she is ready to fire up.
IMG-20140819-00316_zpsf6131a9c.jpg
 

TRDTurko

New member
ok exhaust is in so here are the promised pics of the underside
20140911_164027_zpsquroyuet.jpg

I goofed a bit bending the rear section of fuel line so I just connected it with a piece of rubber line to get the car running until I make a new hard line later. The shiny new flange is where my old 2.5" exhaust from my black car meets the "new" 2.5" I got with the turbo. His front section still had a stock bend in it so I used mine. my old rear section looked like a high school shop project with am actual 90 angle weld in it instead of a bend.
20140911_164018_zpsmjkmruqh.jpg

Next year the 3" is going back on and this exhaust is going back onto my black car so it will get a proper flange welded on and the cannon style muffler will get replaced with my old dual tip which I like the look and sound of much better.

here you can see where the old and new lines diverge
20140911_164008_zpsft7acwma.jpg

Its hard to see in this pic but the cat is very close to the drive shaft and might actually be rubbing a bit. I didn't have that issue in the other car so maybe its the placement of the dp on the 2nd gen engine that is causing the clearance issues. The 3" flex pipe was rubbing on the u joint so I will have to address that at some point.
20140911_164049_zpshyicwfaq.jpg


I finally got my clear cam cover in so I installed that and I changed the header heat shield because the tape I used couldn't handle the heat and started melting after the running the car for a few minutes.
20140912_165329_zpszrv23aba.jpg


and I installed a few gauges into the pillar pod I have had sitting around for ever. the car used to have one but did not come with the car when I bought it so it was lucky I bought one for my other car years ago. Top one is wide band. I have a egt for the middle hole but forgot to drill and tap the manifold before putting it on the engine so I will install that on next years set up.
20140912_165202_zpspjx9vhdk.jpg
 

TRDTurko

New member
break issues urrrggh! At this point the car should be drivable but of course my new braking system has issues. :bangshead:
Almost everything on the car is new except for the booster and the rear calipers which I took off my other car that was sitting for years but were not causing issues when the car was parked.
I found 3 more leaks and fixed those and the brakes seemed to bleed fine with all the air finally seeming to be out of the system and no more leaks that I can see but the pedal is still spongy and you only get pressure if you pump but then it goes away again right away. the seal between the master cylinder and the booster was still leaking so I put more gasket maker on that and it seems to be sealed. I can't hear the tell tale hiss anymore after the engine is shut off anyway. While I was waiting for that to dry I set the ride height so that there is about an inch gap above the tires and set the toe using the string method.
So the only thing I can think to try now is different rear calipers and see if those are causing the problem unless there is a leak I have not found yet.

Any other suggestions?
 

TRDTurko

New member
I know I have been gone a long time but finally back for an update!

first off, brakes... I figured out my issue was fairly simple and kind of a dumb mistake. I finally realized that the bleeders for the front calipers were facing downward and I had them on the the opposite side they should be on. Once I got them switched left and right and the bleeders facing up, they bleed fine and now the brakes work great.

Once I figured that out I started on the body again, put the front end back together and started making wide body front fenders to fit over my 17x9s.

20141006_220646_zpspsos8odp.jpg

20141006_220715_zpsi4o3ecbh.jpg

20141006_220431_zpsgfvy1hm2.jpg


the car now sits like this
20141009_191626_zpshq1dj1ic.jpg


I tried going for a drive with my sports car club last fall and didn't even make it to the meet up spot before steam started coming from the hood. Of course it was the HFH. Can't believe I forgot to change that while the engine was out. That stupid stock oil cooler is getting replaced by a rad style cooler next year so I can eliminate that damn hose.

I took it to a AutoX test and tune at the beginning of summer and found some issues that need to be addressed. Biggest was I had damaged the wiring to the fans when I took the rad out to fix the hfh. Next was a big dead spot in the steering that made going through slaloms interesting as the wheel would kind of jerk in quick direction changes as you turned it through center. I know the tie rods and ball joints were not in great shape so I ordered some new ones and hopefully that will help. If I still don't like the steering after I might have to upgrade to a more modern rack. Also I have at least one rear wheel bearing that needs to be replaced and I ordered two of those with seals. Lastly I have concluded my front coil overs are in major need of some helper springs as any small bump makes a loud crashing sound from the front suspension. I measured how much slack there was in the springs at full droop and there is a full two inches that the spring can move when the suspension is unloaded. So I ordered some 250lb Swift assist springs to compliment my 550lb front springs. I am hoping that they will help soften the ride on the street a bit and should be completely compressed during hard cornering so that the main springs will be working. Hopefully the inch of adjustment I have left on my front perches will be enough so that I will not have to lower the perch with the extra 2 inches of spring. But that should be mostly compressed so I think it will be ok. I will take pics when I install all this.
 

TRDTurko

New member
VERY sad update!

So in order for my wife and I to buy a house I needed to sell the car. So I sold it to my buddy Quentin after taking off as many of my race parts as possible in the short time that we had. Sadly only a couple months later the car was hit while it was sitting on the side of the highway.

file.php


:cry:
 
Top