Nitro Alltrac's '92 185

TheNubkins

New member
Nitro_Alltrac":25wenh93 said:
Thanks for the info on the Tiens. I don't really have any track options close to me here, so most of my driving is on twisty mountian and back roads. Something good and firm but not too stiff, race car stiff, will be what I'm looking for. These could be an option.

If that is what most of your driving is on then I definately recommend the Teins. There are a few other good options out there as well(from what I've read when I did some research back when I was looking at upgrading the suspension). I wish I lived near a lot of mountain twisties.
 

Nitro_Alltrac

New member
Well, I am off this week for the summer plant shutdown and tomorrow is my day to work on the car. I also have put plugs and new wires on my truck, but that shouldn't take too long. Then on to the All Trac!

I pulled the intercooler off today and cleaned it out. It looks like it came out pretty good. I just gave it the final rinse and I'm letting it dry out now. Tomorrow, I am going to finally install my MBC that I picked up last year. I'm planning on going to 12 PSI. The car currently boosts to 9, so I thought I would start by going to 12. I'm not sure with the JDM ECU if I am going to hit the fuel cut out at 12. This ECU is out of an early 90. I have to get a FCD, or make one, so I can dial the fuel cutoff up some. I would like to get to 14 or 15 psi. I think that will be enough for me, at least for now.

I also want to try and install my small catch tank. I picked up one of the moisture traps from Home Depot, like was shown in the one post. I think this will help as I have oil film in the intake hosing. This should take care of that problem.

I'm also going to install the kick panel I got from Terracar and see what I can do about closing the gaping hole beneath the radio. I'm thinking about making a plate to put over it for now. I'm not sure what I'm going to do yet though. I'm missing the cubby and the cup holder.

I will post up tomorrow how everything goes. I've got a couple of house projects to do as well this week and plan on going to shoot my new gun again this week, so I want to get as much done to the car tomorrow as possible.
 

darthripley

Moderator
Mike, fwiw fuel cut on our jdm ecu is ~15psi & it's for a 90-91 - we didn't feel like trying to re-pin anything so it is a direct plug in for Vadar.

hopefully yours will be the same.
 

Nitro_Alltrac

New member
Thanks for the info Keri! I wasn't sure what it was exactly. I thought I had read somewhere that the 90's had a fuel cut at about 12 or 13. I could be mistaken or that could be for the USDM ECU. I'm going to take it slow and easy raising the boost. I'm not going to go past 12 psi right now, so hopefully I won't hit the fuel cut. I'll let you know.
 

Nitro_Alltrac

New member
Well things went good today. It took less than an hour to due the tune up on my truck and now it runs like new. The work on the All Trac went really well too.

I got the boost controller installed without any problem. I did go and get new hose to replace the one that was going from the turbo housing to the waste gate actuator. It was really hard and the end on the actuator was cracked pretty bad. I installed the MBC per Gary's instructions (put it between the compressor housing the actuator.) It works great. I tuned it just a little and I'm getting 12 psi with no problem.

It seems like the car boosts quicker and smoother now. This is probably a combination of the new vacuum lines and the cleaning of the intercooler. I wouldn't think the MBC would have anything to do with that. The car also idles now at a little lower vacuum level. It had always idled with about 18.5 lbs of vacuum. Now it is showing 20. I think I might have had a minor vacuum leak that gotten taken care of during the process.

I also got the kick panel installed today as well. It looks a lot better now with that it place. I like not seeing the fuse box and the wiring harnesses. I didn't get anything done with the opening under radio though. I had to go to the DMV this afternoon to get my license renewed and that took longer than expected. I still have time this week though to work on that. I would really like to do something with my seats. The driver's seat is really starting to bug me.
 

Nitro_Alltrac

New member
Been a while since I last updated. We're thinking about buying another house so I have been busting my a$$ working on this one finishing up little projects so I haven't had a lot of time to work on the car.

I replaced a couple of the tires as one had worn really bad on the inside due a bad bearing. The other one, it turns out, had been bad from day one. The guy at the tire shop had originally said that it was a bad wheel. We had put it on the back of the car with no real problems. After having to rotate it due to the bearing problem, it became an issue on the front. I replaced the wheel first and then found out it was the tire . Luckily the wheel only cost me $25. But everything there is good now.

I bought a 25' piece of 8GA copper wire and I'm in the process of making some ground cables. So far I've replaced the little one that goes from the altenator bracket to the right strut tower and added one from the back of the manifold to the fire wall. I've haven't had a chance to drive it much yet to see if those two make a difference. Can't hurt though. I'm going to add a couple of more as I get time and figure out where to put them.
 

Nitro_Alltrac

New member
Well, I finally had a little time today to do a few things to the car. Mostly maintenance items that the weather has not permitted for a while. I got the oil changed and put in new spark plugs. I was going to do a full tune up but nobody local has the wires and distributor cap, so I'm going to order them.

Project wise, I finally got the new seat I picked up back in October installed today. Here are a few pics of the process. This also gave me an excuse to try out the new camera I bought last night! :D

Here's my original, tired seat. I'm sure this looks familar to a lot of you.

P1010003.jpg

P1010004.jpg


This was a profitable job after all. 84 cents, a good 10 amp fuse and a french fry! Saved money on lunch.

P1010005.jpg


I managed to break the bezel around the gas door release. The second screw on the floor had the head rounded out and instead of getting out the right way, I thought I might be able to pull the bezel up enough to get to the bought. Bad idea.

P1010006.jpg


Here's the new seat once it was in. It was out of a GTS and the guy at the salvage yard said the interior pieces had been there about 10 years. It's in really good shape, especially compared to the old seat. I'm still pumping moisturizer into it to soften it up some more.

P1010007.jpg


P1010008.jpg


That's it for now. I've got some more mechanical maintenance to take care of before the Dragon run next month. But after that, I hope to be able to start doing some cosmetic work to it. I'll just have to see how the cash part works out.
 

CMS-GT4

Active member
The new seats look great.

If you got the money I would really look into the ground control for your suspension. Now that I have seen that blistein makes struts for the Camry that should fit in the 185 housing, I would almost get those and get them rebuilt to the specs you prefer then get a spring rate you like. The only real issue is your car will be down while you get the sleeves welded on the struts.
 

Nitro_Alltrac

New member
Thanks Josh.

I'll have to look into that suspension option. I'd like to do something with it but haven't yet decided what. That sounds like a very good possible choice.
 

darthripley

Moderator
the "new" seat looks really nice Mike.
love the spare change + the dead french fry lol

we found 95 cents + sunflower seeds in Vadar under the carpet haha
 

Nitro_Alltrac

New member
Thanks. I was really pleased with it. I got it from a salvage yard in Cincinnati (N. Kentucky actually). They had the passenger seat and the rear seat as well. From what I could see, there were at least as good as the driver seat. I worried all the way out (3 hour drive) that it would be junk. Needless to say, I was pleasantly surprised.
 

Nitro_Alltrac

New member
Just a quick update. We're in the process of remodeling our kitchen so I have had minimal time to work on the car other than maintenance. I have gotten to do a couple of things to it over the past month. I finally got the door speakers hooked back up. That has made a difference in the way the stereo sounds.

Today I installed at rear strut tower bar. It was very easy and took only about 30 minutes. I've got to find something to cover the ends and the holes I had to cut in the rear panels. The plastic cuts very easy. Too easy in one case as I ended up cutting about 4 inches too far while cutting the second hole.

I bought the bar from a member over Celicatech. I'm pretty sure that it's an Aspec Honda Accord bar but he modified the mounting plates to bolt up to the Celica. It may not be as heavy as some of the others out there but the price as right and it will do for now. If I like how it performs, I'll move up to a heavier bar later.

After cutting the holes in the trim panels, the mounts dropped right in place and bolted up fine. I haven't driven the car yet since I got the bar in place. I'm curious as to how much difference it is going to make.

Here are a some pictures of the install and the of the bar in place. They're a little big but they show some detail. Overall, this one of the easiest things I done to my car.

P1010151.jpg

P1010152.jpg

P1010153.jpg

P1010155.jpg
 

RedCelicaTRD

Moderator
When I put one in my car I cut a circle opening in the plastic. I then sliced some rubber vacuum hose down one side and slid it over the edges of the plastic. It made a pretty good looking "trim" to help clean up the hole. Might want to give that a try and see how it works.
 

Autobot

New member
The ACE Engineering rear strut bar I have came with rubber trim for the opening in the plastic. Definitely would look cleaner. :wink:
 

Wicked Toys

New member
Love the new seats Mike, and for the bar you'll feel the difference I did with mine.

As for the hole I cut a circle as well and used soft black felt to cover the edges.

GT4Trunk2.jpg
 

gtfour77

New member
Looking great Mike!!! We need to meet soon, it's a shame we live 10 miles from each other, own an alltrac and never met... :shock:
 

Nitro_Alltrac

New member
Yea Martin, we've got to meet. I really want to check out what you've done with your car. Once I get the kitchecn renovation project done in a few weeks I think the boss is going to give me some time off!
 

Nitro_Alltrac

New member
Ok, I bought my paint on Friday and things are a go. Those of you that have had the "pleasure" of seeing my beast know that it is a couple three shades of red, grey hood and black front bumper.

I had initial planned just to paint the bumper and the hood but I got thinking that since I was going that far, go ahead and try to do the whole thing. There wasn't much body work to do a dent in the quarter panel where some jackass got his head ran into while the car was in my son's posession, a dent in the hood and some goofy body work in the back where a previous owner had removed the spoiler, the antenna and the wiper, why I don't know.

So far I've fixed the dent in the quarter, worked on smoothing up the right side of the hatch and fixed the dent in the hood. Today I sanded the hood and the headlight covers and primed everything. I also found another small dent in the back of the hood that I fixed as well.

Everything went pretty good other than the second can of primer ended up not being what I started with and has kind of jacked up the hood. I'm going to have to resand it and prime it again. I'm using quality rattle can primer as the old paint itself isn't that bad and I don't have any place to spray the primer with a gun while I'm working. Hopefully in a couple of weeks I'll be able to start shooting the color.

Here's some progress pictures.

P1010249.jpg

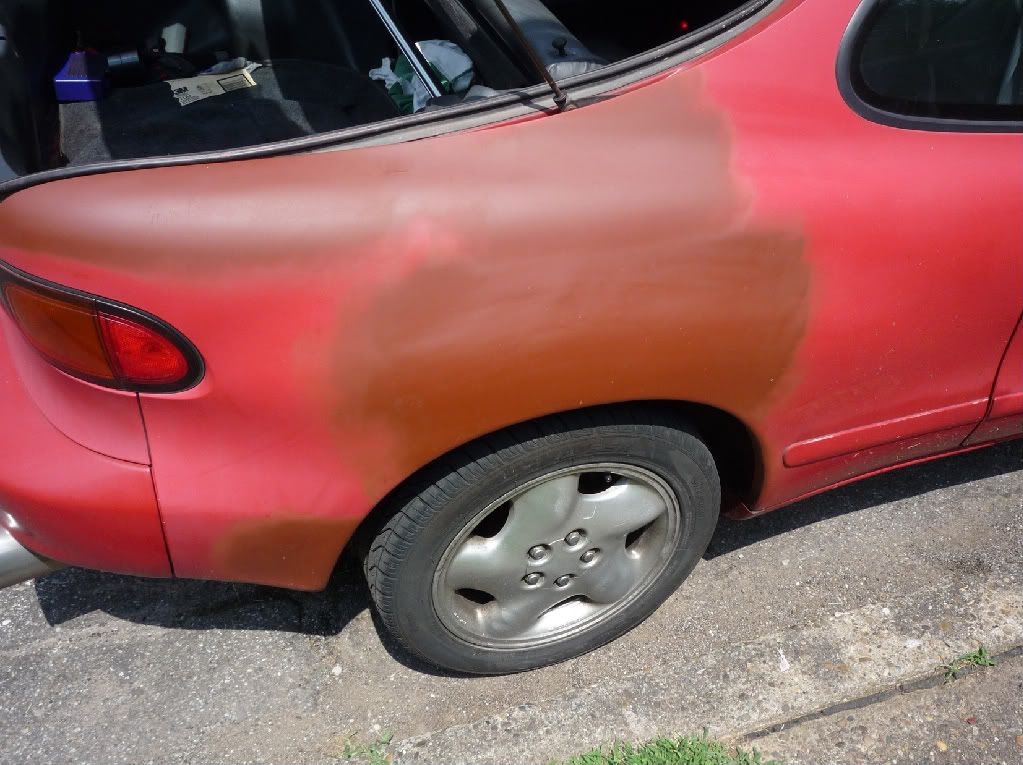
Quarter panel repair. I've got a little outward dent that I'm going to have to try and fix. If you've seen the car you know this was a pretty ugly spot on the car.

P1010250.jpg

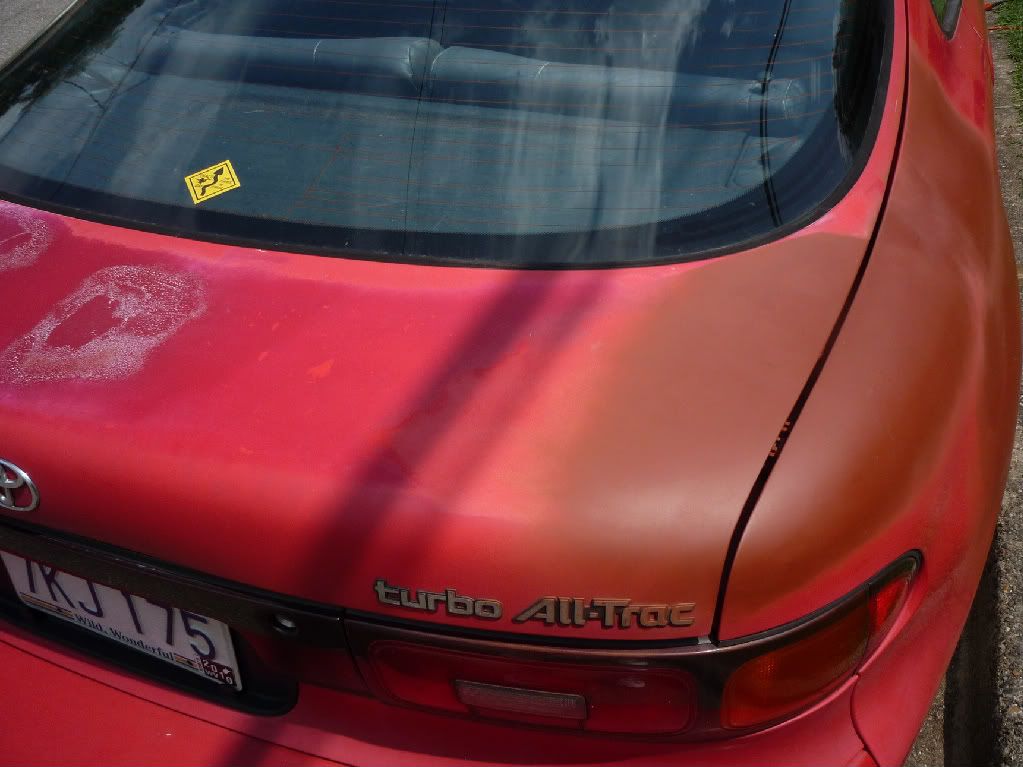
Right side of the hatch. I still have to finish it and the top of the left quarter.

P1010251.jpg

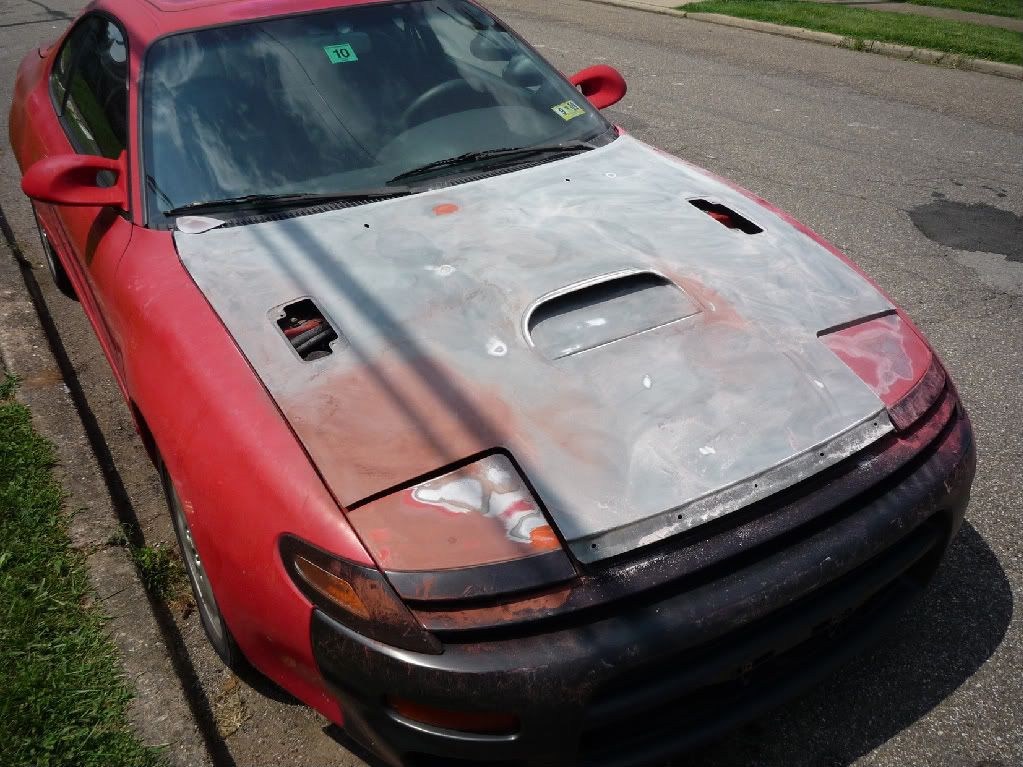
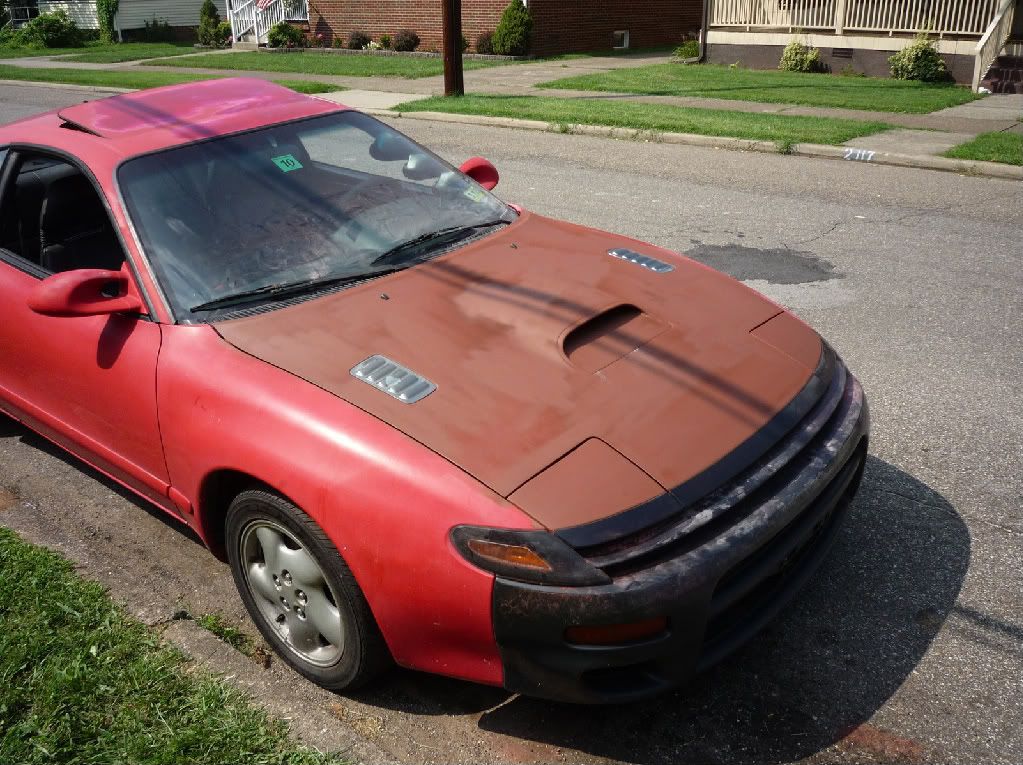
The hood in process.

P1010252.jpg

After priming. It looks better but I'm going to have to over it again before I paint. I'm going to have to get some paint stripper and do the hood vents. The paint is peeling and it would be almost impossible to sand those little bastards.

So, that's were I'm at as of today. I'll have more updates shortly, I hope.
 
Top