Project Phoenix 1990 Alltrac Paint Work Starts 3-5-16!!!

Lamont

New member
LegacyofDan":3crr1dwy said:
wow man, great great progress!! its been a while since i was last on here, so all i knew about was from what you told me through texts, good man! seriously good job!


Thanks Dan, I've been pretty busy :wink: :wink: . The car runs and drives great, but because of the ATA top mount intercooler I've been pretty limited to short runs. I did go for a fill-up at the Sunoco and noticed that all the way home I smelled gas :shock: :( :doh: . So once I got back to my house I checked the tank for leaks. I couldn't find any, but there was gas pooled on the lip of the tank near the filler neck. I also recalled when I put the tank back together, it was disassembled by the previous owner, that either the filler neck or the plate for the fuel send and return line had a very small bend that I thought sealed once I tightened all the screws. Well I guess it didn't :roll: :roll: now I have to drop the tank while it's full of gas to try and fix the seal :doh: :doh: :bangshead: . I'm really not looking forward to it at all. On a more positive note, I received my WTA intercooler setup yesterday :wink: :wink: , I will attempt to install everything this weekend 8) 8) . I also have been busy cleaning up a few other things as well. I cleaned out my ST185RC WTA intercooler :shock: :shock: and it was pretty dirty. I sanded, primed, and painted the windshield wiper arms and installed new blades :lol: :lol: . I know that's not much of an upgrade, but wait until you see the before and after shots :wink: :shock: . Thanks for following Project Phoenix guys, I will take plenty of pics of the WTA intercooler install this weekend. Here are a few pics of the windshield wipers and the intercooler cleaning progress:

wipersandgas.jpg


wipersandgas1.jpg


wipersandgas2.jpg


wipersandgas3.jpg


wipersandgas4.jpg


wipersandgas13.jpg


wipersandgas14.jpg


wipersandgas15.jpg


wipersandgas16.jpg


1st rinse
wipersandgas5.jpg


2nd rinse
wipersandgas6.jpg


3rd rinse
wipersandgas7.jpg


4th rinse
wipersandgas8.jpg


5th rinse
wipersandgas9.jpg


6th rinse
wipersandgas10.jpg


7th rinse
wipersandgas11.jpg


8th rinse
wipersandgas12.jpg
 

LegacyofDan

New member
HAHA i have done those rinse's before, they suck! i hate doing them! lol

and i remember how rusty those blades were, the pics dont do justice to the surface rust on them, but now, they look REALLY good, good job bro! keep up the good work!

haha and your not the only one whom has been busy, i have been taking pics for the write for my front calipers. and i doing the rear ones too at the same time.
should prove to be very helpful information for the community :)
 

Lamont

New member
Hey guys, I finally have my Water-To-Air intercooler installed. It took some trail and error, mostly error :doh: :doh: to get it running correctly. I decided to go with a ST185RC/CS intercooler with a custom heat exchanger, pump, and ice box from http://www.siliconeintakes.com :D :D . I had some serious trouble with getting everything to circulate properly, but found out that my problem was kinked hoses in spots that I couldn't see, and some that I could :twisted: :twisted: . The setup works really well, and it looks cool too 8) 8) . I also took a little spin roughly 30 miles today :shock: :shock: , and for the most part everything went really smooth. I took my first highway run today, but took it easy :roll: :roll: still teething here :lol: . I only got it up to 65-70ish, but it pulls really well, and I'm impressed with the acceleration :D :D . So let's get back to the not so smooth parts :| :| :x . After my little cruise I get back to my house and notice that something just spayed my windshield :doh: . I was worried because it looked like it came from under the hood. I then noticed the sweet smell of burning coolant :( :( . So I quickly parked the car and pop the hood to assess the damage, and there was a coolant geyser shooting roughly 4 feet from the top radiator hose :x :x . It looks like the clip/clamp cut into the hose and it was spraying coolant everywhere. All over my freshly mounted CS/RC intercooler too :rofl: :rofl: . I must say I was honestly relieved when I seen where the problem was :wink: :wink: . That's the first not so smooth occurrence. I also noticed that in my haste I forgot to secure the water line the runs through the front fender well, and the hose was nearly worn completely through :pissed: :crazy: :pissed: . If I had been driving any farther it would have ruptured the hose for sure :oops: :oops: . So I had to repair the hose by placing a hose splice in the line after cutting out the damaged area. Luckily I had enough hose to fix it :wink: :wink: . Also if you notice the pics of the cutouts for the water lines in the hatch area there is an extra hole :doh: :doh: :doh: , I thought I measured it right :shrug: :shrug: :cry: .So enough talk already :rofl: :rofl: here are some pictures of the water-to-air setup, and of my goofs :roll: :twisted: :oops: . Thanks for following Project Phoenix guys :D :D :

WTA.jpg


WTA1.jpg


WTA2.jpg


WTA3.jpg


WTA4.jpg


WTA5.jpg


WTA6.jpg


WTA7.jpg


WTA8.jpg


WTA9.jpg


WTA10.jpg


WTA11.jpg


WTA12.jpg


WTA13.jpg


WTA14.jpg


WTA15.jpg


WTA16.jpg


WTA17.jpg


WTA18.jpg


WTA19.jpg


WTA20.jpg


WTA21.jpg


WTA22.jpg


WTA23.jpg


WTA24.jpg


WTA25.jpg


WTA26.jpg


WTA27.jpg


WTA28.jpg


WTA29.jpg


WTA30.jpg


WTA31.jpg


WTA32.jpg


WTA33.jpg


WTA34.jpg


WTA35.jpg


WTA36.jpg


WTA37.jpg


WTA38.jpg


WTA39.jpg


WTA40.jpg


WTA41.jpg


WTA42.jpg


WTA43.jpg
 

Lamont

New member
Hey guys, I have temporarily removed the ice box and all the hoses that connected it to the WTA intercooler setup. I noticed that the pressure through the system was extremely low and the water didn't circulate that well :( :( . So after some rearranging of the hoses and removing the ice box the circulation through the intercooler and heat exchanger is great :D :D . Now I just need to figure out how to incorporate the ice box into the system and still have the same flow rate :roll: :shrug: :shrug: . I was thinking of either adding additional pumps to compensate for sending the water to and from the rear of the vehicle, or finding an industrial strength 12v pump that has enough power to work with a single pump :? :? . I'm not sure how I'll solve this issue, but with one Bosch pump I just don't have the power to move that much water :cry: :cry: . It does however flow very well without the ice box so that's how I'll leave it for now :) :) . I also have been on a couple nice drives and aside from the split radiator hose everything seems to work nicely 8) . I even drove to work today, without the usual ton of tools on the passenger seat :rofl: :rofl: . So I'm hoping to find an effective solution for incorporating the ice box back into the WTA setup without breaking the bank :roll: :roll: . Any suggestions guys :shrug: :shrug: ? Thanks for following Project Phoenix guys.
 

alltracshoak

Active member
how did you wire up the pump??straight to battery with a on/off switch?imsoon to be in the process of wiring a wta for a member
 

Lamont

New member
Hello alltracshoak, that is correct I used a fused wire from the positive battery terminal, and ran that to a switch on the shifter surround. I will be changing it though because it's not activated by the ignition, and it's just a matter of time that I forget to turn it on or off :oops: :oops: . So I will likely run it off the cigarette lighter with a relay so it powers up and down with the ignition 8) .
 

Lamont

New member
Summit Racing has this type of setup that might work for your application: http://www.summitracing.com/parts/SUM-890015/
I was considering using and just connecting it to the engine coolant temperature so it turns on and off with the engine temp, but I thought the coolant temp setting were too high due to me running a lower than stock thermostat :shrug: .
 

Lamont

New member
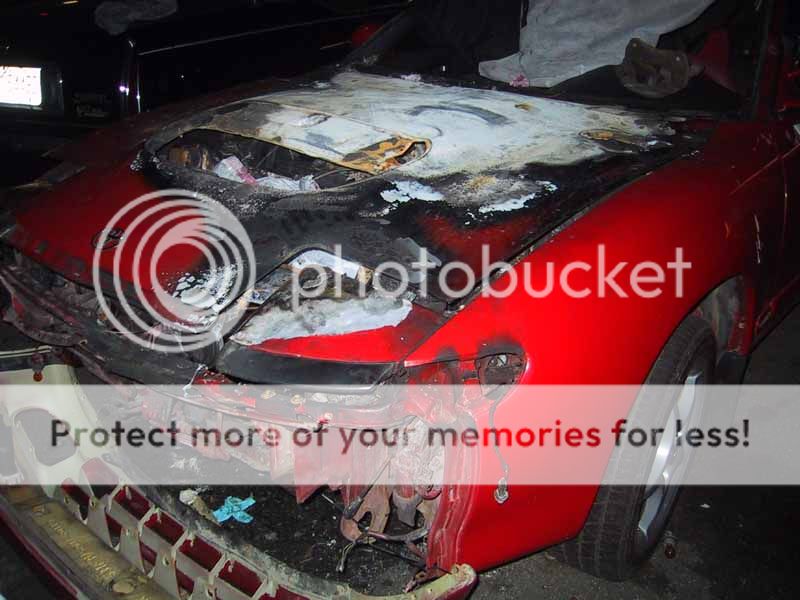
Hey guys I know it's been a while since my last update :roll: :roll: . I have been quite busy working on the car however. At the 8-29 MD. meet Phoenix developed a small oil leak that progressively got worse, more embarrassing and annoying than anything really :oops: :oops: . Every time I would stop at a red light you would just see a light stream of smoke coming from the hood vent :x :x . The oil leak was dripping on the mid-pipe and burning, it was quite smelly and made stop and go driving very annoying :p
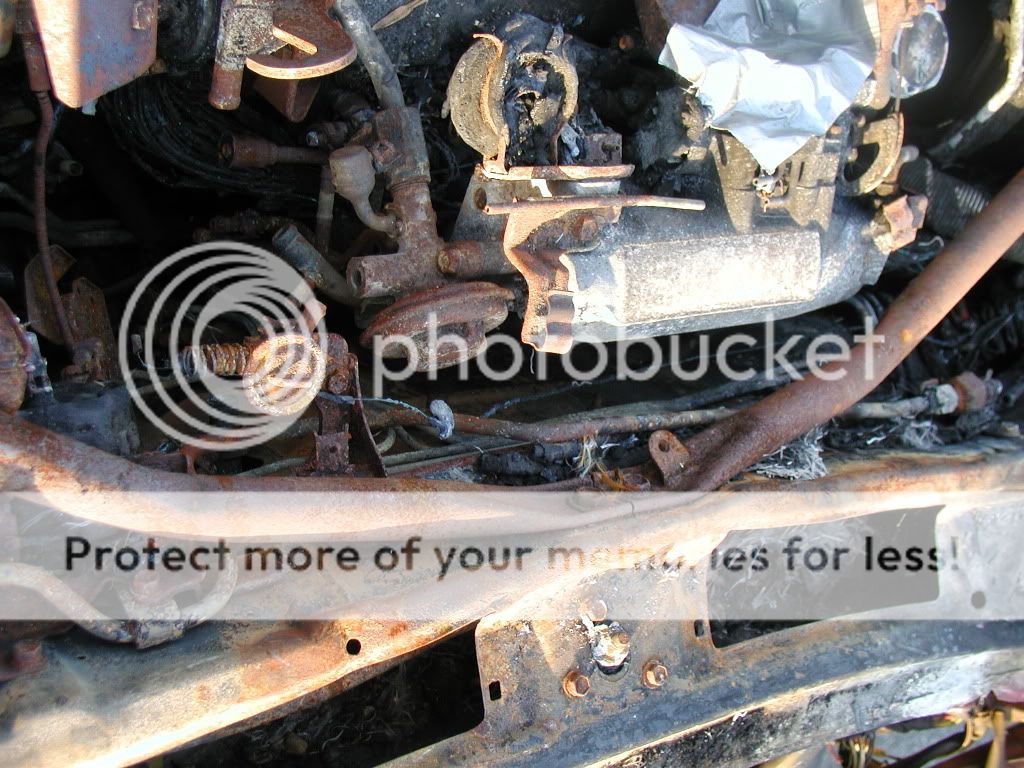
issed: . I at first thought the leak was coming from the oil pan seal, due to all the oil that was visible around and on the oil pan itself. So I went to my local Toyota dealership and forked over $20 for a tube of Black FIPG (Form In Place Gasket) it worked like a charm for sealing the oil pan :wink: , but that wasn't the cause of the oil leak at all :doh: :doh: . So I started to look around for other possible sources for this oil leak and remembered that my turbo seal set that I purchased came with two washers that go on the top and bottom of the large oil feed banjo bolt. While taking the entire turbo setup off the car to change these two washers, which by the way is the only way to gain access to the oil feed line banjo bolt :cry: :cry: 
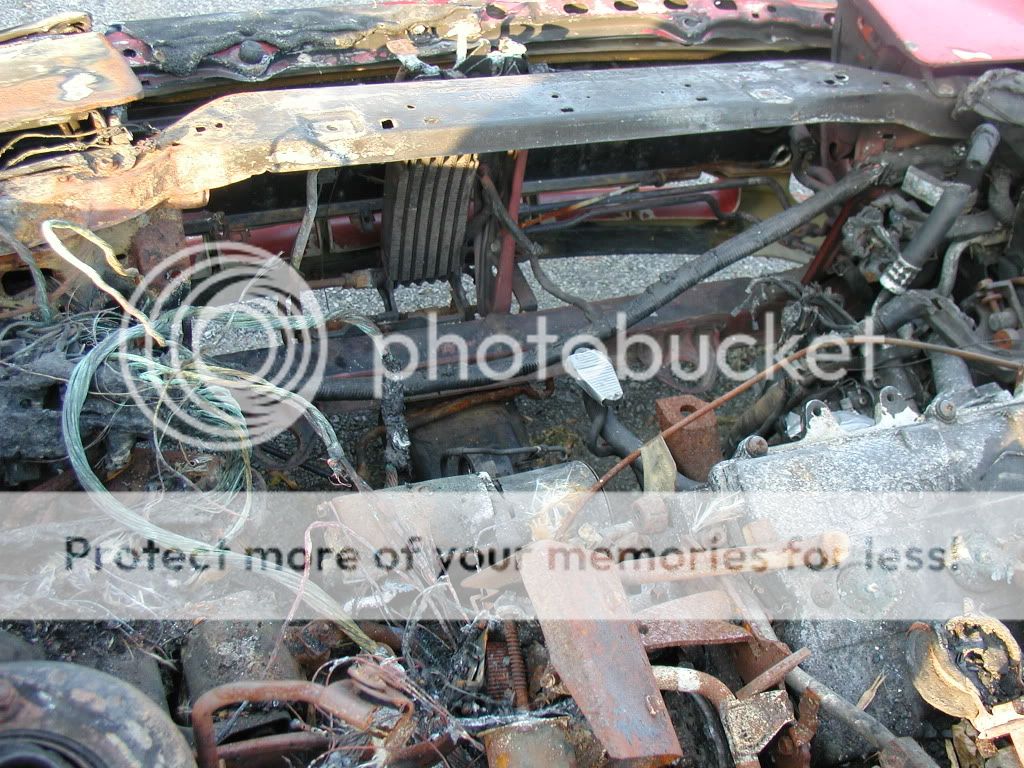
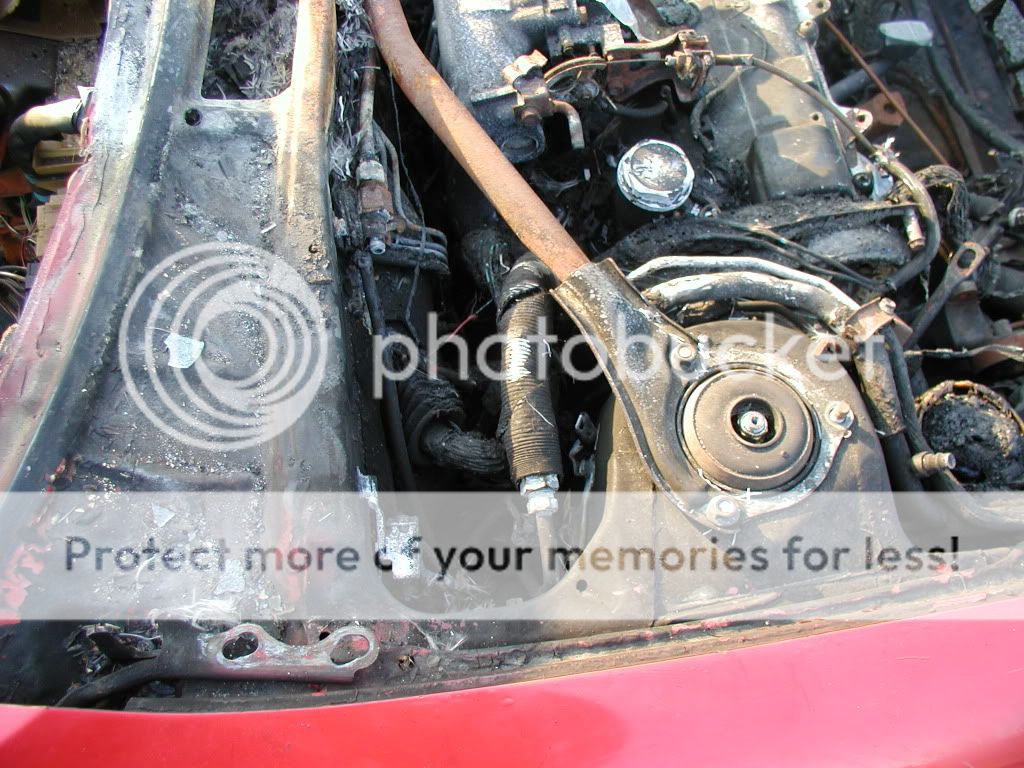
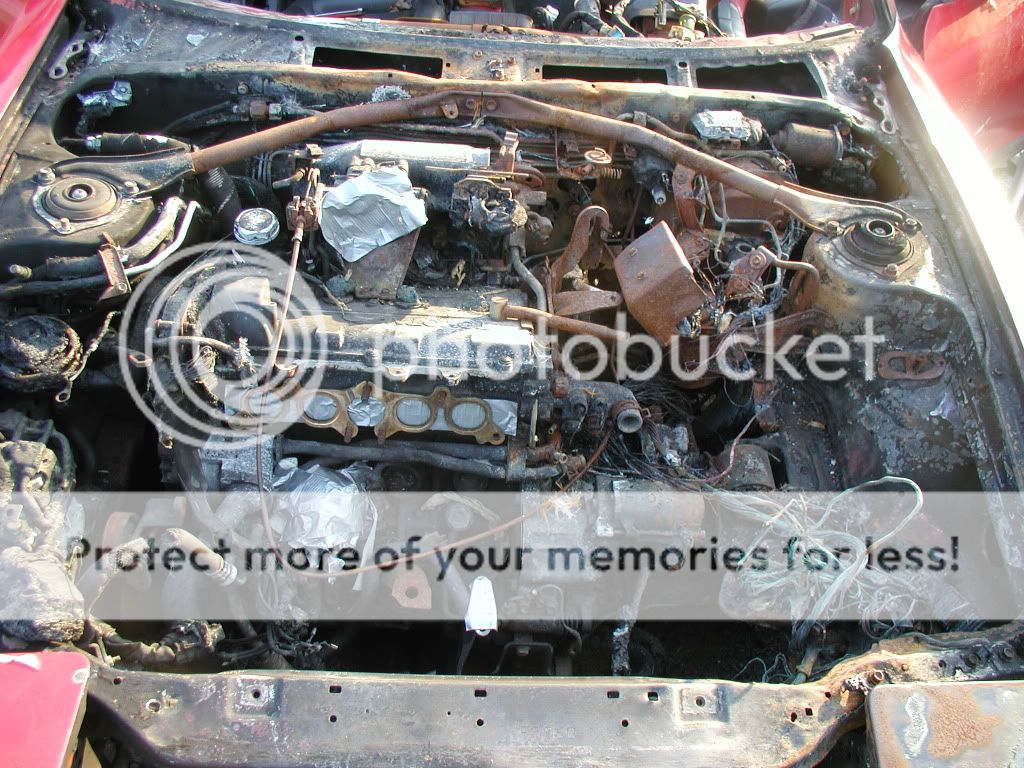
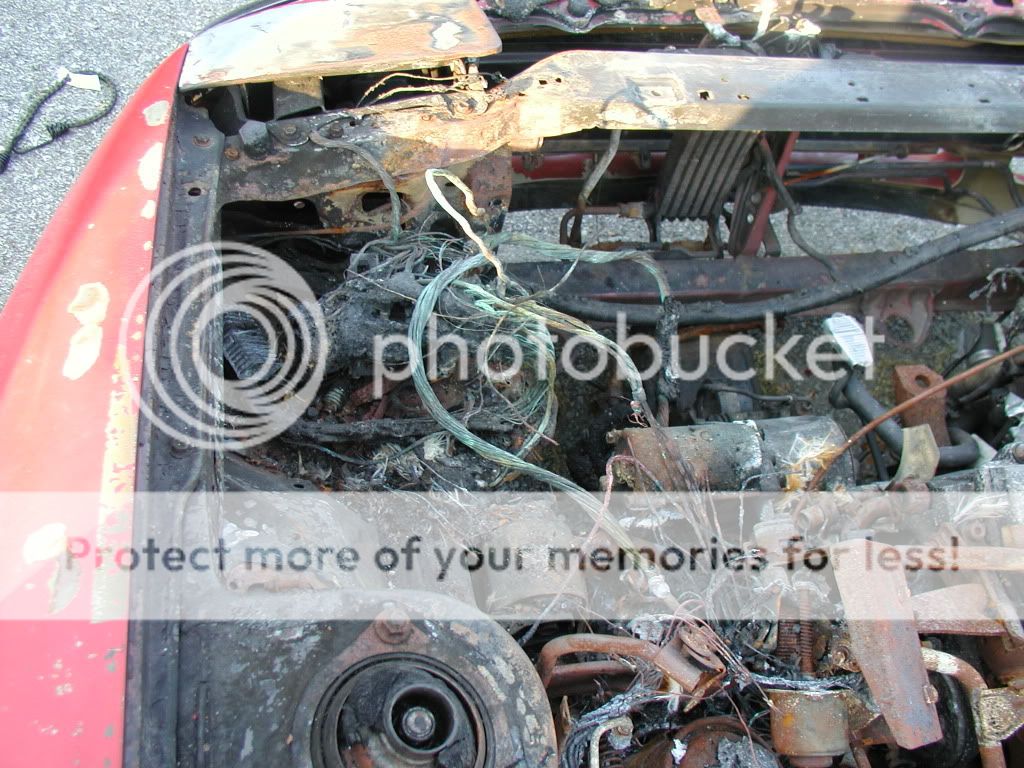
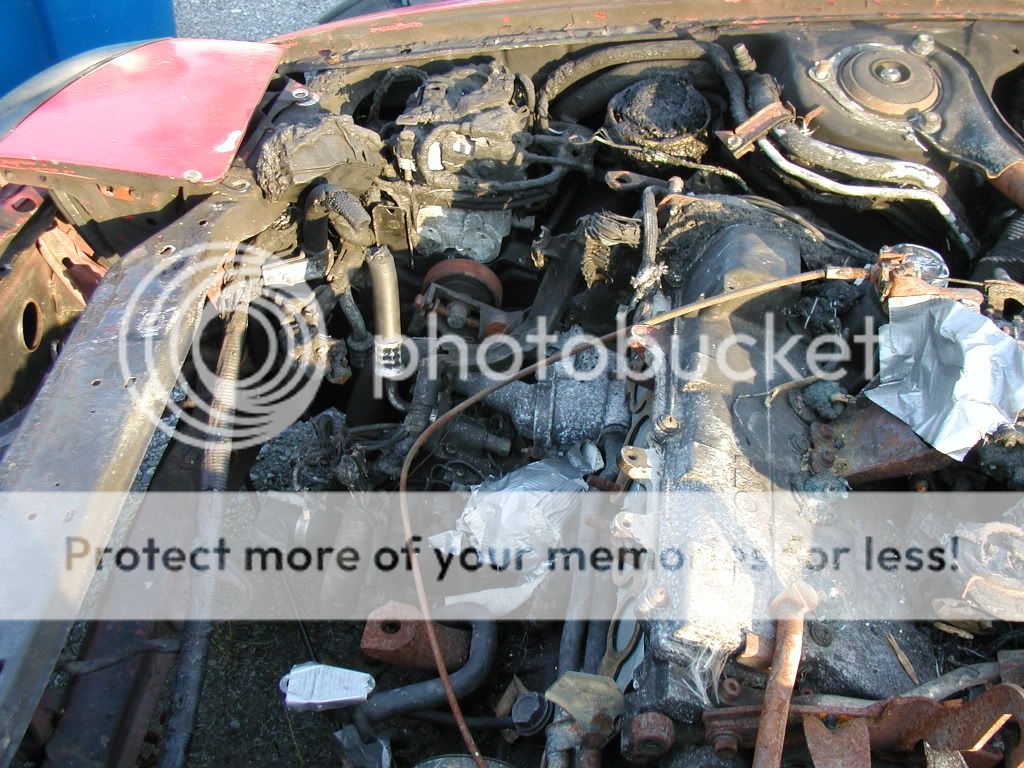
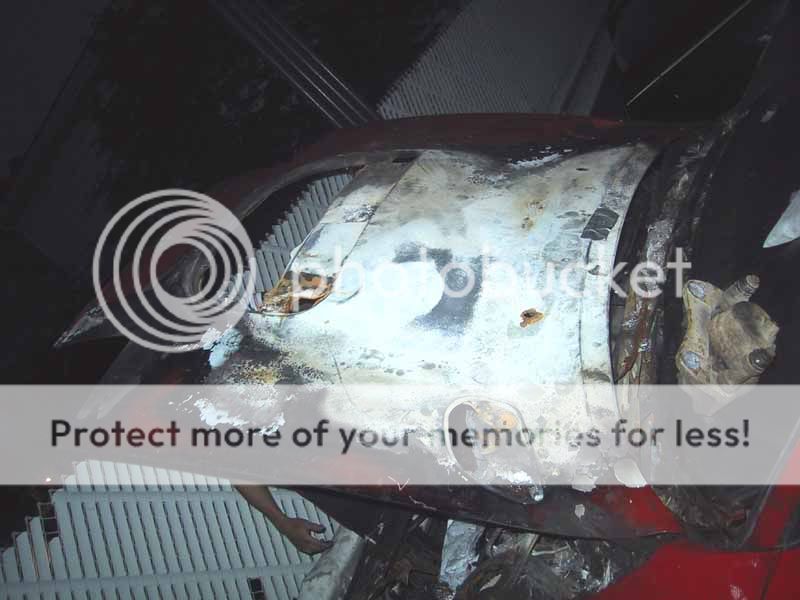
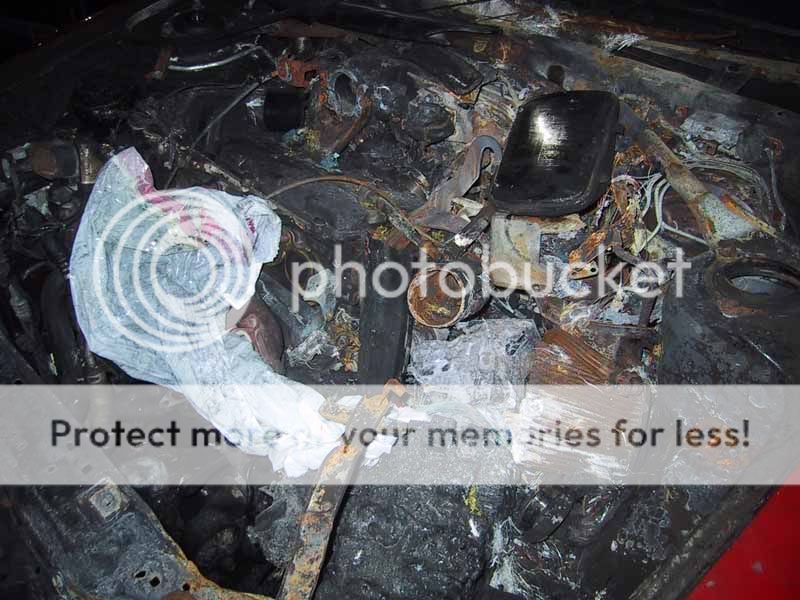
. So I'm removing the turbo and anyone who has done this before knows that you have to remove the large fitting that holds the oil cooler in place, and then I had a eureka moment :shock: :shock: . I thought to myself what if the oil cooler had a bad seal somewhere ah ha, and so I proceed to remove the oil cooler only to find that the tiny bit of coolant that came from the radiator and water lines for the turbo only held a tiny bit of coolant compared to the oil cooler :rofl: :rofl: . There was coolant everywhere I felt terrible :( :( 
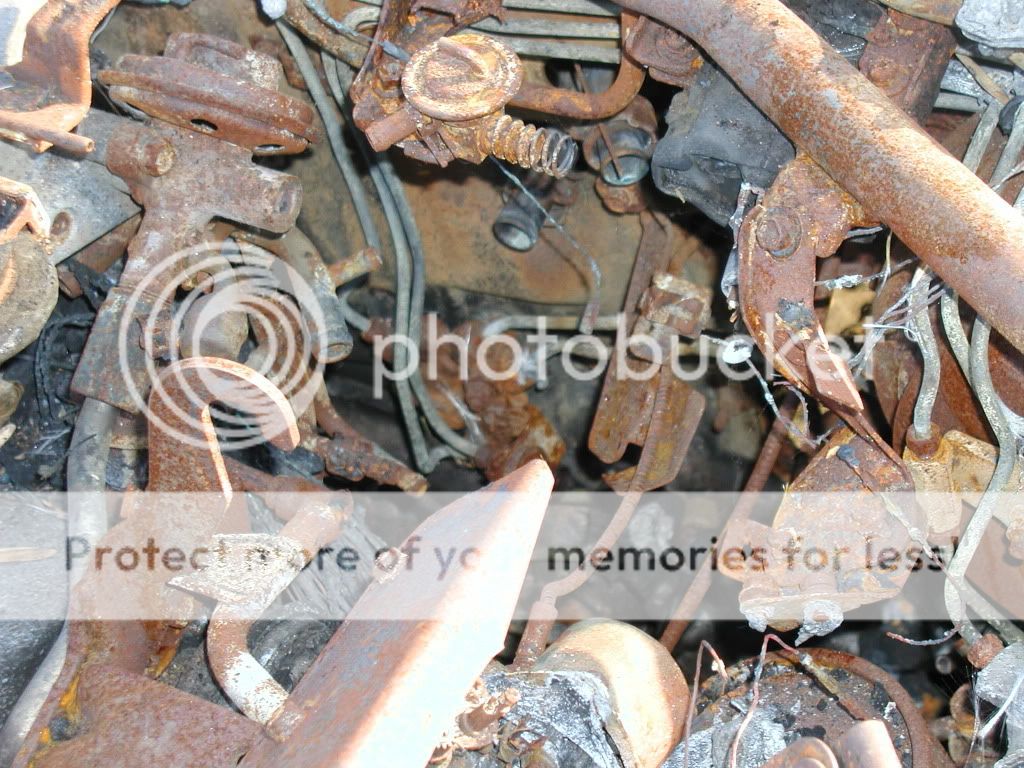
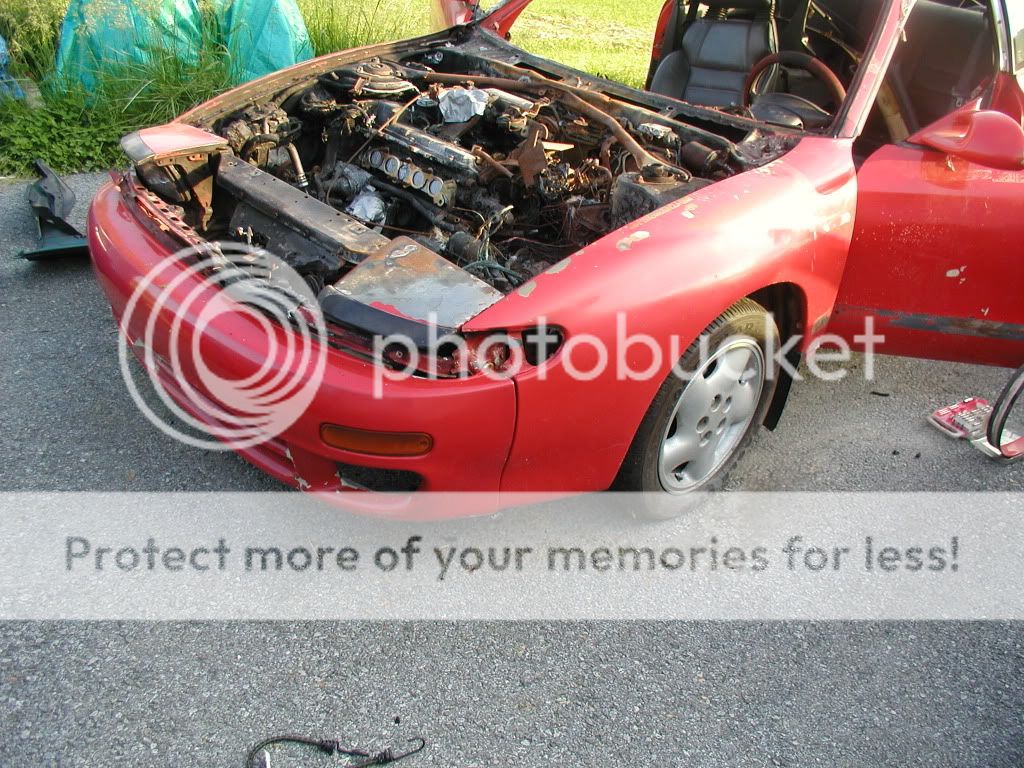
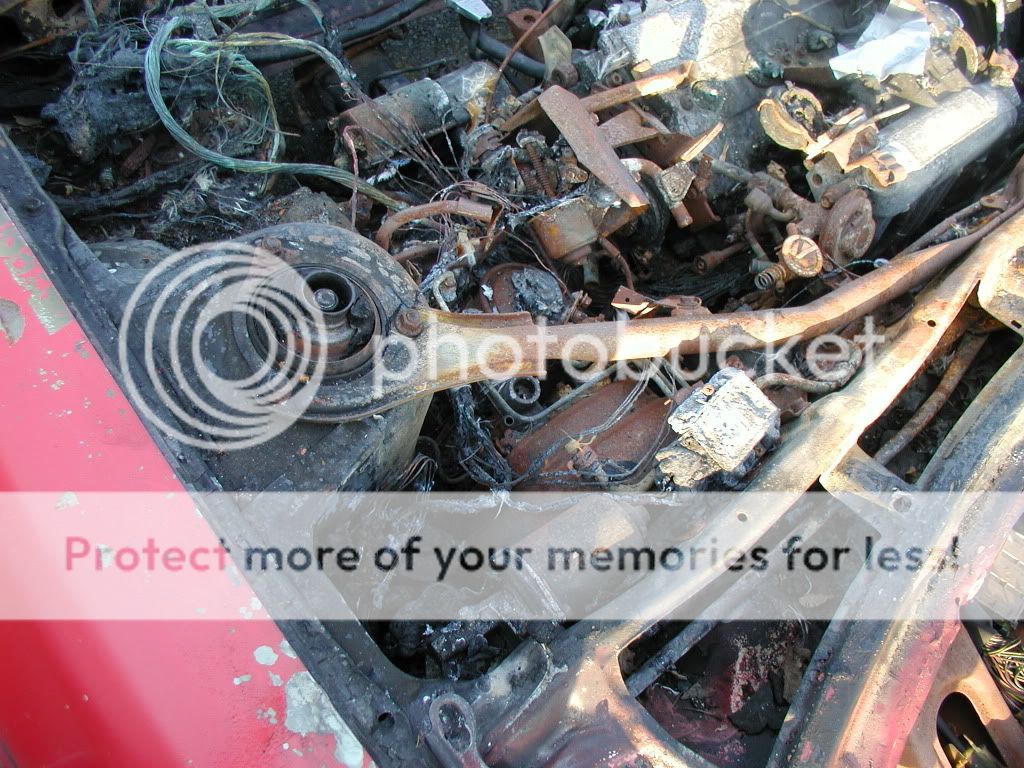
because I pride myself on keeping my little work area as clean as possible :roll: :roll: . To make matters worse there was a lot of coolant that managed to get into the mid-pipe that was detached and just hanging there :doh: :doh: . Once I had the oil cooler removed I found the source of the oil leak. The large gasket at the bottom of the oil cooler was split :doh: . I replaced it and the two washers/gaskets that go at the top and bottom of the large oil feed banjo bolt. I haven't noticed any more smoke or the burning oil smell on the few drives I have taken since I replaced the gaskets :wink: . I also had all four wheel bearings replaced because mine were pretty bad. I did most of the labor myself apart from pressing the old bearings out and pressing new bearings in :p :p . I was told that for the shop to do the bearings it would be $986 that was including my inspection cost of roughly $60 :nono: :nono: . Me being broke :shrug: decided it would be more realistic for me to do the labor myself and purchase the new bearings and seals and let the shop replace the bearings :D :D . For anyone doing this you need all new seals and Toyota sells a front bearing seal kit, but you have to purchase the inner and outer rear bearing seals separately :shrug: :shrug: . I decided while the hubs were at the shop that it would be a good time to replace the outer tie rod ends while I had the hub removed. I picked up a set from Napa for around $35 and they seem to be decent quality, and I needed them badly the old tie rod ends had busted seals and were in pretty bad shape :( :( . There was a bit of a delay in getting the hubs back because I had to wait for the dealership to get the front seal kits in, and just my luck once they did come in 4 days later one was missing a seal :pissed: :pissed: . It took another 2 days for them to get another one in. So finally I have the hubs back :D :D . I installed the hubs being careful to torque everything to spec. The install wasn't so bad, I just followed the BGB instructions :smokes: . After everything was back together I took Phoenix for a spin to the store, I didn't want to go too far because after getting new bearings, replacing the tie rod ends, and reinstalling all four hubs I'm 100% sure I need an alignment :twisted: :twisted: . I noticed on the short trip that the front drivers side dust shield was rubbing other than that it was smooth and quite :D . I honestly didn't realize how loud and worn the old bearings really were :lol: :lol: . My only gripe is that now I can hear every tiny squeak and squeal from the suspension :rofl: . So I get home and park the car pull the emergency brake and SNAP :shock: :shock: :shock: the cable breaks :pissed: :x :x . I jack the car up and slide underneath to check were it snapped, and it broke right at the base of the little metal block that attaches to the leveling bar that the rear cables attach to. The cable was so badly rusted that it was only 5 or 6 tiny stands holding the cable to the metal block. The rest was rusted away :shock: :shock: . So needless to say one problem fixed just in time to work on the next problem :doh: :doh: . I ordered a new cable and it should get here in a few days :D :D 
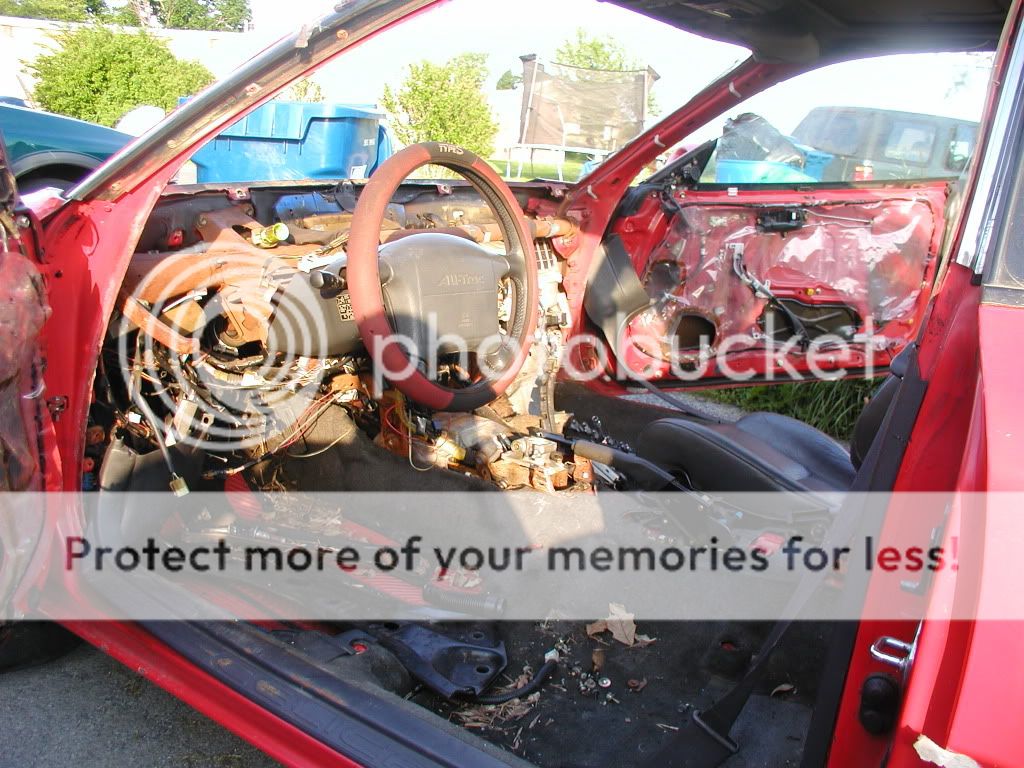
. Wish me luck that once that is installed nothing else breaks for a little while :bangshead: :rofl: . Here are a few pics of my recent adventures. Thanks for following Project Phoenix guys :D :D .

InpectionRepairs.jpg


InpectionRepairs2.jpg


InpectionRepairs3.jpg


InpectionRepairs4.jpg


InpectionRepairs5.jpg


InpectionRepairs6.jpg


InpectionRepairs7.jpg


InpectionRepairs8.jpg


InpectionRepairs9.jpg


InpectionRepairs10.jpg


InpectionRepairs11.jpg


InpectionRepairs12.jpg


InpectionRepairs13.jpg


InpectionRepairs14.jpg


InpectionRepairs15.jpg


InpectionRepairs16.jpg


InpectionRepairs17.jpg


InpectionRepairs18.jpg
 

Lamont

New member
Hey guys I got my emergency brake cable today, and installed right away :D :lol: . It wasn't too hard at all, but the rear section of the center console and the emergency brake handle have to be removed in order to install the new cable :doh: . I also noticed that there is a plastic sleeve on the new cable that wasn't on the old cable :shrug: . Maybe Toyota added it after my cars production date in order to protect the cable from the elements. I pulled the plastic sleeve back a few inches and put a little axle grease on the cable near the mounting block, then I slipped the sleeve all the way to the base of the mounting block. I noticed when I installed the cable with the provided protective rubber boots that none of the cable is exposed at all :D :D . Now I just have to get an alignment and take Phoenix through inspection :doh: :doh: . I took a couple pics of the cables for comparison. Thanks for following Project Phoenix guys.

ebrake.jpg


ebrake1.jpg


ebrake2.jpg


ebrake3.jpg
 

UtahSleeper

Active member
Quick work there.

Wonder if the fire had anything to do with its death.

What else is on your immediate to do list for pheonix?
 

Lamont

New member
3tcpower":320mdcwi said:
Quick work there.

Wonder if the fire had anything to do with its death.

What else is on your immediate to do list for pheonix?

Hey 3tcpower, I 'm not too sure if the fire damaged the emergency brake cable or not, it seemed to just be rusted but I'm not 100% sure. Other than an alignment the only other things on my immediate to do list is to replace the head unit and all the speakers. Nothings wrong with my current head unit but I want something with MP3 capabilities and I-pod connectivity. My speakers are all fubar :cry: :oops: , it is now to the point where I'd rather listen to the exhaust and not the raspy dry rotted speakers :twisted: :rofl:
 

Mafix

New member
you know, you are a miracle worker! everyone should take some of your enthusiasm and bottle it up for rainy days. a lobor of love is an understatement.
 

LegacyofDan

New member
Lamont...i love your thread...i just took the time to look at the pics from start to finish....

P1010018.jpg

P1010023.jpg

P1010024.jpg

P1010025.jpg

P1010026.jpg

P1010027.jpg

P1010028.jpg

P1010029.jpg

P1010030.jpg

P1010034.jpg

P1010035.jpg

P1010036.jpg

P1010037.jpg

P1010019.jpg

P1010020.jpg

P1010021.jpg

P1010022.jpg


and now look how far you have gotten, you are still going strong, you are an inspiration seriously man!

Keep it up Lamont!

ps i think i find another "inspection" guy, i talked to my buddy last night(different guy) and he may be able to hook ya up.
no promises, and i hope i am not getting your hopes up, but we will see :)
hopefully this time it works out...fingers crossed!
 

Lamont

New member
Mafix":pxho6ssh said:
you know, you are a miracle worker! everyone should take some of your enthusiasm and bottle it up for rainy days. a lobor of love is an understatement.

Thanks for the kind words Mafix, but I have to give all the credit to the Alltrac.net community :notworthy: . Honestly I couldn't have gotten this far without all the help and support I have received so thanks guys :wink: :wink: . A labor of love indeed, but the payoff is priceless in smiles per gallon :D :D

LegacyofDan":pxho6ssh said:
Lamont...i love your thread...i just took the time to look at the pics from start to finish....
and now look how far you have gotten, you are still going strong, you are an inspiration seriously man!

Keep it up Lamont!

ps i think i find another "inspection" guy, i talked to my buddy last night(different guy) and he may be able to hook ya up.
no promises, and i hope i am not getting your hopes up, but we will see :)
hopefully this time it works out...fingers crossed!

Thanks Dan, I found a few pics of the car posted here on an old thread from right after it caught fire:

marlon12111.jpg


marlon1211.jpg


marlon12112.jpg


marlon12113.jpg


marlon12114.jpg


I won't forget all the hours of work that I have put into this car. I also won't forget all the help I had along the way. It still has a long way to go Dan, but I will never forget the humble beginnings of Phoenix :shock: :shock: :shock: . Thanks again for the kind words it really means a lot :D :D . Oh and if the inspection guy works out that’s great 8) 8) if not I'll probably try and get the car inspected at the end of next week if I can :shrug: :shrug: .
 

jonahs_3sgte

New member
hey lamont
hows the alltrac driving?
i traded my halftrac off for a mustang
but as of tomorrow i will be a new owner of a 90 alltrac lol
 
Top