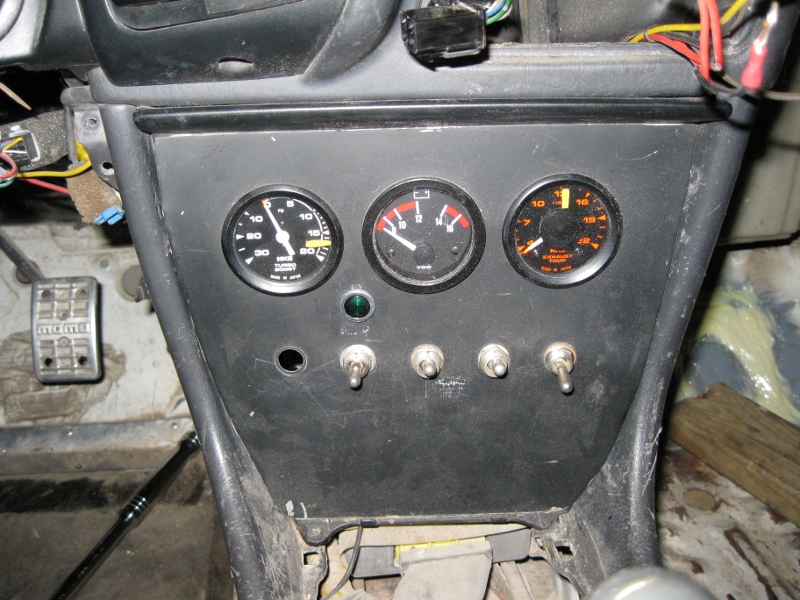
Since I needed to install a Ham radio in the Rally car, I had a need to move some gauges and switches from the stereo mounting area to make room. Taking a cue from others who have used a similar process, I decided to go with a 4-gauge pod in the center vent. Since this is a rally car, this is not a big issue.
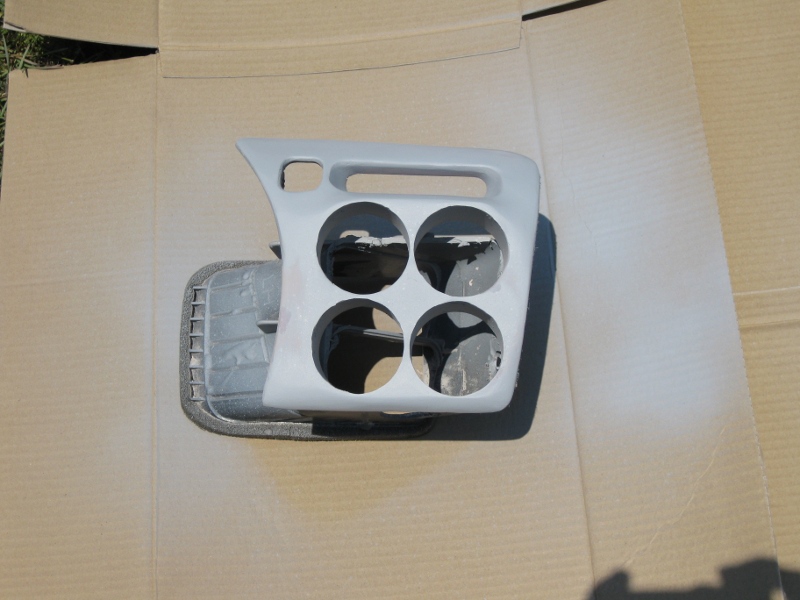
Here is the finished product, I could have done better, but considering the car has a mostly stripped interior, it didn't warrant the effort:
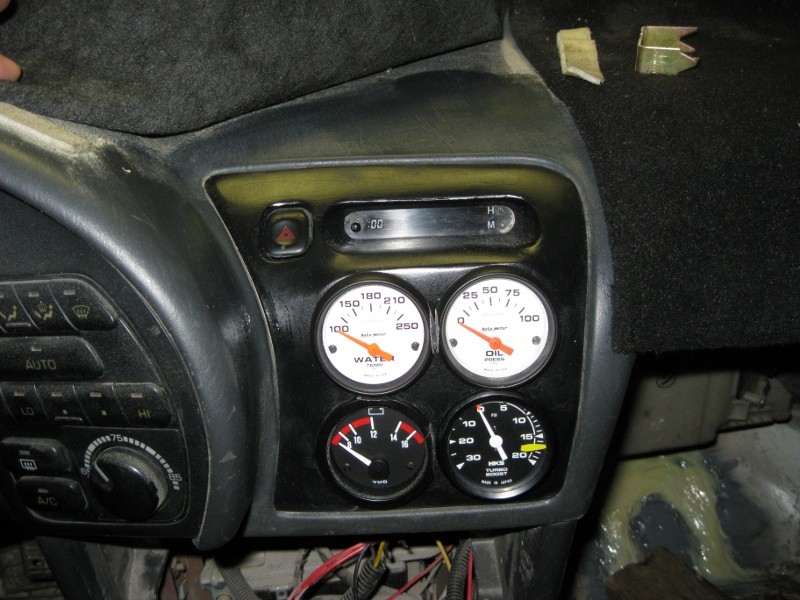
Here is the starting layout:
The Process:
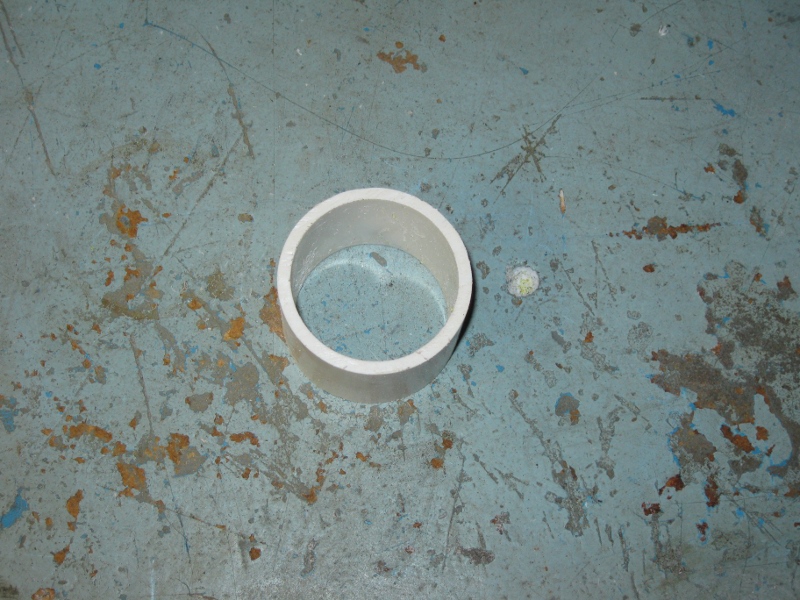
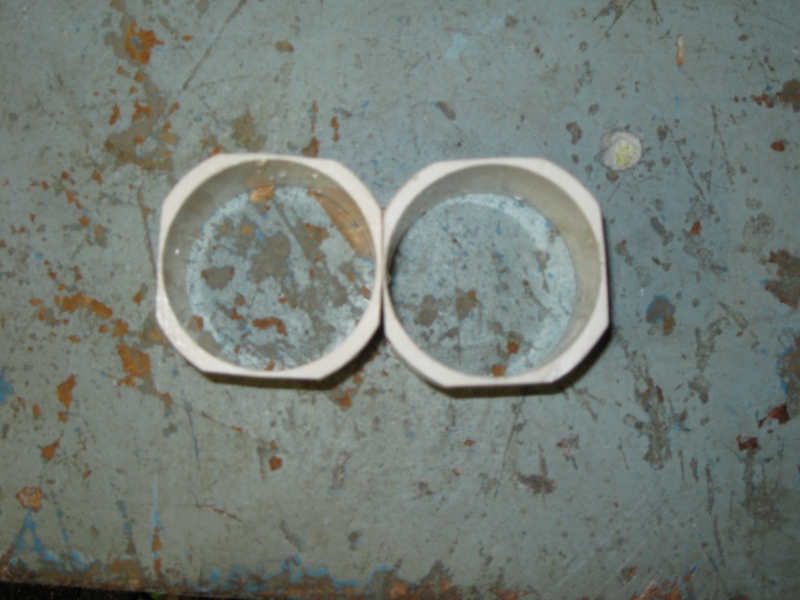
Get some Standard 2" PVC piping, ground all 4 sides down to help fitment (I used an angle grinder, makes a mess, but does it quickly.) Use PVC cement to attach them in groups of 2. Note: if you don't want to have to grind the gauge bezel, make the walls thick enough to leave that space. I didn't think of that until later.
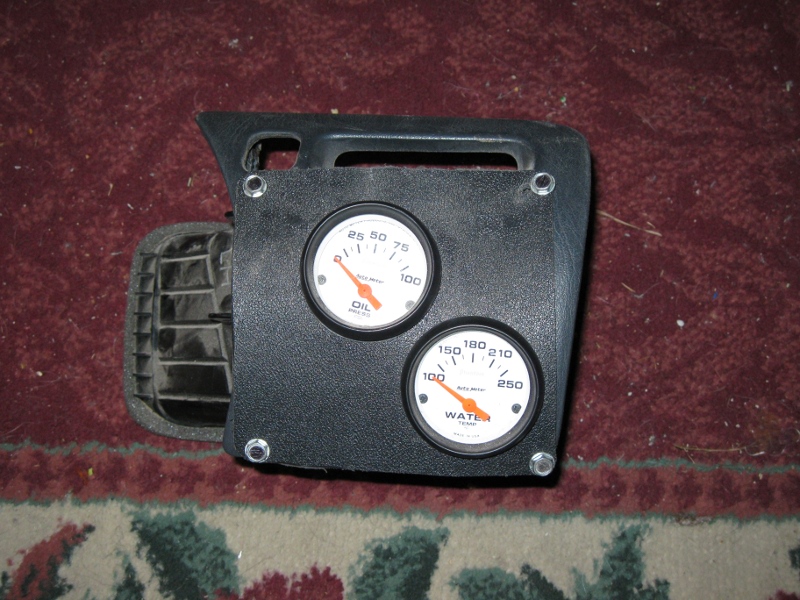
Before:
After:
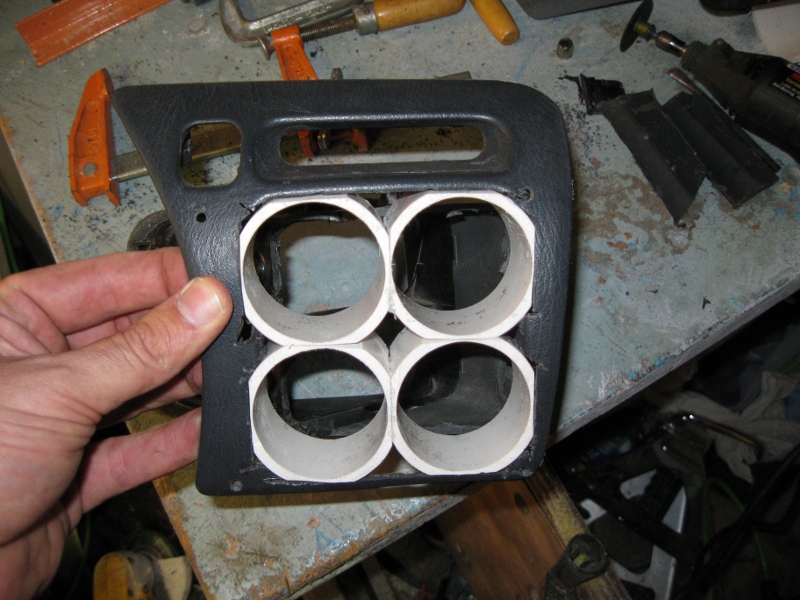
Cut out the vent section to allow room for the new pods, and test fit. When you are satisfied, epoxy them in place. Keep the left and right sides flush with the vent holder to make it easier.
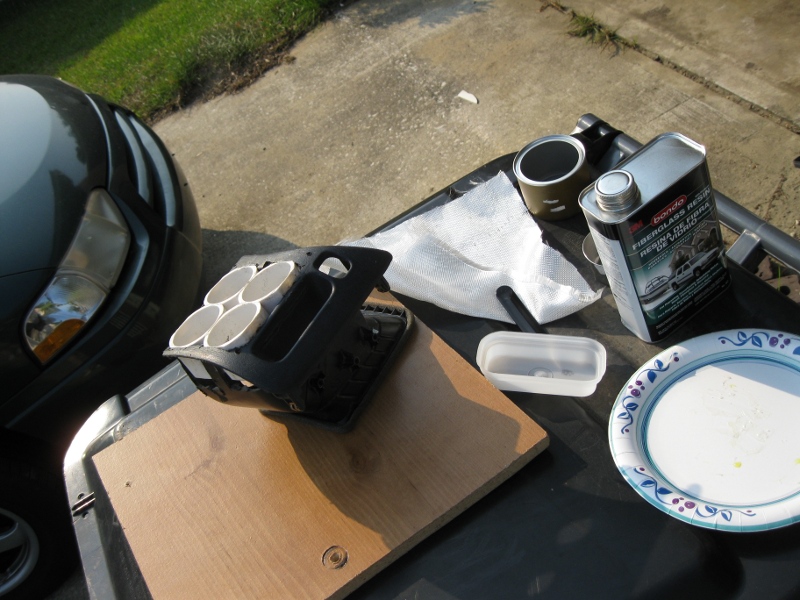
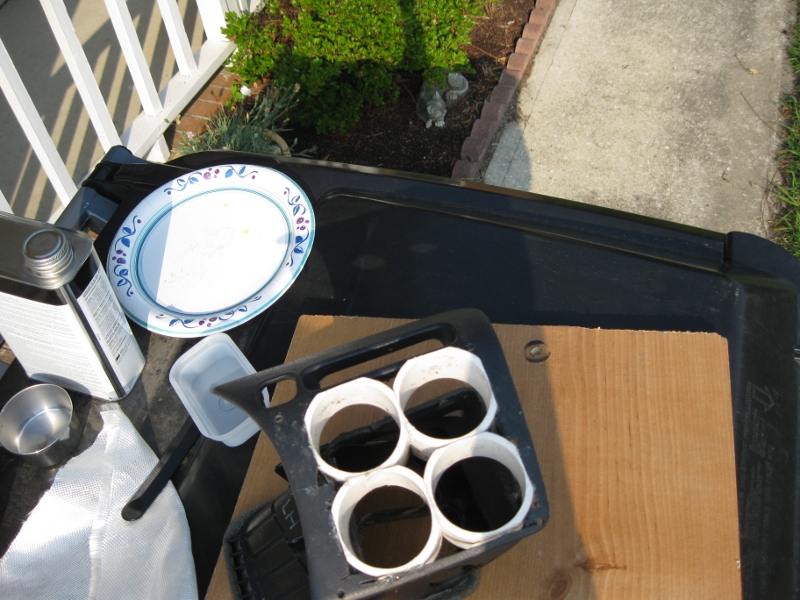
Find a suitable work area outside, and lay out all of your fiberglass supplies. I used standard fiberglass cloth.
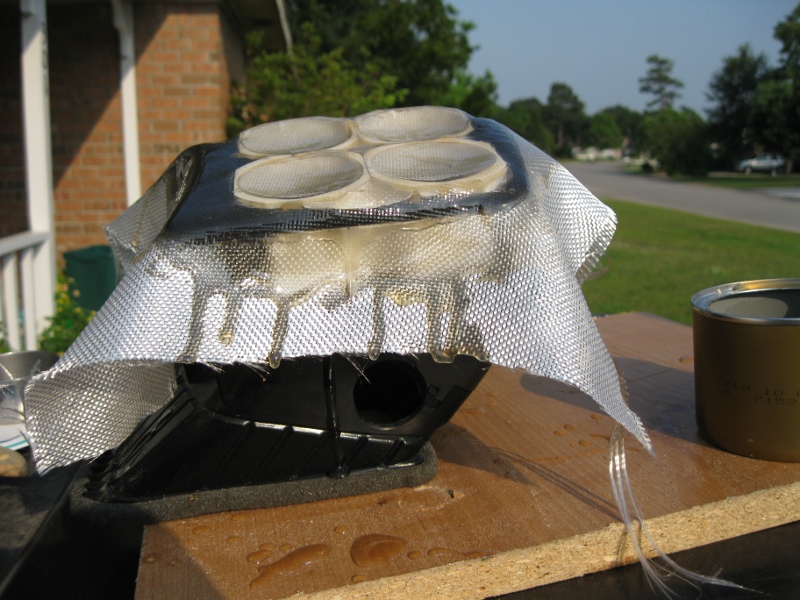
Stretch the cloth over the entire surface, and stretch it down into the clock and hazard holes, which will help later. Remove the cloth, mix your resin. Spread resin over all the contact surfaces of the vent area. Lay the cloth on the surface in the same location as before. Using a brush, spread resin liberally over the entire surface. Use the brush to push out any bubbles and make the cloth contour to the surface as much as possible.
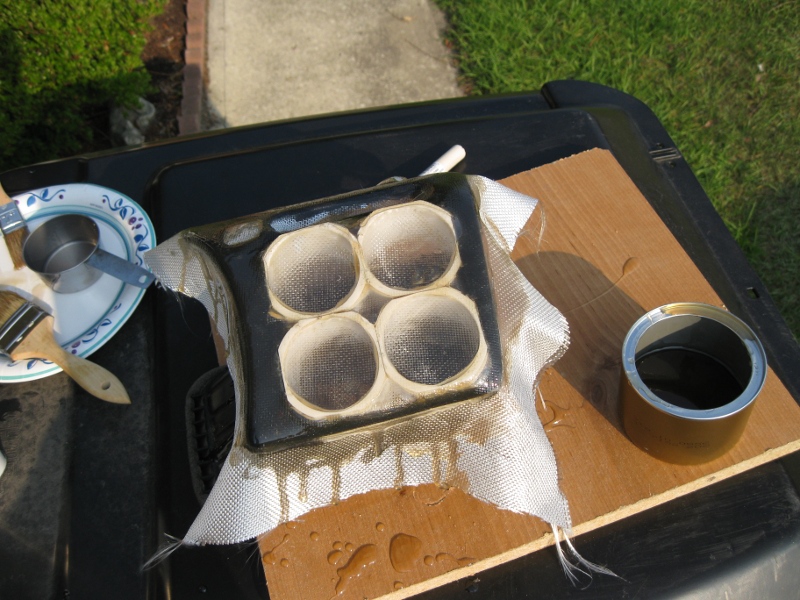
When the resin has set, but before it has hardened completely, trim the unused cloth off with a razor knife. It saves a lot of work later.
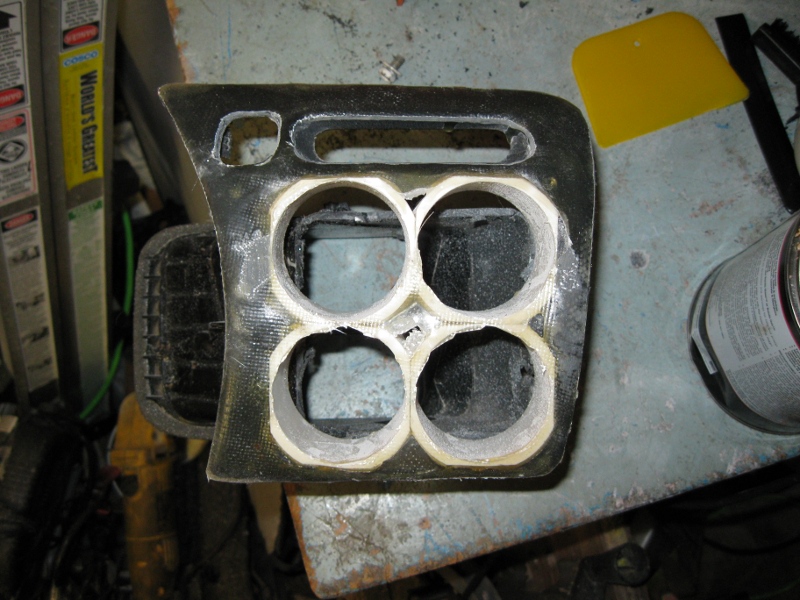
Allow to cure completely. Mix some Bondo and apply liberally to the entire surface. Work quickly, when the bondo starts getting "grainy" when you apply it, stop using that batch. It is too dried to use effectively.
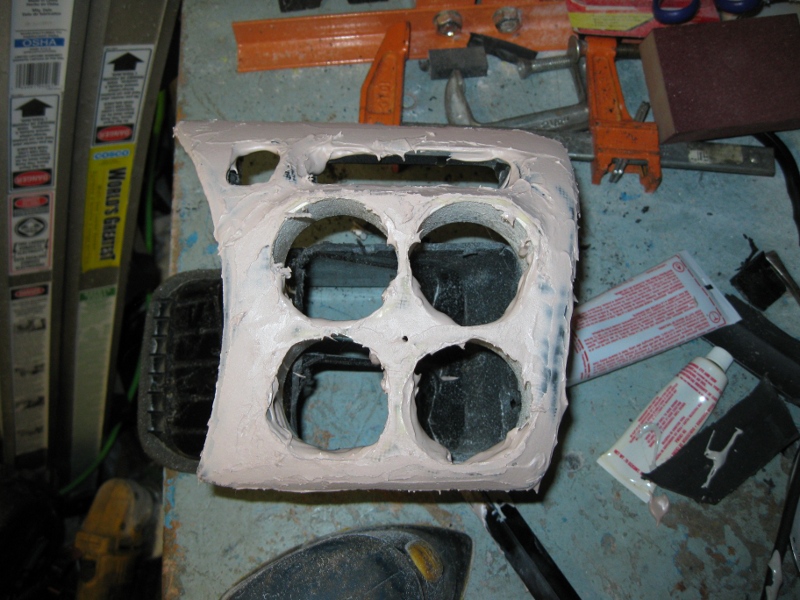
Sand using a power sander with 120+ grit sandpaper with a block or power sander where possible. Use a small piece of sandpaper wrapped around your finger for the contours. The bigger and flatter the surface area you are sanding with, the better. Once you have it reasonably close, apply another coat of Bondo and sand again. Continue adding thin coats of Bondo and sanding until you are happy with the shape. You will get tired of sanding long before this is done. Any bumps or ridges you can feel with your fingers, you will see on the final coat.
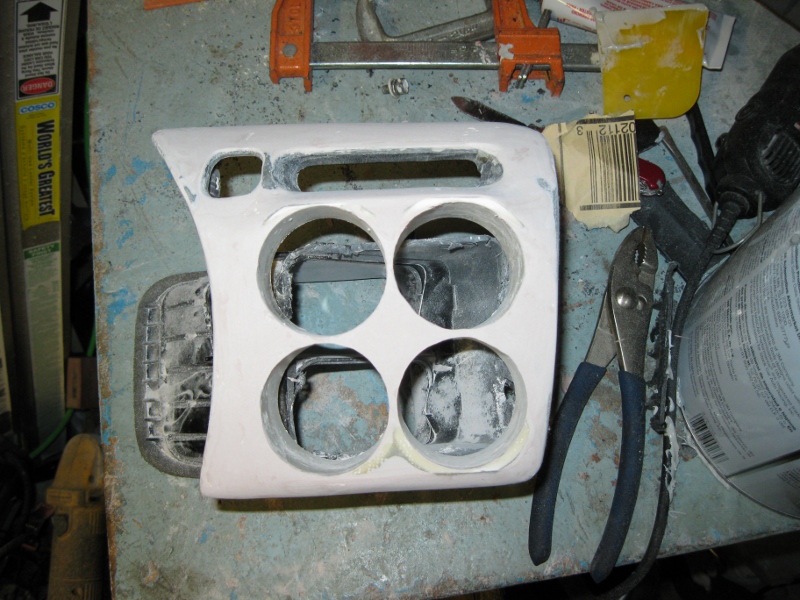
For small pits and imperfections in the Bondo, apply a little spot filler putty (it is thinner and easier to work with than Bondo), smooth over and allow to dry.
Sand some more.
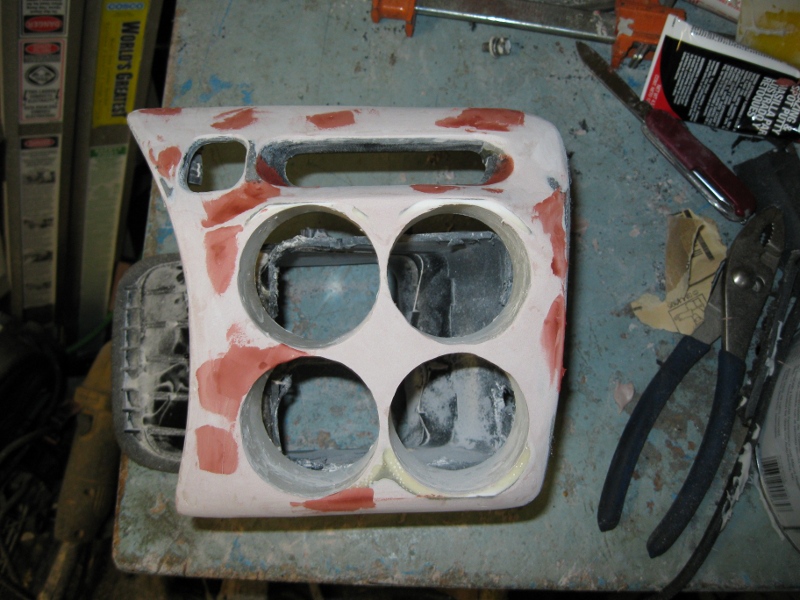
When everything is dry, spray a thin coat of primer. This will show more imperfections.

Apply more spot putty to the blemishes, and sand some more.
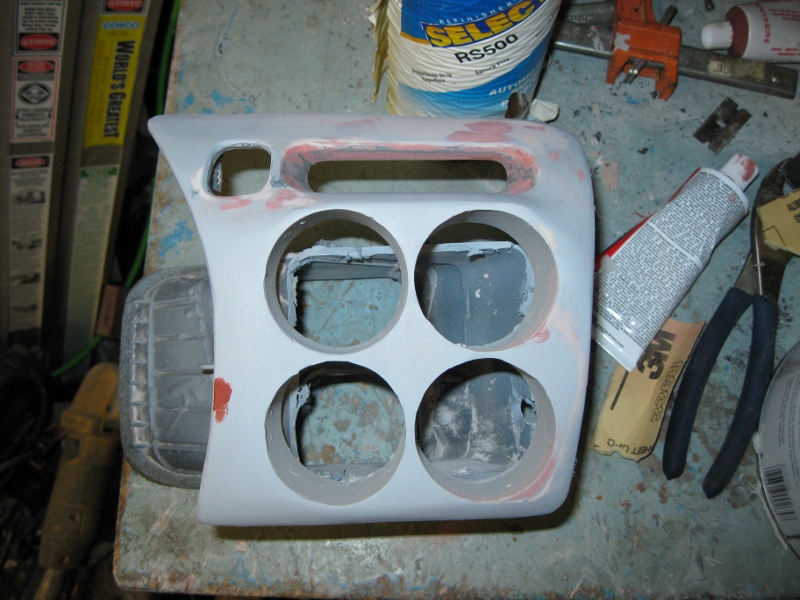
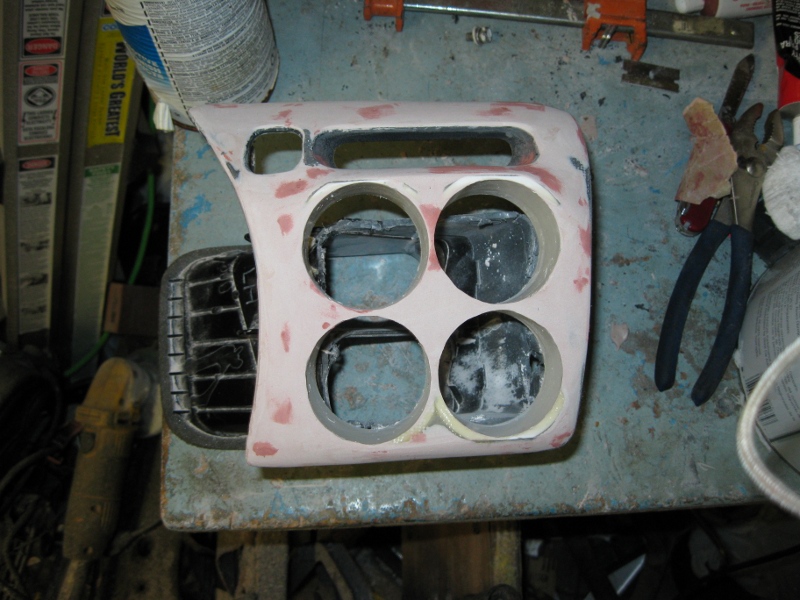
Prime it again, and make sure you are happy with the result.
Apply the final color coats in thin layers.

When it is all dry, test fit the gauges, and sand the junk out of the PVC pipes as necessary.
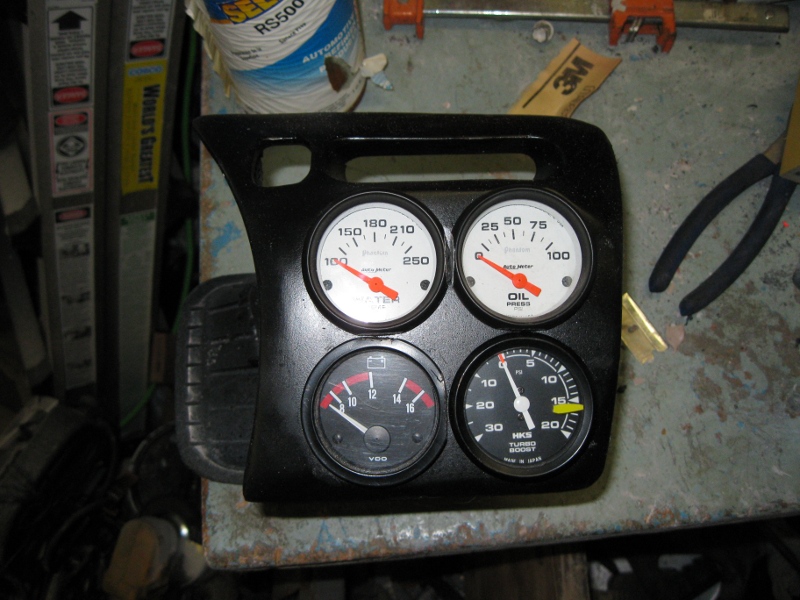
Install.
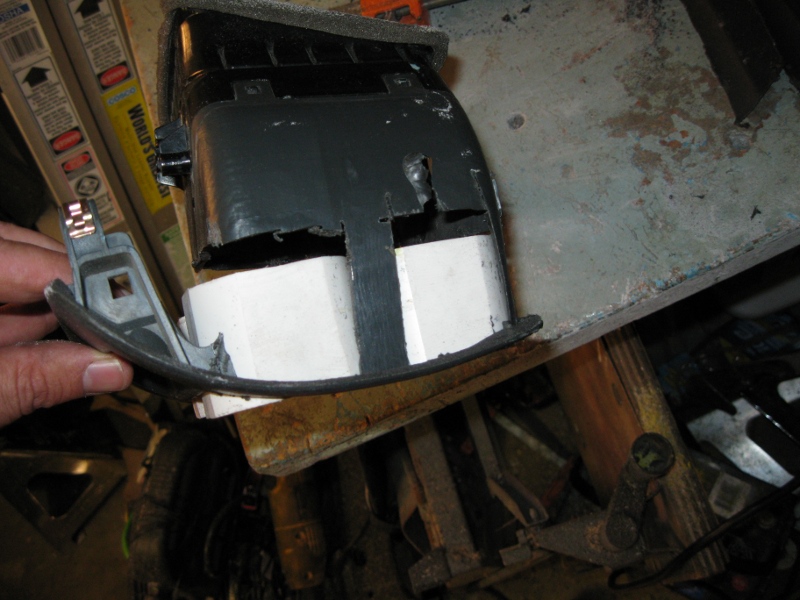
I ended up cutting the vent part off completely. I am simply going to seal this off so the other vents work.
Here is the finished product, I could have done better, but considering the car has a mostly stripped interior, it didn't warrant the effort:
Here is the starting layout:
The Process:
Get some Standard 2" PVC piping, ground all 4 sides down to help fitment (I used an angle grinder, makes a mess, but does it quickly.) Use PVC cement to attach them in groups of 2. Note: if you don't want to have to grind the gauge bezel, make the walls thick enough to leave that space. I didn't think of that until later.
Before:
After:
Cut out the vent section to allow room for the new pods, and test fit. When you are satisfied, epoxy them in place. Keep the left and right sides flush with the vent holder to make it easier.
Find a suitable work area outside, and lay out all of your fiberglass supplies. I used standard fiberglass cloth.
Stretch the cloth over the entire surface, and stretch it down into the clock and hazard holes, which will help later. Remove the cloth, mix your resin. Spread resin over all the contact surfaces of the vent area. Lay the cloth on the surface in the same location as before. Using a brush, spread resin liberally over the entire surface. Use the brush to push out any bubbles and make the cloth contour to the surface as much as possible.
When the resin has set, but before it has hardened completely, trim the unused cloth off with a razor knife. It saves a lot of work later.
Allow to cure completely. Mix some Bondo and apply liberally to the entire surface. Work quickly, when the bondo starts getting "grainy" when you apply it, stop using that batch. It is too dried to use effectively.
Sand using a power sander with 120+ grit sandpaper with a block or power sander where possible. Use a small piece of sandpaper wrapped around your finger for the contours. The bigger and flatter the surface area you are sanding with, the better. Once you have it reasonably close, apply another coat of Bondo and sand again. Continue adding thin coats of Bondo and sanding until you are happy with the shape. You will get tired of sanding long before this is done. Any bumps or ridges you can feel with your fingers, you will see on the final coat.
For small pits and imperfections in the Bondo, apply a little spot filler putty (it is thinner and easier to work with than Bondo), smooth over and allow to dry.
Sand some more.
When everything is dry, spray a thin coat of primer. This will show more imperfections.
Apply more spot putty to the blemishes, and sand some more.
Prime it again, and make sure you are happy with the result.
Apply the final color coats in thin layers.
When it is all dry, test fit the gauges, and sand the junk out of the PVC pipes as necessary.
Install.
I ended up cutting the vent part off completely. I am simply going to seal this off so the other vents work.

