ZeroDrift's 1988 All Trac. Engine Overhaul Project!

ZeroDrift

New member
Started working on the car today. Prepping to drop the engine down and lifting the car above. Never tried this approach before, much less pulling an engine on a 'trac, so I figure its worth trying.

Whats left to do before the engine comes out:
-Drain tranny fluid.
-Remove tires and disconnect lower ball joints.
-Disconnect CV joints.
-Sub frame and cross members.
-A/C and power steering assemblies.
-Exhaust mid pipe.
-Motor mounts, then drop engine.

DSC_0178_zpsd6797d54.jpg


DSC_0184_zps28515404.jpg


DSC_0185_zpsdd6c1b00.jpg


More progress after Christmas!
 

ZeroDrift

New member
More progress today. Gotta admit that I am surprised how much is connected to the engine compared to the chassis. Anyways, on to pictures!

DSC_0186_zps7c5cdb74.jpg


DSC_0190_zps8209dab1.jpg


DSC_0193_zps7015532e.jpg


DSC_0195_zps1c2142ad.jpg


DSC_0202_zps963cd40b.jpg


DSC_0201_zps994bc1e1.jpg


DSC_0197_zpsafdadf96.jpg
 

ZeroDrift

New member
Here is the recent progress. Few "glamor shots"
DSC_0209_zpsad1c94f7.jpg


DSC_0213_zpse5ff7a1c.jpg


Now for the business side of things. Engine is torn down and ready to be inspected. All of the exterior hard lines need some attention as do the hoses. All are pretty much shot/swelling and need to be replaced.

DSC_0204_zps49da7ca7.jpg


DSC_0206_zps4423b7fa.jpg


DSC_0225_zps8f1191e8.jpg


DSC_0226_zps5a541485.jpg


Spray paint ceramics- After a few months, discolored and wearing away... Going to be ceramic coating this, or hopefully be replacing it for a twin scroll header and exhaust side of the turbo. Which will be ceramic coated as well.
DSC_0230_zpsa335e5d2.jpg


DSC_0231_zpse101992f.jpg


Head:
DSC_0233_zpsa52d2995.jpg


DSC_0237_zps74db2864.jpg


Piston to wall clearances look rather generous... I'm surprised that the rings are so easy to see... Going to check tolerances tomorrow and reseal the oil pan. Good news is the head studs are from ARP and at first glance appear in great shape for the next head.
DSC_0238_zpse84daf7f.jpg


DSC_0239_zpsd43b903f.jpg


DSC_0241_zps3b34a812.jpg


DSC_0242_zps062acced.jpg
 

ZeroDrift

New member
This part is not as glamorous as pictures of the engine, but it's importance is just as paramount. The engine wiring harness. Here it is laid out on my living room floor and the second pictures is tonight's progress; stripping the insulation. The final picture is one of the many instances of the insulation failing, and exposing the bare metal wire.


Anyone know where to buy new plugs and a pin tool?


DSC_0282_zps6708757a.jpg


DSC_0291_zps50028575.jpg

a
DSC_0293_zps2dc34026.jpg
 

ZeroDrift

New member
phattyduck":18m1952c said:
You could see if Dr Tweak has what you need: http://www.tweakdperformance.com/about.html

-Charlie

Thanks for the lead! I'll be in contact with Tweak after the holidays settle down some.

As I am currently awaiting a working budget, and avoiding the cold weather I'm taking on small projects here and there. Tonight I cleaned the harness 'bridge' that routes the wiring harness in between the intake manifold and head. After all of the grime was removed I wrapped the aging plastic with some spare gold foil.

DSC_0367_zps3f402580.jpg


DSC_0368_zps67ea16cb.jpg


DSC_0370_zps60de800c.jpg


DSC_0371_zps225226d2.jpg


DSC_0372_zps51159e7b.jpg
 

ZeroDrift

New member
Had the block inspected this morning and it turns out the block is bored out to its maximum. With the scuffing on the walls means I'm now in the market for a new block ASAP. From the little that I know of these engines I would likely be better off going with the 2nd generation block as replacement parts are more plentiful. Other than the 3sgte blocks is there anything else worth getting? Though I would very much like to stick with the same crank and rods if possible. New pistons are going to happen and I'm most likely going with CP pistons as I've had great luck with them in the past. What do most of you run for PTW clearances on these engines? Power goal is to stay under the 400whp range.

In other news new wires, shrink wrap and insulation are on the way. At this point I am planning to go with the new MegaSquirt ECU, the MS3-Pro. Hopefully I will be putting the new engine management and repaired harness together in the coming weeks. Anyone have a good source for a crank trigger wheel setup? I have no issues building one for myself, but would appreciate pictures of other setups to use as reference.
 

ZeroDrift

New member
rio_cyber":354q8d8b said:
u could :oops: always go all out and built 5sgte monster :notworthy: or maybe some darton sleves in this block ?


Have any details on the 5sgte (hybrid?) engine? Don't think I need Darton Sleeves for my power goals, and as I understand it sleeves on these blocks are more prone to cracks from the additional stresses of machining. Any link you can provide will be much appreciated!
 

Terracar

New member
ZeroDrift":21x82mxl said:
Had the block inspected this morning and it turns out the block is bored out to its maximum. With the scuffing on the walls means I'm now in the market for a new block ASAP.


I have a 2nd gen block sitting in the garage with crank/rods/pistons - still assembled. If you want to pay shipping +$10 for a six pack, it is yours.

-Terracar
 

ZeroDrift

New member
Terracar":1n7jbzu8 said:
ZeroDrift":1n7jbzu8 said:
Had the block inspected this morning and it turns out the block is bored out to its maximum. With the scuffing on the walls means I'm now in the market for a new block ASAP.


I have a 2nd gen block sitting in the garage with crank/rods/pistons - still assembled. If you want to pay shipping +$10 for a six pack, it is yours.

-Terracar


You have a PM sir! :D
 

ZeroDrift

New member
Anyone have experience with a 5S stoker motor? It seems the Camry motors are much more plentiful, and for that reason alone I may consider it. Any links/sources on what needs to be done to use this block would be greatly appreciated! Only thing I know of the conversion is the crank needs to have the rod journals machined to fit 3S rods.
 

ZeroDrift

New member
Thank you for the information! After discussing everything with the wife, I think we may be better off going with a used JDM engine for now. I'm half tempted to get a front clip from a ST205 to ensure I have all the parts I need.

That being said, anyone have any interest in ST205 body parts, brakes and a spare ST205 transmission?
 

ZeroDrift

New member
Recently made some progress on the engine project. First off, I'll be rebuilding the motor with a new block and head thanks to the Alltrac/MR2 community. Next the OEM hard lines and brackets have been ceramic coated and should be ready to handle and photograph whenever I make it out to my shop next.

Also have done some investigation into the TVIS system and the diaphragm was torn and the unit was not functional and a likely source of a vacuum leak. Hopefully I can figure out a way to have the rubber diaphragm serviced, or replace the mechanism with a newer electrical means of control such as a linear actuator or a solenoid of some sort.
 

ZeroDrift

New member
Thanks for the intel! I'll have to do some searching on that, however I did find an alternative in the form of a mini pneumatic cylinder. In other news I've put in an order for some parts the other day! As for engine management I did opt for the Megasquirt MS3-Pro, their newest ecu that is not a 'DIY' build. Just need to wire that in as I overhaul the wiring harness.

Decided top modernize the intercooler system with a new pump as well. Going with a Bosch SVT Cobra WTA pump and am currently searching for a Ford variable fuel pump module, which should allow the ECU to adjust flow according to the need.
 

UtahSleeper

Active member
I am looking forward to your build here as I am going to do the same thing MS wise to my alltrac. I assume you are going to base the IC pump on the temp of the IC temp. Or other plans?

Also, you better document the shit out of this!!! lol.
 

ZeroDrift

New member
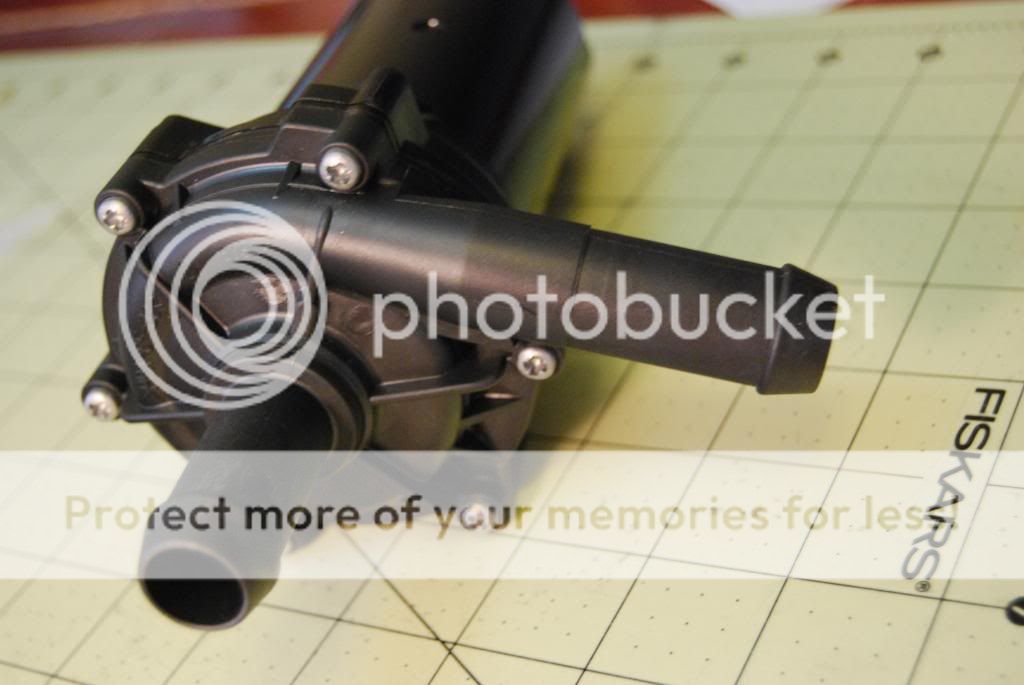
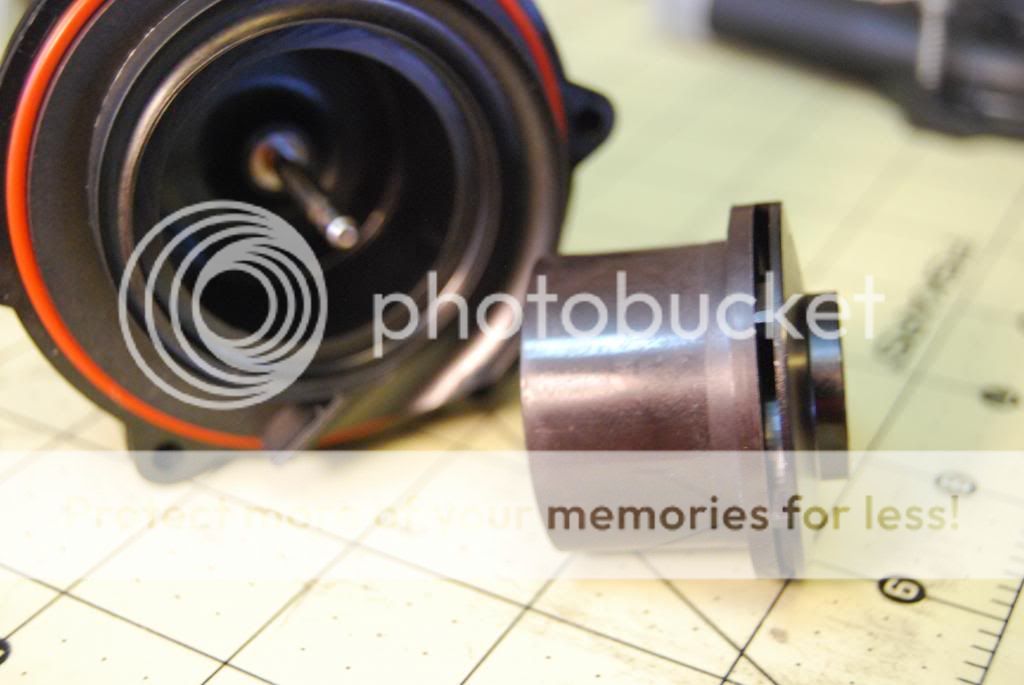
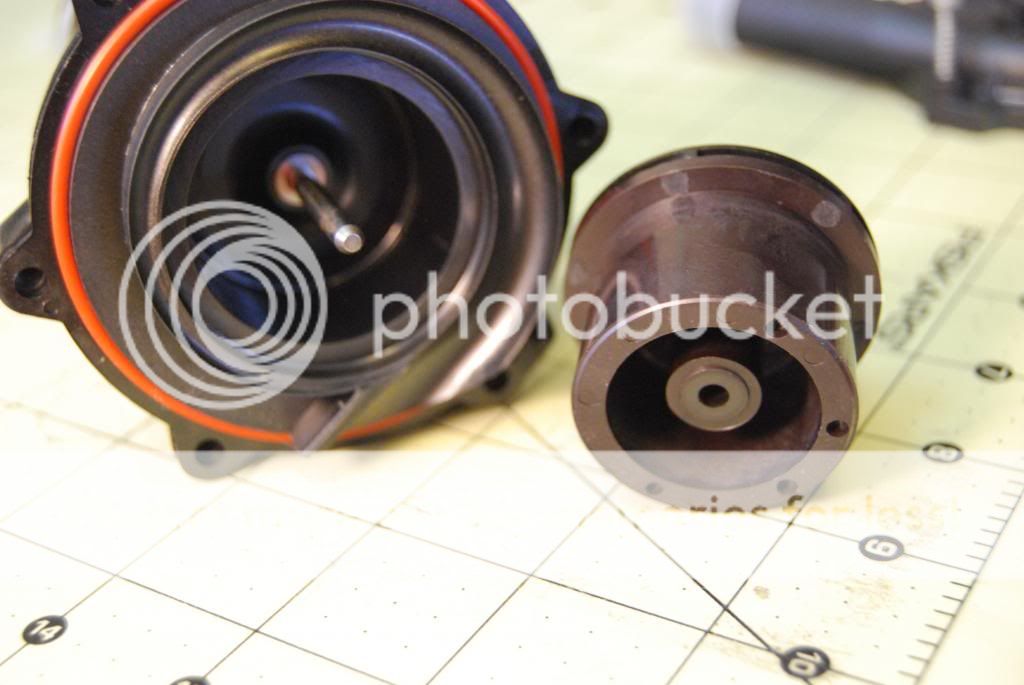
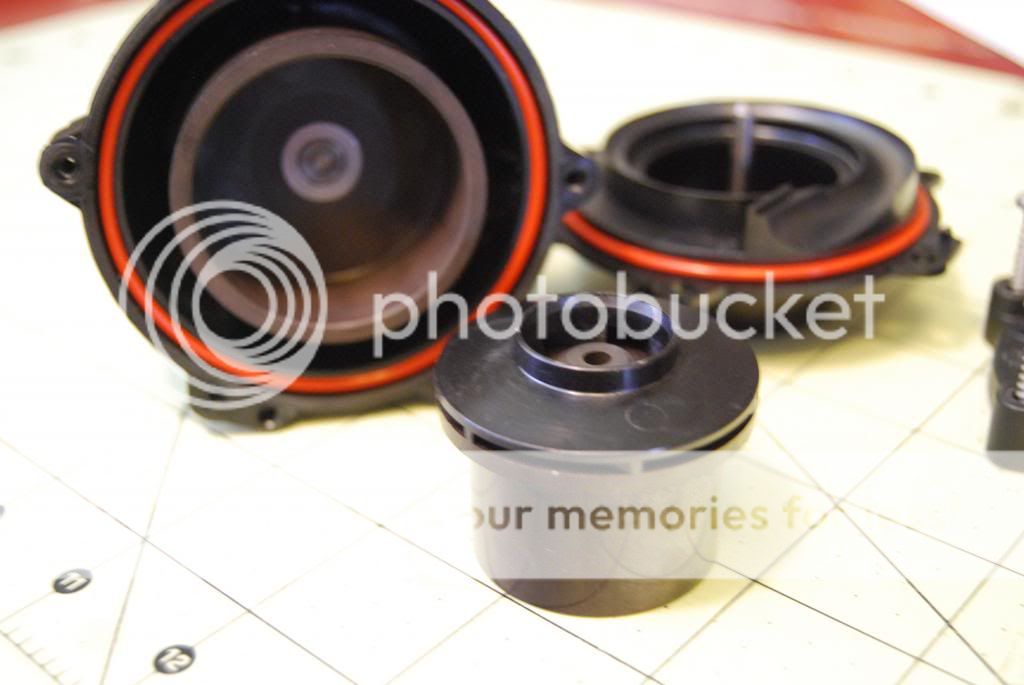
Parts arrived today! First up is the new pump: A Bosch SVT Cobra WTA Pump. (Part Number: 0 392 022 002 [058])

Dismantled the pump to inspect everything:
DSC_0382_zps2ae09369.jpg


DSC_0381_zps8faee1a9.jpg


DSC_0380_zpsffdf1a74.jpg


DSC_0379_zps7b90f077.jpg


DSC_0378_zpscae4d00b.jpg


DSC_0377_zpsc97b326a.jpg


DSC_0376_zps27589168.jpg


DSC_0375_zpsbe1ee5fc.jpg
 
Top